11 Practical Filmmaking Pro Tips on How to Film Yourself
Affordable video gear has made filming yourself easier than ever before. Let’s look at 11 practical tips for filming yourself like a pro.
As production equipment has become more accessible, the amount of people looking to regularly film themselves is on the rise. What once required a large team can now be done by one person on a standard smartphone. However, there’s a real art to filming yourself successfully, which can require practice to master. I caught up with two seasoned experts on this subject. Let’s see what they have to say.
Jonty Egginton runs his own production company called The Video Creators. He’s a master at filming himself, having produced this type of content for his social media channels for years now.

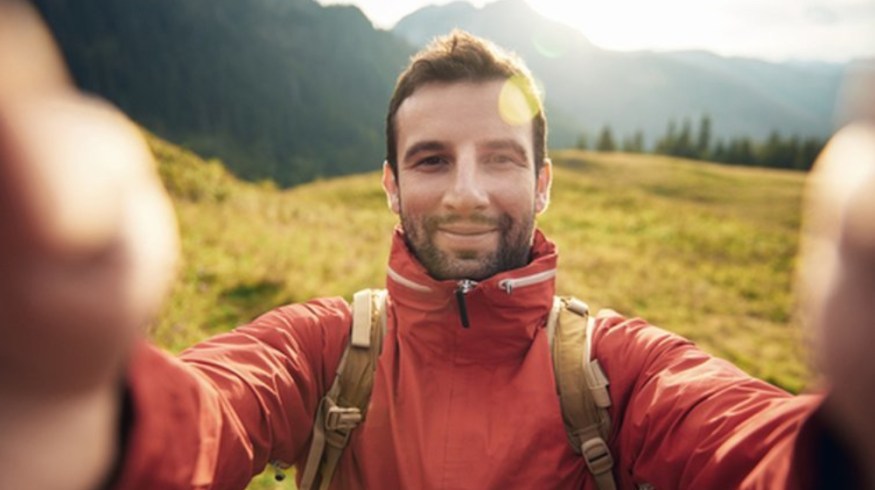
Egginton is a pro at the art of filming yourself. Image via The Video Creators.
Sarah Outen is a record-breaking adventurer and award-winning filmmaker. She recently completed her phenomenal film Home, covering her four-year expedition around the world. She shot most of the film herself.

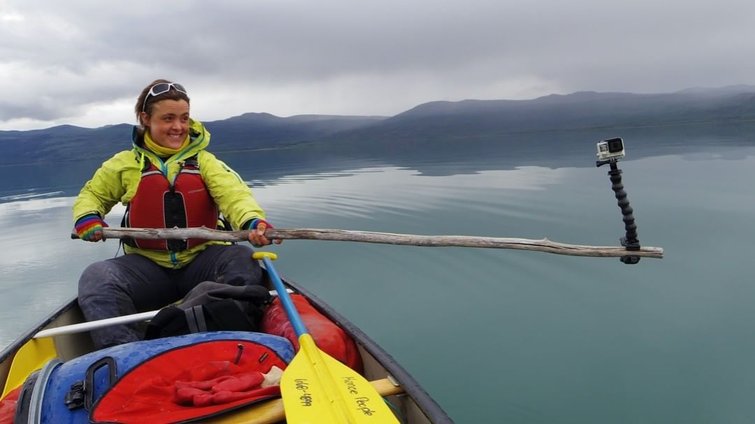
Outen documented her four-year expedition around with world, mostly shot by herself. Image via Kickstarter.
Here are eleven tips from my interviews with these two professionals. Whether you’re a vlogger, adventurer, or simply looking to promote your business online, these tips will help you improve how you capture footage of yourself. Let’s start with gear.
Video Gear for Filming Yourself
Making sure you have the right gear and knowing how to use it is the first step to quality self-videos.
1. Use the Right Camera
Egginton stressed that not having the right gear shouldn’t stop you from getting started. Your phone’s camera shouldn’t be underestimated, although most people use the inferior “selfie” camera. You can immediately up your game by using the forwards facing one, which is much higher-quality.
If not using your phone, Outen advises buying the best camera you can afford. Look for a camera that has a flip screen so you can see what you look like as you speak. Alternatively, you can purchase an external screen that’ll easily connect via HDMI.
If you’re off on an adventure, invest in a GoPro or two. They’re waterproof and can be attached to just about anything. They might give you the action shots you’ve been looking for! Brand new, they cost around $360, but you can pick up some of the older versions on eBay for a fraction of that price. These days, you want a camera that films at a resolution of at least 1080p, but 4K is definitely not essential.
2. Stabilize the Camera
There’s nothing worse than wobbly footage. It doesn’t make you look professional! At a bare minimum, put your camera on a stable surface (like a table), but if you have a budget, definitely invest in a good tripod. Manfrotto are many people’s go-to make. If you’re shooting yourself on an adventure, Outen suggested purchasing some GoPro Mounts. These take up far less room than a tripod and can provide more exciting angles.
3. Get Quality Audio
Egginton described how audio makes up fifty percent of the overall quality of a video. If your audio is rubbish, your video will most likely be rubbish. If you’re filming on your phone, using an external lavalier mic rather than your phone’s built-in mic is a game changer. It’s also worth letting audio factor into your decision of where you film yourself. Excessive wind or background noise can ruin your footage! Search for a time and place that’s quiet.
4. Control Your Lighting
If you want your image to look fantastic on people’s screens, then you need to carefully consider the light you film in. Staying away from harsh sunlight is a must! If you want to shoot outdoors, then overcast conditions are often preferable. Cheaper cameras cannot deal with harsh contrast images.
If you film inside, make sure you don’t stand with a window behind you — you’ll appear as a silhouette. If you want to control your lighting then it’s better to film inside, using lights specifically created for this purpose. The right setup will create a softer light, stopping you from getting harsh shadows that can ruin your image.
Spend a couple minutes watching this short tutorial about lighting while filming yourself.
Filming Techniques While Filming Yourself
Once you’re all set up with gear, let’s talk about how to film yourself.
5. Film in 4K
It’s definitely not essential to film at a 4K resolution, but it can have some enormous benefits. It allows you to create two angles from one shot. Most likely, you’ll export your final video at 1080p, so you can crop-in on the original 4K without compromising on resolution. Using both the original and the crop-in helps you vary your angles, as well as enabling you to cut more seamlessly between takes if you’re not a fan of jumpcuts.
6. Go with Multiple Cameras
If you want to take your video to the next level, why not try using two angles by filming with two different cameras. (We’ll talk about how to sync multiple angles later.)
Try using one camera as your main angle, facing you front on, whilst another camera can give you a closeup, slightly off to the side. If using several cameras, it’s important not to break the 180 degree rule by making sure all your angles are front on or on one side, but not both sides. If you do break this rule, it can be disorientating for the viewer.
7. Be Creative
This was one my favorite discoveries during my discussions. It’s too easy to end up using the same ideas and techniques over and over again. However, there are so many options to be creative when filming yourself that’ll stop your viewers from getting bored.
Why not try a variety of angles? Try a super wide shot or a super close-up, or position your camera on the floor facing up and stand looking down at it. There are endless options! You could mount a GoPro to your car/bike/kayak for a more exciting adventure shot.
This contraption allows you to have a moving camera angle, even if you stood still and have no additional crew members. What about changing the way you enter the frame? Walking and talking to the camera while filming yourself could help bring energy to your videos. You can achieve stable moving footage by using a gimble. If you’re filming on your phone, check out this stabilization device.
8. Be Natural
Everyone envisions themselves as a charismatic presenter when they turn the camera on themselves, but many people freeze up as soon as they press record. Sarah mentioned how, over time, you begin to relax when filming yourself.
It’s worth practicing first and accepting that it may take time to appear confident on camera. Just because you’re not immediately a natural, doesn’t mean you won’t find your groove eventually. Sarah also mentioned that it’s important to be authentic on camera and find a style that feels right for you, rather than copying someone else’s — audiences love authenticity!
Post-Production Tips
Post-production — the stage after all filming is done — is another important step. This is the time to review, edit, and distribute videos.
9. Re-Watch Your Previous Videos
Like everything in life, you need to have a humble attitude if you want to perfect this craft. Rewatch your previous videos and make notes on how you can make your next videos even better. It could be worth asking others for input as well. Take all feedback about your filming work constructively. Use all the information about your video to learn and improve your filmmaking skills.
10. Edit Your Videos Yourself
Personally, I’d recommend using Final Cut Pro X to edit together these types of videos. This is because of how simple and efficiently it synchronizes different angles. It’s also the most accessible professional standard editing software out there. To import your footage, you simply create a new library, then drag and drop your footage from the finder window straight into an event of your choice. Learn more about setting up your library (the same as a project file in Premiere) here:
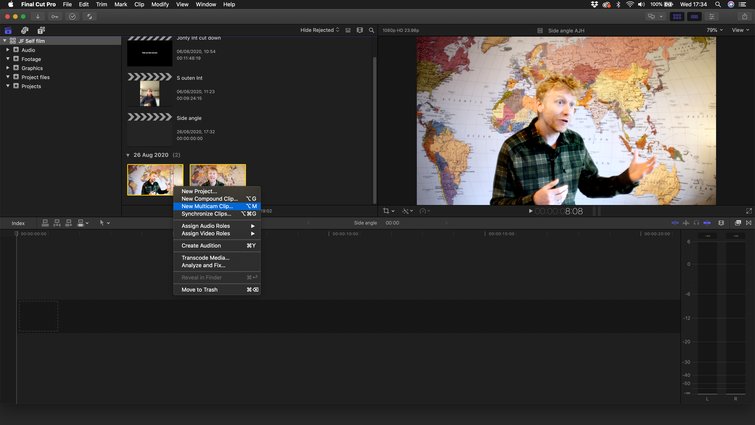
If you want to synchronize numerous angles, the best way to do this is by setting up a MultiCam. Select your angles, including your audio (although this will often be attached to one of your angles), right-click and select Create MultiCam.
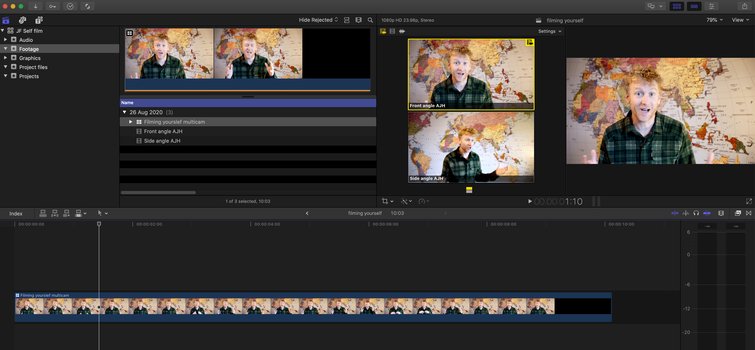
Once you’ve named your new MultiCam clip, all your angles will have synchronized. Drag and drop this new clip into your timeline. Once selected, you can select the audio track you want to use in the Inspector. Cutting between angles couldn’t be easier, just click Show Angles in Viewer and you’ll be able to see both angles as you play back your clip. You can cut to a particular angle by clicking on it.
You can drag where the cut point is by pressing T and clicking on the cut. Should you wish to change one angle for another, you can do this by holding down the Option key while clicking on the angle you wish to use. This will change out whichever angle is being used, wherever the playhead is, to the one you’ve clicked on.
11. Know How and Where to Distribute Videos
There are so many different ways in which you can distribute your one-person videos. YouTube is a great starting place as, once your video is on there, you can embed it in various other platforms.
If your content is a means to promoting your business, try sharing it on LinkedIn. Sharing your videos on Twitter couldn’t be simpler. Just drag and drop your clip onto your Twitter post, or use Twitter Media Studio to take things up a level.
While Instagram can be a fantastically visual sharing platform, it can also be quite fiddly. My recommendation is to make sure your videos are over a minute long so they can be uploaded directly from your computer onto your Instagram TV account. Your video will still appear on someone’s feed, without you having to get your phone or external plugins involved. Be sure to use the relevant hashtags when sharing on social media to ensure that your videos get as many viewers as possible.
It’s important not to be intimidated by the price tags attached to a lot of the equipment I’ve talked about. You can employ many of these techniques if you’re just using your phone, then add to your kit one bit at a time when your budget permits. Have a play and see which of these points helps the most. They may just transform the way you film yourself!
Cover image via mavo.


