Comparing the Performances of Premiere Pro vs. Final Cut Pro X

Let’s compare these two pieces of editing software—Premiere Pro and Final Cut Pro X—in five different areas of performance.
User Interface
It’s well-recognized that Premiere has an incredibly customizable layout. For example, you can have multiple timelines open at once, or you can drag-and-drop your panels to change your workspace so that it’s perfect for you.
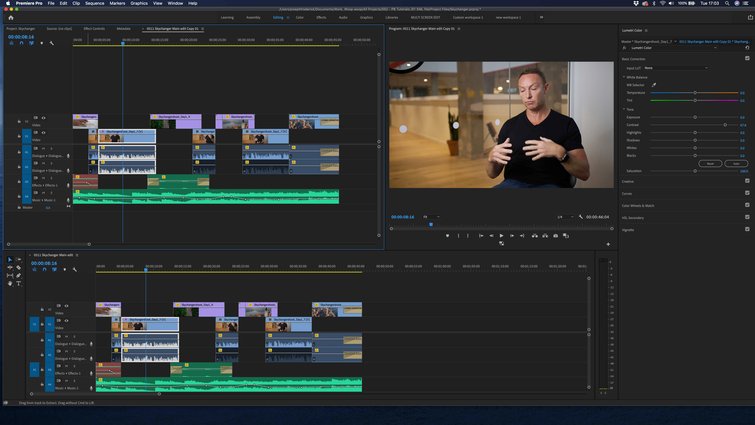
It also comes with nine default workspaces that you can use that are organized according to post-production task. In addition, you also have the ability to save your customized workspaces. So, once you have perfected your layout, you can access it again next time with a simple click.

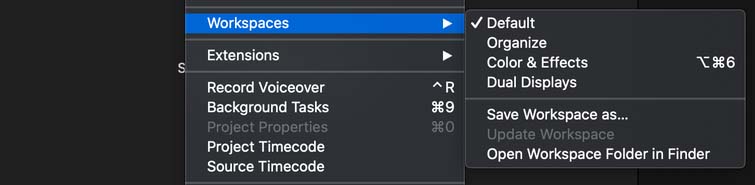
However, FCPX only has four default workspaces and the ones that you can create are far less customizable than those in Premiere. If your inspector is visible, it’ll always be on the top right. You can also only have one timeline open at once, and it’s just far less malleable. I hope that in the future, the software creators over at Apple might take some inspiration from Adobe and make FCPX more customizable.
Project Preparation
Before beginning an edit, most of us invest a little bit of time in setting up our projects (or libraries in FCPX) in a way that will enable us to edit as efficiently as possible. Luckily, each software has a variety of tools at hand to help us get our footage and audio organized.
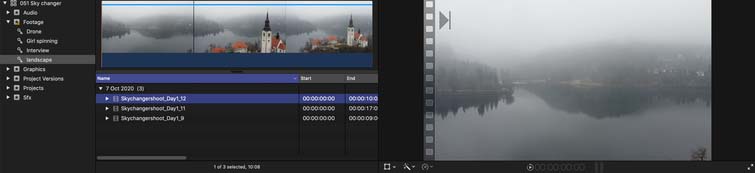
FCPX gives you the option to use something called keyword collections, in which you can tag clips (or portions of clips) with a specific word or phrase. If you click on this keyword, it’ll show you all the clips that have been tagged with it.
However, in Premiere, you can organize your footage within bins. These are different from keywords in that you don’t just tag a clip; rather, you put it into a bin. Therefore, when a clip is in a bin, it can only be in that bin. But with keywords, multiple keywords can reference the same clip.
Personally, I think Premiere misses out on not having keywords as often many clips fall into several subcategories and it’s helpful if you can label them accordingly.
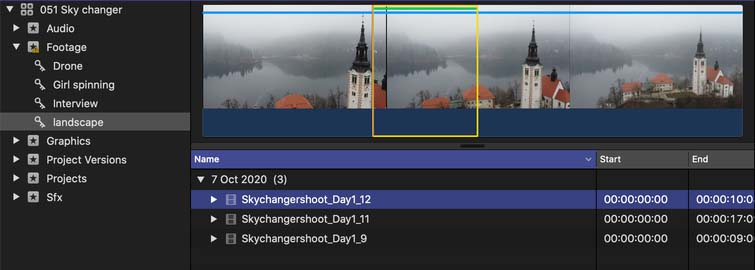
However, the best thing (in my opinion) about FCPX’s capacity to organize your footage is favoriting. This is where you can select your preferred portions of each clip and then “favorite” them. Once you’ve done that, a small green line will appear at the top of the section that has been favorited. Then, you can select Favorites in your event viewer and you’ll only be able to see your desired clip portions in the event viewer. This can be particularly helpful if you have an assistant editor, who can search through your extensive B-roll to find the gems, which they can save for you using the Favorite function. Sadly, you don’t have the ability to do this in Premiere, but I often wish you did as it’s unbelievably helpful.
Editing in the Timeline
In many ways, they both operate quite similarly when actually editing. However, there are a few distinct differences. First off, Premiere divides your audio and video into separate tracks, even if your file contains video and audio.
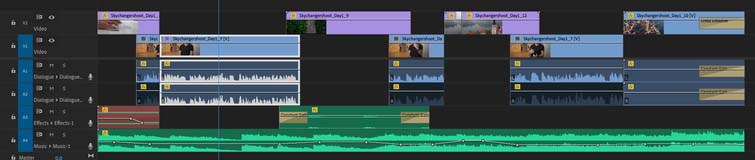
FCPX doesn’t do this. FCPX uses something called the Magnetic Timeline. Within that, you have the primary storyline (as shown below), in which you put your main footage. For example, in my edit below, I have my interview footage in my primary storyline. All your other audio and video clips attach to whatever is in the primary storyline. That way, when you move one clip, whatever is attached to it will move with it. This helps keep your editing nice and efficient as you can move whole sections of an edit just by moving one or two clips. When you move a clip that’s in the primary storyline, the gap that is now left will automatically close, bringing the clip that was after it forward.

Premiere doesn’t have a magnetic timeline system, which can make editing far more laborious. Once you select all the clips you want to move you’ll find yourself creating and closing gaps manually.
In addition, FCPX also gives you the option to background render your edit. This means it’ll render your timeline while you’re working, which will allow you to watch your edits back smoothly, when you so desire. However, in Premiere, you’ll often find yourself having to wait while you manually render your edits before you can watch them back.
Motion Graphics
Most editors I know use Adobe After Effects to create their motion graphics. Premiere’s compatibility with After Effects makes it incredibly useful here. Thanks to the dynamic link, you can drag your comps into Premiere, and when you make changes to that comp in AE, those changes will appear automatically in Premiere.
This makes for an incredibly efficient workflow, and is the reason why I always choose Premiere over FPCX when it comes to edits that contain sufficient motion graphics. FCPX would require you to export your comp every time you wanted to make a change to it, which would be far more time consuming than when working with Premiere.
Color Grading
In Premiere, every time you want to grade a clip, you need to add a Lumetri Color effect. If you wanted to add two curve-based grades, you’d need to add two whole Lumetri effects—which contain curves, wheels, and many other grading tools. However, in FCPX, you add the curves, color boards, or wheels individually.
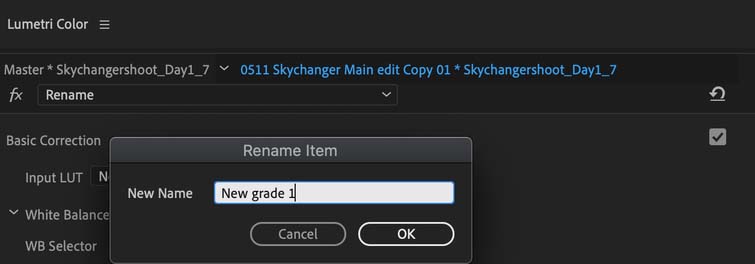
Despite this, many prefer Premiere when it comes to grading. Premiere gives you the option to rename your grades individually, which you can’t do in FCPX. This gives you that extra level of clarity as to which grade you’re copying/pasting when copying grades between clips.
One other ability that Premiere boasts over FCPX is the ability to track your grades to objects within your shot. This allows you to give a distinct grade to certain objects. For example, increasing the saturation on a character’s face in order to draw attention to them.
You could compare these two pieces of software for hours if you wanted, there are so many intricacies to look at. However, these five areas of comparison are definitely vital to consider when deciding which one to use. I encourage you to play around with both and see which you prefer.
Cover image via Gau zohchair.
For more information regarding software programs, check out these articles:
- The Best Free and Paid Screenwriting Software Solutions
- Software Timelapses: A Therapeutic and Viable Way to Learn
- Best FREE Animation Software — Ready to Download Right Now
- This Remote Access Video Game Software Also Works for Video Editing
- Using the Pick Whip for Motion Graphics in Adobe After Effects