Using the Pick Whip for Motion Graphics in Adobe After Effects

The Pick Whip is a motion graphics game-changing tool in Adobe After Effects. Let’s explore what it does and how to use it.
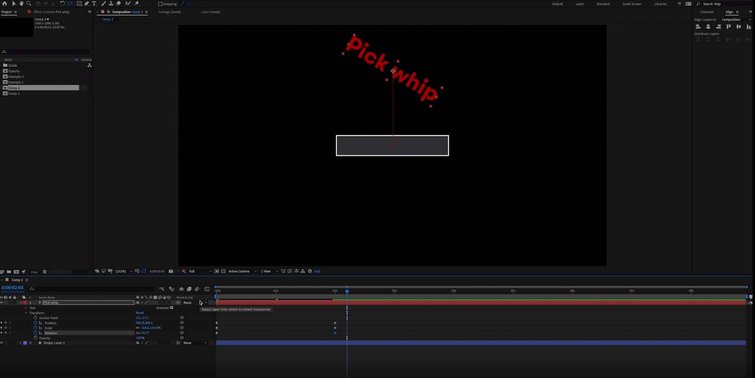
All too often, you create a nice animation on a text layer using keyframes, before realizing that you want a shape to move with the text so that the shape and text move together. You can see in the screenshot below that the text has moved without the shape layer. If you have finessed your keyframes on your text layer using the graph editor, it will be quite laborious to create the exact same keyframes on the shape layer.
The Function of a Pick Whip
This is where the pick whip comes in. It allows you to “parent” one layer to another. When you have parented a layer to another, it’ll take on any changes in scale, position, and rotation that the layer it’s parented to goes through. There’s a pick whip icon located on each layer, as shown below.
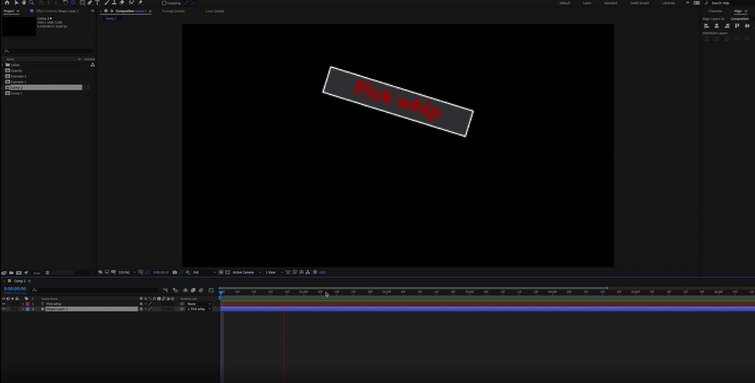
The screenshot below shows me parenting the shape layer to the text layer using the pick whip, resulting in the shape now moving with the text.
Animating Layers
The pick whip really comes into its own, though, when you start working on more complex projects. In the screenshot below, you can see that I’ve got multiple layers that I want to animate in unison. Rather than animate them all individually, you can simply parent them to a null object and add the keyframes to that layer.
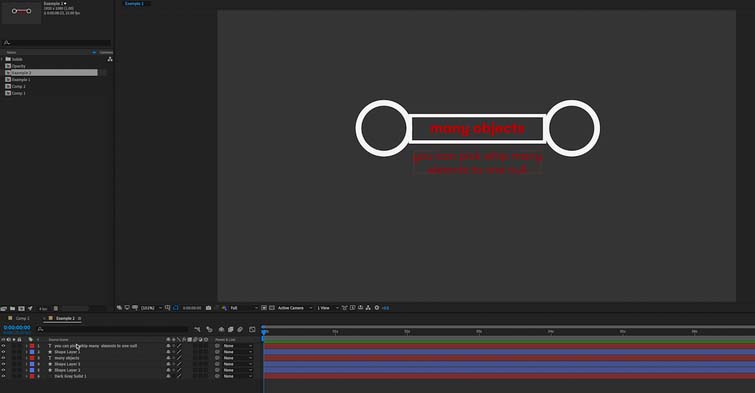
If you select all the layers you wish to animate, you can drag the pick whip from the top layer to the null object, and it’ll parent all of them to it. Once you have done this, you can simply animate all the layers using the null, as shown in the screenshot below. One thing to note is that the layers will rotate around the anchor point of the null object, not their own anchor points.
Opacity

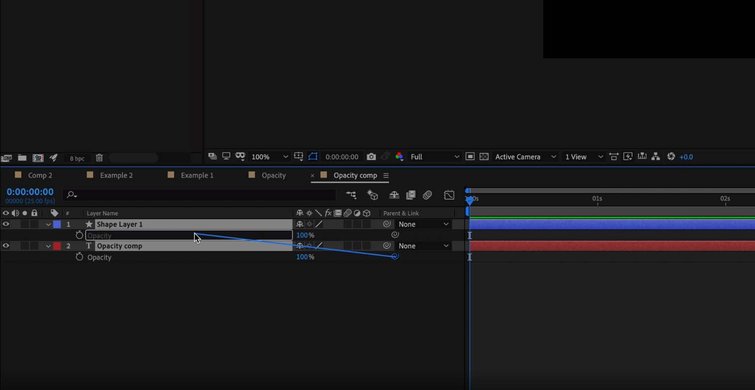
However, in the example I’ve just used here, you cannot control the opacity value of these layers using the null object.
There’s a solution to this and it’s fairly simple. You can see in the screenshot below that there’s also a pick whip icon on each layer next to the opacity property. If you drag that from one layer to the opacity of the layer above, you can now effect the opacity of both layers by just controlling the one. You can actually parent any of the individual transform properties between any layers you want to.
There’s still so much more that you can learn about the pick whip, but even the fundamentals I’ve described here can be enormously beneficial. Play around with it! I’m sure you’ll end up wondering how you managed without it.
Cover image via ssuaphotos.
Discover additional tips, tricks, and advice with these articles: