
Adobe Prelude: Organize, Log and Rough Cut

Jump start your editing workflow with Adobe Prelude before moving to Premiere Pro or Final Cut Pro.

Whether your an individual or a team, everyone is looking for ways to save time and work efficiently while creating the best work they can. This is especially true in the video production business, where time is short and deadlines are always fast approaching.
Prelude is a handy tool for video pros to ingest and organize your video footage. Video producers and editing assistants can use Prelude to ingest, log, and create a simple rough cut edit in Prelude before handing off to the editor. Prelude can be used on-location on a laptop or older computer as it has lower system requirements than Premiere Pro.
But Prelude is not just for Adobe Premiere Pro video editors. If you also work with Final Cut Pro 7 or Final Cut Pro X (common for freelancers) you can export an XML file from Prelude to continue working in those apps.
In this post we’ll explore logging, clip organization and creating a rough cut in Adobe Prelude. Note, if you’re new to Prelude, check out my previous posts on ingesting in Prelude here and here.
Get Organized With Prelude
It’s hard to be creative when you can’t find your footage! Getting organized at the beginning of the project will save you a lot of hair pulling later on. To organize your clips in Adobe Prelude create bins, just as you would in Premiere Pro, Final Cut Pro or Avid Media Composer.
Click the bin (folder) icon to create a new bin (highlighted in red below).

Or right-click in the Project Window and select “New Bin”.
Editing trivia break: If you are wondering why they are called bins and not folders, film hung in bins when editors were cutting film!
Right Click Contextual Menu:

Be aware that if a bin is selected and you create a bin, the bin will be created nested inside the previous bin. In some instances you may want to have sub bins, it just depends on your workflow. Note, you can’t see icons of clips currently in the Project, but hopefully that is added in a future release.

Logging: Subclips & Adding Markers
In Prelude we can create subclips and add markers to save the editor time. Subclips let you break large clips into smaller, more manageable clips and can be better organized by topic or priority. Comments are useful to pass along notes to the Editor like “stabilize shot” and “fix white balance.”
Double click on a clip in the Project to open it’s Timeline. To add a marker, press the appropriate number (1 for subclip, 2 for comment).

Give your marker a name in the highlighted blue “Name” column. Use J,K,L to navigate the clip and set In & Outs with I & O like you would in an editing app.

After adding your marker you’ll see an asterisk in the timeline, telling you you have unsaved changes. After you save a subclip, you will see the subclip in the Project.

You can always name the marker later and add comments by clicking on it, and renaming it in the Marker Inspector.

Creating a Rough Cut in Prelude
If you want to rough out an edit in Prelude, you’ll first need to click the Rough Cut icon (highlighted in red below) or use the shortcut Command + N (on a Mac) or CNTRL + N (on a PC). Name and save the rough cut, and it appears in your project. Click image for larger view.

Open the timeline by double-clicking the rough cut in the project panel.

You can now drag clips and subclips into the rough cut timeline, or right click on a clip and select “Append to Rough Cut”. The editing functionality is kept basic (no transitions or insert/overwrite), as Prelude is designed to roughly string together clips which is then handed to the editor.
Send to Premiere Pro from Prelude
If you are running Premiere Pro and Prelude on the same machine you can send your Prelude project to Premiere. Select the rough cut and the bins you want to send, right click and choose “Send to Premiere Pro”. Alternatively, you can use File> Send to Premiere Pro.
If you have Premiere Pro already open, whatever you send from Prelude will be added to your current Premiere project.

Export to Premiere Pro, FCP 7, & X
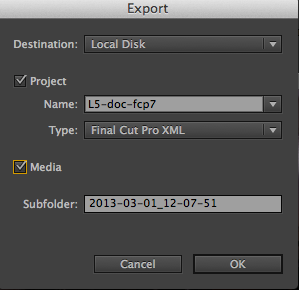
If Premiere Pro is on another machine or if you want to export Final Cut Pro XML, use Export instead of Send To.
Select your rough cut, clips and bins. Then from the menu bar select File > Export (you can also use the shortcut Command + M on a Mac or CNTRL + M on a PC). In the dialog box, set your Destination (hard drive or FTP), Project, and Media settings. Then, click OK.
If you are a Final Cut Pro X editor you will need the 7toX app ($9.99) to convert from FCP 7 to FCP X xml. Depending on your format you may also want to transcode to Pro Res if working in FCP.
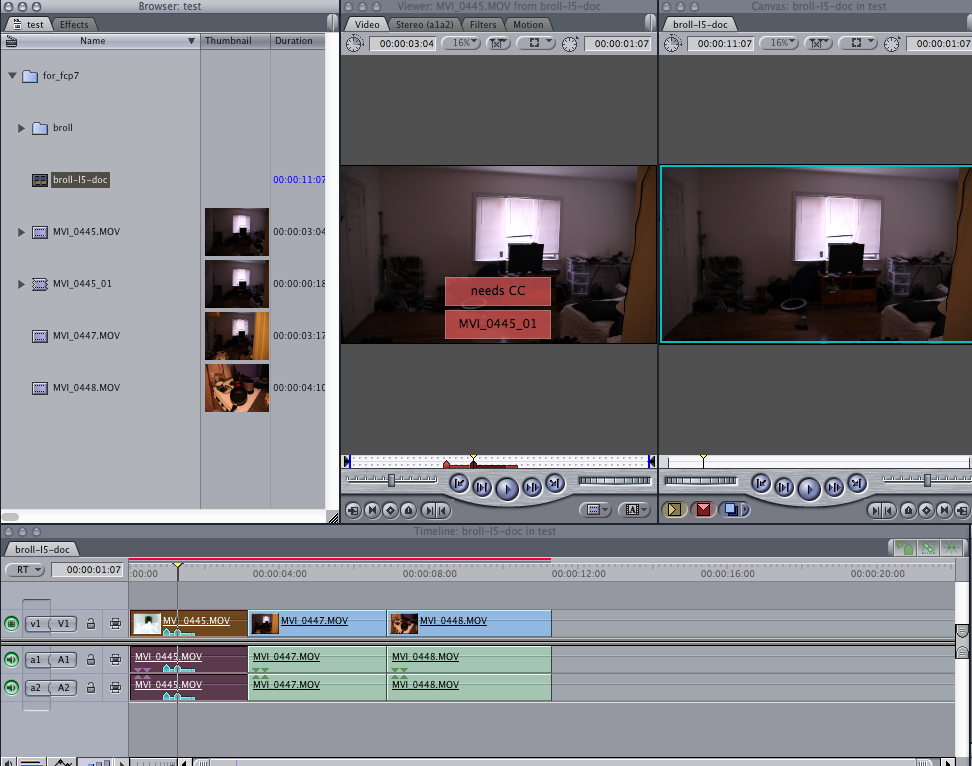
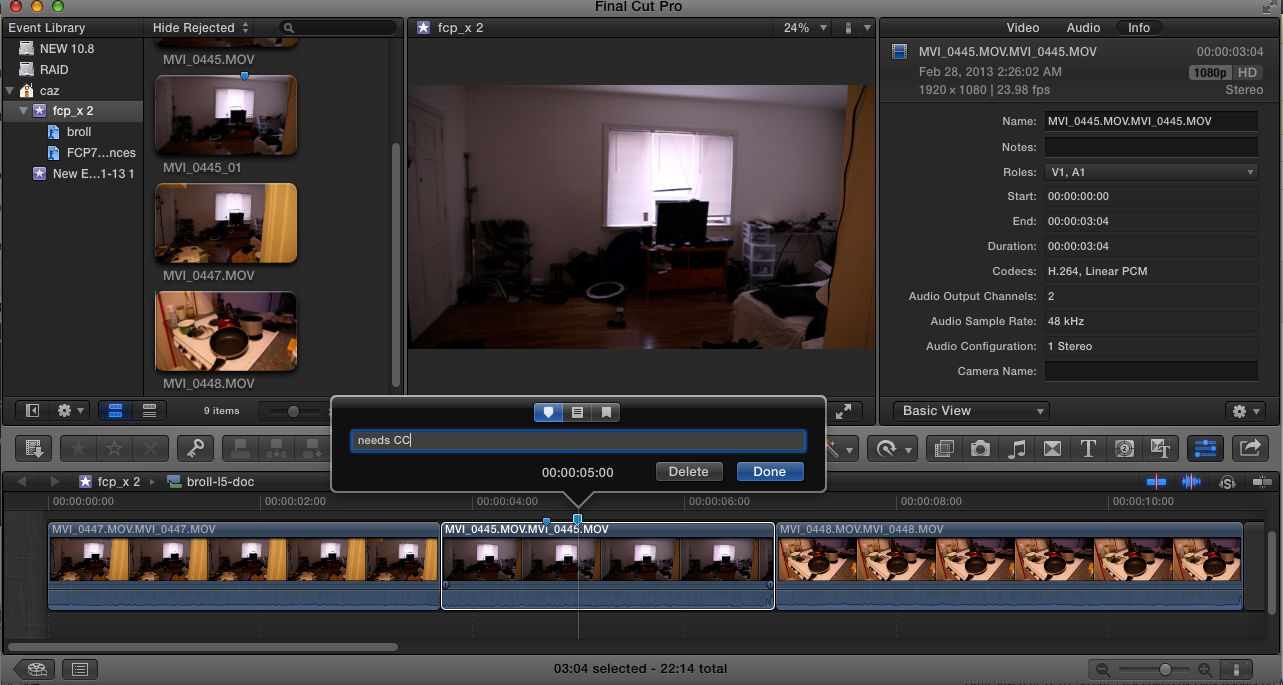
Markers & subclips are sent with the XML to Final Cut Pro 7 & X (terminology is different). This is helpful, as freelancers often use various software depending on the job.
For more details check out the Adobe online help site and forum.
Are you using Adobe Prelude in your post production workflow? Have tips or tricks to share? Let us know in the comments below!


