
10 Time Saving Tips in Adobe After Effects
Looking to optimize your After Effects skills? These 10 After Effects tips will save you time and let you work more efficiently.
Whether you’re an Adobe After Effects newbie or a seasoned pro, knowing the tricks for speeding up your AE workflow will save you time…and ultimately money. In this post, we share After Effects tips that will let you avoid common roadblocks and optimze your AE workflow for peak performance.
1. Improve the Quality of Your Previews
If your magnification in the composition is not an even value (ex. 39.1%), you get rough edges in your previews. Instead of losing time by changing your magnification every time this happens, change the preference setting instead.
You can improve the preview quality (better aliasing) by setting “Viewer Quality to More Accurate”. This is set in Preferences > General.

Faster Previews

More Accurate Previews

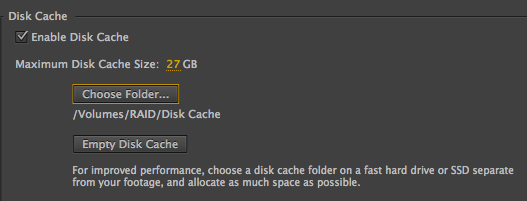
2. Improve Your Performance By Changing the Disk Cache Location
To improve performance in After Effects you should move your disk cache off of your system drive. In Preferences > Media & Disk Cache > Disk Cache, change this from the default to a fast drive (SSD if possible).
Here is a handy link to Adobe’s white paper on Hardware Performance for more tips.
3. Changing Mask Behavior So Each Mask is a Different Color
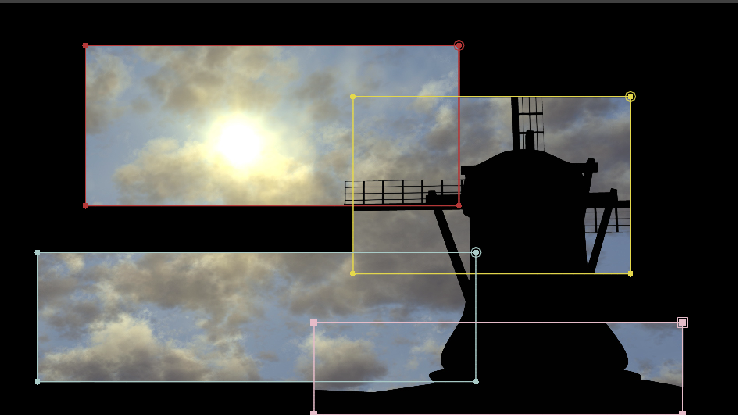
Although the AE default is to have all masks the same color, having all masks the same color can get confusing quickly when you have many in your composition. Make each mask a separate color by checking “Cycle Mask Colors” in Preferences > Appearance.

Example of “Cycle Mask Colors” Checked
4. Use After Effects Auto Save to Give You Backups in Case of Crash/Client Changes
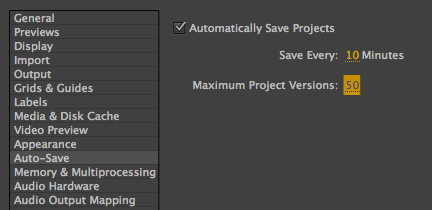
Unlike in Adobe Premiere Pro, Auto-Save is not turned on by default in After Effects. I tend to save every 5-10 minutes and increase “maximum project versions”. The Auto Save files are in the Auto-Save folder, which is saved in the same location as the project.
In Preferences > Auto-Save check “Automatically Save Projects”.

5. Use the Shy Guy to Reduce Clutter in the Timeline
This is handy when you have a lot of layers in the timeline and want to hide layers you don’t need to see (especially useful when working with small monitors). Enable the Shy Guy for the comp (see red highlights below) and the selected layers will hide in the timeline.
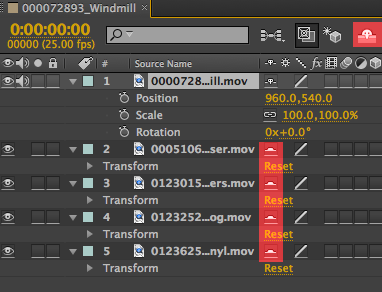
Shy Guy Enabled for Composition and the Layer
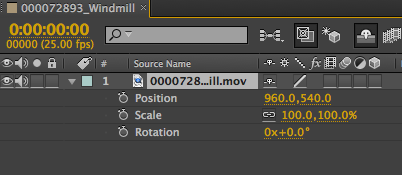
6. Improve After Effects Performance Using Proxies
Proxies use a low resolution movie or still to speed up previews. This is handy if you are working with large footage files and want to use a smaller file in their place.
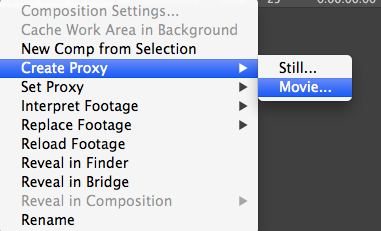
Right click on a clip in the Project and select “Create Proxy > Movie/Still.
The Render Que opens. This where you set your Render Settings & Output Module. By default the Render Settings are draft (half size), and I changed the my Output Settings to Photo-JPEG (quick render, decent enough quality).

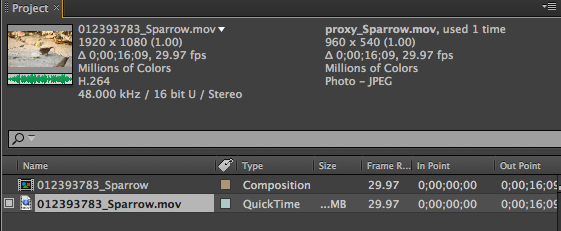
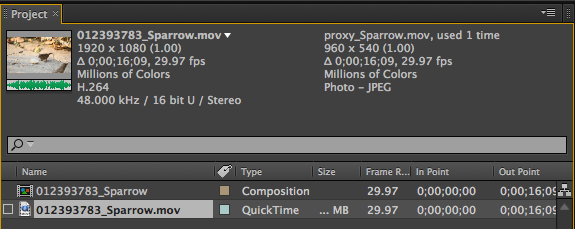
After the Proxy renders, you will see a square beside the footage. This indicates the proxy is being used. To stop using a Proxy, click the square which changes to an outline and turns off the proxy.
Proxy Turned On
Proxy Turned Off
7. Add a Clip to a Composition & Replace a Clip with Shortcuts
One common After Effects process is adding footage or swapping out footage in a composition. Here are are 2 handy shortcuts to make this easier/faster.
Instead of dragging footage from the project to a composition, use the shortcut CMD + / (on a Mac) or CTRL + / (on a PC).
To replace a layer in a composition with different footage, select the layer in the comp, then select the footage in the project and press CMD + OPTION + / (on a Mac) or CTRL + ALT + / (on a PC). For more After Effects shortcuts check out this comprehensive list.
8. Use Guide Layers to Use a Layer as a Non-Rendering Guide
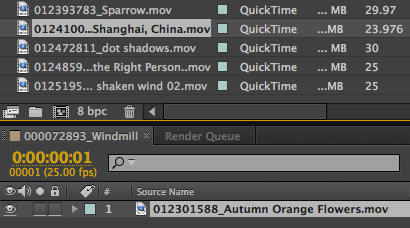
You can make any layer a non-rendering guide layer to aid in layout and positioning. This way you don’t accidentally render a layer that you just want to use as a guide. In my example I made the video a guide layer, as I just want to use it to align my text, but I don’t want the video to render.
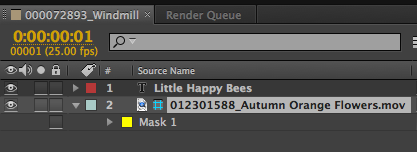
To make any layer a guide layer in After Effects select the footage, right click and select “Guide Layer”. A blue grid appears beside the layer and now it won’t render.

9. Interpret Footage
Interpret Footage in After Effects lets you perform several handy functions with your media.
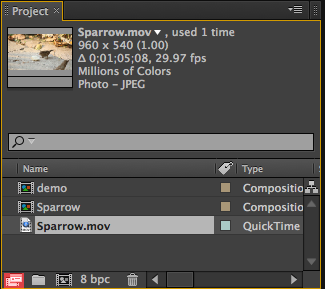
Select any piece of footage in the Project panel and click the icon in the bottom left that looks like 2 cassette tapes (very old school).
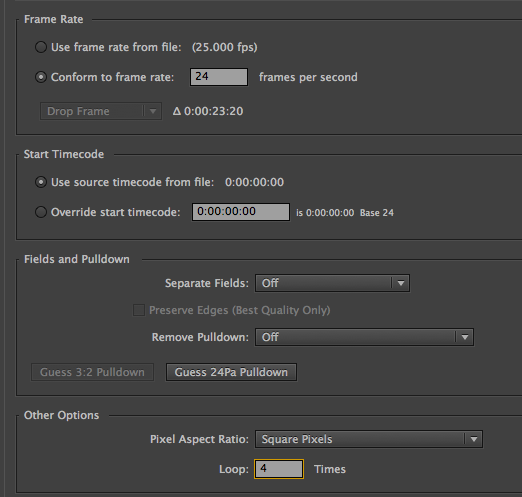
In the Interpret Footage dialog window you can change the frame rate of a clip, which is handy for footage filmed in slow motion. If you have a 60 FPS clip that you want to play at at 24 FPS, click ‘conform to frame rate” and change the frame rate to 24.
Want to loop your clip in After Effects? Have a short clip contentiously loop in the composition without having to copy and paste it like you would in a Premiere Pro or FCP. Enter the number of times you want the footage to loop. Then, in the composition, click on the edge (you will see a highlighted area) of the footage and drag out to loop the clip.

10. Allow Scripts to Write Files & Access Network
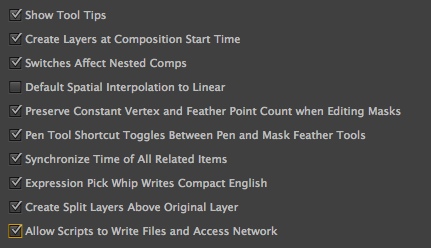
After Effects scripts are handy time savers for looping layers, controlling cameras and keyframe assistance (just to name a few of their functions). To use scripts in AE you’ll need to go to Preferences > General and check the box that allows you to use scripts. Note: this preference has to be checked or you won’t be able to use scripts.
You can find After Effects scripts at aescripts, ae enhancers, BatchFrame and Adobe Exchange. If scripts are new to you, learn more here.
Got useful After Effects tips to share?
We want to hear from you in the comments below!


