
5 Tips for Keeping Your Tripod Shots Stable and Wobble-Free

Don’t let your tripod camera shots wobble! Use these simple tricks to keep your static camera stable.
Camera stability issues are most likely to occur when your camera is put into motion — think handheld cinematography, run-and-gun videography, or when any manner of shoulder mount, rig, or steadicam is in use. These shot types are all prime candidates for stability issues, which can make your shots shakier than desired.
One would be forgiven for thinking that the quick fix for these stability issues is simply shooting with a camera on a tripod. Unfortunately, that’s not always the case.
Depending on your tripod, camera, and location circumstances, even the seemingly steadiest of tripod setups can still add unwanted movement and shakiness to your shots. With this reality is mind, let’s take a look at some of the best tips, tricks, and techniques you can use to ensure that your static tripod camera shots remain stable, wobble-free, and, well, actually static.
1. Invest in the Right Tripods and Gear
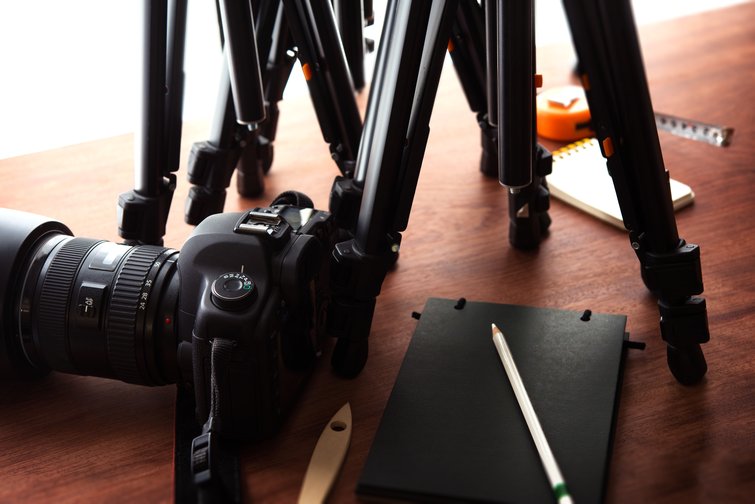
This one might sound like a no-brainer, but it must be said: If you’re looking for stability in your tripod setup, investing in the right tripod and gear is your top priority. A dinky plastic tripod that isn’t designed for video cameras will always be more prone to shakiness than a stronger tripod purpose-built for stable video production.
It comes down to quality and design. You want a sturdy, robustly constructed tripod with strong, wide legs. Locking mechanisms matter; look for tripods that have secure locks and tough joints that keep everything exactly where you need it.
As far as budget, there are plenty of tank-like tripods out there at a variety of price points. Here are some of our top picks for the best tripods and tripod systems for video professionals. We’ve highlighted a few of the best selections below.
- Manfrotto 645 Fast Twin Leg Video Tripod with Ultra-Lock Mechanism
- Manfrotto 502AH Video Head and MT055XPRO3 Aluminum Tripod Kit
- Magnus VT-4000 Tripod System with Fluid Head
2. Buy Cameras with Internal Stabilization

Your next stability solution involves the camera itself. At this point, pretty much every digital photography and video camera includes some degree of built-in stabilization. This stabilization, often referred to as in-body image stabilization —or IBIS — defines just how much shake and movement a camera can handle internally.
Obviously, IBIS tech varies across manufacturers and camera types. Generally speaking, though, some good old-fashioned common sense applies here — the better the camera (and the larger and more advanced the sensor), the better the in-camera stabilization.
Take a minute to check out our top picks for the best digital video cameras for filmmaking. Pretty much every camera on the list features above-average IBIS that will help you smooth out your basic tripod shots.
3. Pick the Right Location and Setup

Moving on to practical tips for working with a tripod camera setup, a lot of stability issues can be fixed by simply setting up your tripod in the right spot. And by “right,” we mean flat and smooth.
Don’t just trust your eyes, because even the flattest-looking floor, road, or sidewalk can actually be quite uneven. Instead, test your tripod’s levelness by hand — carefully move it around to see if it wobbles, drifts, or leans — and then use an actual level tool. Some tripods and cameras have built-in levels you can use for this step, but it certainly never hurts to go ahead and bring one of your own.
Finally, avoid surfaces that are slick, wet, or uneven (like gravel). While most tripods have some sort of non-slip footing, slippage can still occur. Ultimately, your attention to the surface below your tripod is a stronger defense against unwanted motion than three little rubber feet.
4. Use Sandbags and Lock the Legs

If you do find yourself in a situation with less than ideal ground or flooring, there are other methods for ensuring stability. One of the most popular options is using sandbags to weigh down the feet of your tripod.
Sandbags are a production staple; they’re found on most professional video sets for a reason. If you’re working with bigger, heavier, higher-end cameras and gear, you’ll want to use them to keep your setup steady and safe.
Here’s another simple, oft-forgotten tip: Lock your tripod legs! At every joint or release for your tripod, there should be some sort of locking mechanism. Whether it’s a twist or a latch, make sure your tripod is tightly secured.
5. Add Stabilization in Post-Production
Adding stabilization in post can be difficult at worst and time-consuming at best. Nonetheless, it’s an option when you find yourself in a pinch. If that’s the case, post-production stabilization solutions are plentiful, from classic tools like warp stabilizer to various built-in resources in Adobe Premiere Pro and Final Cut Pro.
Keep in mind, though, many of these stabilization editing techniques are limited in their capabilities; if you’re shooting handheld or in highly unstable conditions, there’s only so much you can do in post. However, if you’ve smartly followed the above steps when shooting with a tripod, minor wobbles cause by wind will be relatively easy to fix in your edit — and your audience will be none the wiser.
For more stabilization and other filmmaking resources, check out these articles:
- Everything You Need to Know About Stabilizing a Shot
- A Quick Guide to Steadicams
- Learning Curve: How to Use a Geared Tripod Head
- DIY Hacks: 10 Cheap Tripod Dolly Options to Try at Home
- The Best Mobile Filmmaking Gear for Making Videos on Your Phone
Cover image by diy13.