How to Quickly Stabilize Footage in Final Cut Pro

Are your clips giving you motion sickness? Stabilizing shaky footage is a breeze in Final Cut Pro X.
In this video tutorial, we’ll walk through the fastest, easiest steps you can take to stabilize clips in FCPX. Let’s explore the differences between SmoothCam and InertiaCam to find the best way to get the smoothest footage possible.
Miss something? Go through the steps at your own pace with the video transcript below.
Stabilizing Footage in Final Cut Pro X
Before we dive in, remember: The more stable your footage is straight out of camera, the better the results you’ll get from FCPX. So, if you have a gimbal, use it. If your camera has a built-in stabilization feature, use that too. Okay, let’s look at the stabilization options available in FCPX.
Automatic

Although it appears that Automatic (highlighted blue on the right side of the image above) is a stabilization technique, it’s really not — ultimately, you have two options: SmoothCam and InertiaCam. If you choose Automatic, FCPX will decide which of the two stabilization features will work best for your footage.
SmoothCam
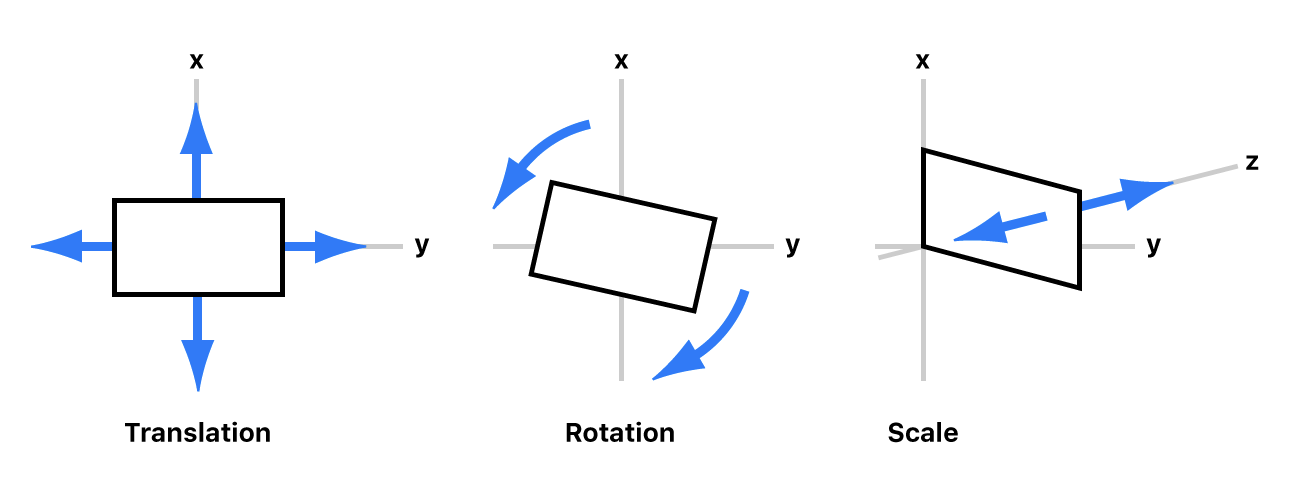
SmoothCam is the original stabilization feature within FCPX. It takes an X, Y, Z-axis approach to image stabilization, working within 3D space — Translation, Rotation, and Scale, illustrated above — to maximize your results.
InertiaCam

InertiaCam is FCPX’s latest stabilization technique, optimized to work with footage that has pans, zooms, and tilts. One interesting InertiaCam feature that’s worth noting: Tripod Mode. It does exactly what it implies — makes a handheld shot appear as if it were locked off on a tripod. Once FCPX analyzes your footage, it will determine if Tripod Mode is applicable. If it is, the checkbox will marked.
For today’s example, we’re utilizing the standard InertiaCam effect to stabilize our footage. If you’re going to use this effect, it’s important to know that a simple “drag and drop” usually will not yield the results you’re hoping for; even a little time spent refining will lead to better results.
And, obviously, “better results” is the goal — you don’t want to distract your audience with visual evidence of image stabilization. So, as you work through your footage, always be checking the straight lines and corners in your clips to ensure there’s no warping or “dancing.” These are dead giveaways that a stabilizer has been used.
Overall, FCPX’s stabilization feature is an extremely powerful tool that’s capable of creating exceptional results. Whether you use SmoothCam or InertiaCam, taking the time to smooth things out will make your footage more cinematic.
Explore a few more image stabilization tips, tricks, and techniques:
- Fix Shaky Footage with Warp Stabilizer in Premiere Pro
- Video Editing 101: How to Stabilize Footage in Premiere Pro
- 3 Simple Tips for Stabilizing Smartphone Videography
- Everything You Need to Know About Stabilizing a Shot
Cover image via arda savasciogullari.