
5 Color Correction Effects in Adobe After Effects

Quickly improve the quality of your footage or create a stylized look with these 5 simple color effects inside Adobe After Effects.

With each new Adobe release, there is more cross over of the same effects and features between Photoshop, Premiere Pro and After Effects. The following 5 effects originated in Photoshop, but are now useful image tools in After Effects.
These effects all fall into the Color Correction category. You apply them to your footage by selecting the layer and going to Effect > Color Correction or by typing the name of the effect in the “Effects & Presets Panel”.
When you need a quick color correction fix or want to add style to your footage, each of these After Effects tools can really come in handy.
After Effects: Shadow/Highlight
Shadow/Highlight is an After Effects tool that can quickly bring out details in underexposed or overexposed footage. By default, when you use shadow/highlight, After Effects will apply an automatic setting. For more control uncheck “auto amounts” and manually drag the shadow and highlight sliders. Then click the twirly for “More Options” to tweak the radius and black/white point settings. You can also choose “Blend with Original” to dial in the look and keyframe if needed.
See the example images below, demonstrating how Shadow/Highlight can make your footage more dynamic.

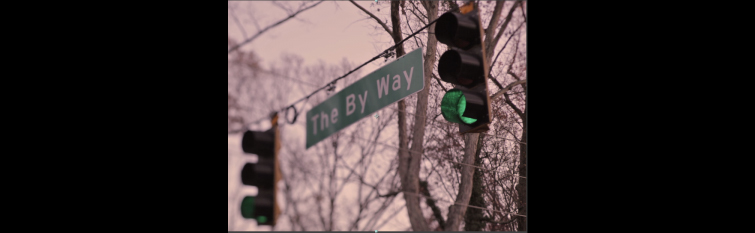
Original:

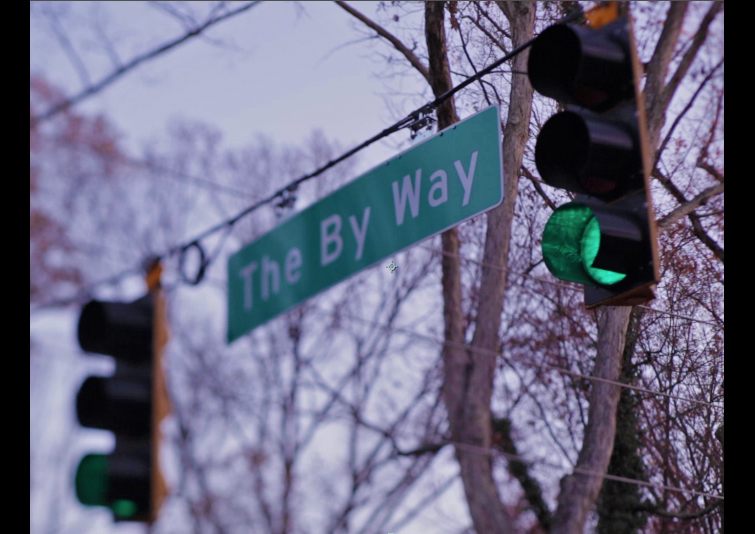
With Shadow/Highlight:

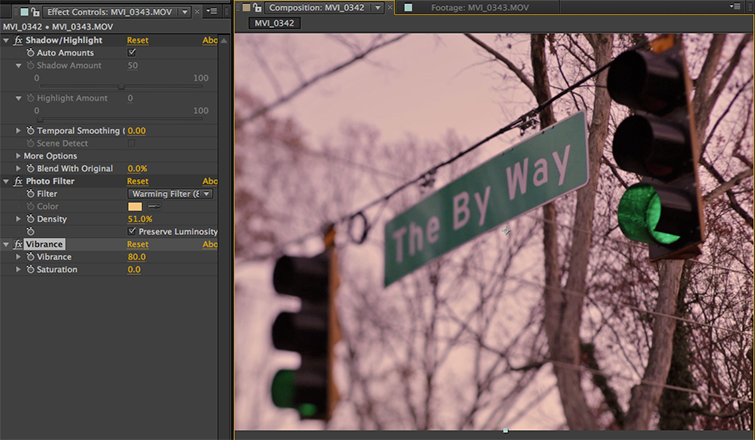
After Effects Photo Filter
The After Effects Photo Filter mimics traditional warming and cooling filters that go on camera lenses. I used the default 85 Warming Filter and increased the density to 51% to get more of an end of day look.
Leave “luminosity” checked to keep the brightness the same.
Original:

With Photo Filter:
After Effects Vibrance
Vibrance increases the saturation of the less saturated colors in an image, but it doesn’t make the already saturated colors garish. This generally gives you more natural looking results than only increasing saturation.
After Effects Tip: When stacking effects, the order can give you different results. If I drag Vibrance before Photo Filter, it will be boosting the original colors and not the warm color of the Photo Filter. I’ve turned off Photo Filter so you can see the result better.
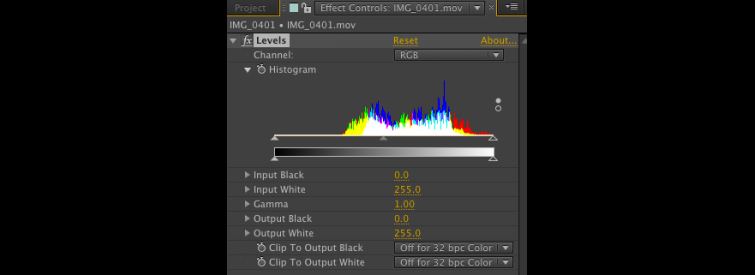
After Effects Levels
After Effects Levels uses a histogram that shows you the blacks, mids, and whites of an image. In my example, the image is flat and needs more black.
The triangles with the histogram adjust the input levels, and the sliders below that with the Black to White gradient adjust the output sliders.
Drag the black triangle until it touches the edge of the histogram to correct the exposure of the clip. The middle gray slider is gamma or mid tones. Dragging this to the left brightens the mid tones.
Dragging Input Black to the right increases black, while dragging Output Black to the right decreases black. Dragging Input White to the left increases brightness, while dragging Output White to the left decreases the white.
Before Levels:
After Levels:
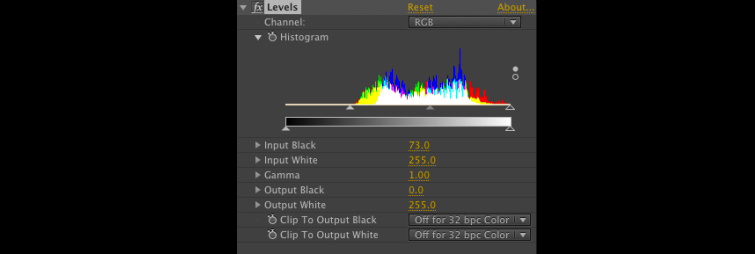
Image with Levels Applied:

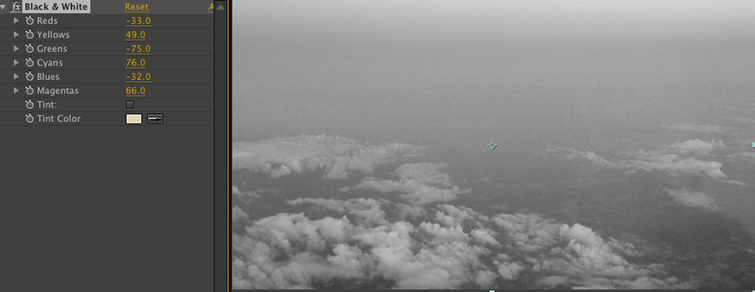
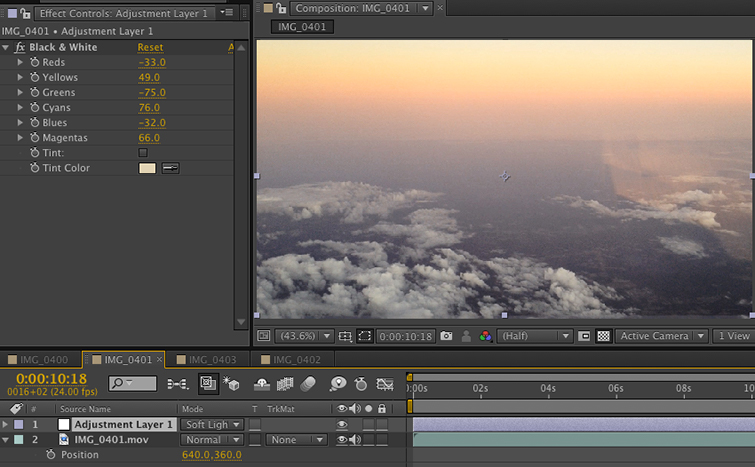
After Effects Black & White
The After Effects Black & White filter gives you more control than the Hue/Saturation filter, when converting a color image to black & white.
For a stylized look, we could put the Black & White effect on an adjustment layer and change the opacity of the layer or put it in a blending mode like Soft Light.
Got After Effects quick tips to share?
What app do you use for color correction?
Share your thoughts/experiences in the comments below!


