
How to Animate via Audio Frequencies in Adobe After Effects

“Without music, life would be a mistake” ―Friedrich Nietzsche. Without music, animation and motion graphics would also be a mistake.
This is why Davey.Studio created the FreqReact script for Adobe After Effects. This helpful little tool allows you to harness specific sound frequencies and use them to animate properties of a graphic element.
This might remind you of a tutorial I created several months ago that was all about how to use audio to drive animations via keyframes, pickwhips, and the graph editor. While this method is certainly useful, it’s not as streamlined and intuitive as using the FreqReact script. Let’s take a step-by-step look at how to use this tool in a real-world animation scenario.
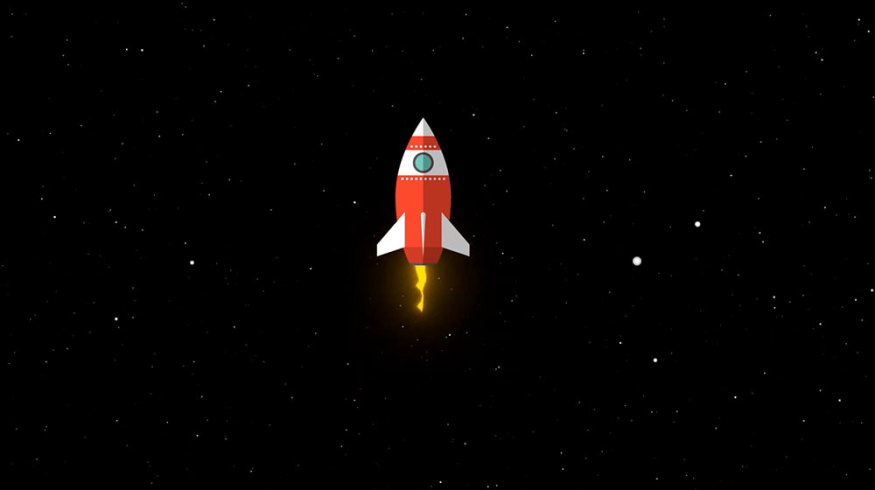
In this particular tutorial, I’m going to animate a rocket flying through space. I’ll use the bass of a PremiumBeat track to control the flames of the rocket, as well as the star-field in the background.
Step 1 — Create a New Profile

First, I’ll need to create a new profile. With the music track selected in the timeline, I’ll click on the New Profile button in the FreqReact panel, and I’ll name it Bass. I can choose to apply the profile to the entire comp or a specific work area.
Step 2 — Select the Frequency

Now for the fancy part. FreqReact will generate a new comp, allowing me to view the spectral frequency of my music track. I’ll use the preset views in the FreqReact panel to isolate the desired range of the frequency, or I can manually type in a range. Now, I’ll use the bounding box in the comp panel to highlight the bass area I’d like to use to drive my animations. Once selected, I’ll press the Bake button.
Step 3 — Bake

Baking adds all of the necessary keyframes to my audio track. The beauty here is that I can add multiple profiles to one single music track, as each one will show up as a separate effect. Now, I’m ready to apply these as animations.
Step 4 — React

To animate, I’ll need to select a property. First, I want the flame of my rocket to shoot out during the bass hits. To apply, I’ll select the Scale attribute of the Flame layer. Next, I’ll grab the Bass profile in the FreqReact panel, then grab the Pulse controller. Now, I can apply the effect via the React button. For the stars in the background, I’ll grab the necessary attribute and follow the same steps as above.
Step 5 — Customize

After pressing the React button, a new Pulse effect applies to the layers, allowing me to customize the intensity of the pulse via the Effect Controls panel. For the star-field, I’ll open up the Mods section of the effect and select Additive. This’ll make the stars move across the screen instead of simply moving back and forth.
Voilà! A quick and easy animation with just a few simple clicks. To pick up a copy of FreqReact, head over to Davey.Studio’s website.
Looking for more on Adobe After Effects? Check out these articles.


