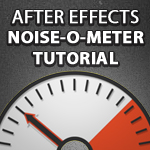
Creating an Applause-O-Meter: Animation Synched to Audio in After Effects

Dynamically link audio to animation in After Effects! In this video tutorial we show you how to use this technique to create a Noise-O-Meter (or Applause-O-Meter) in AE.

Using expressions you can dynamically link audio to motion in your After Effects project. One example of this cool technique is the Applause-O-Meter or Noise-O-Meter that you often see on the big screen at sporting events – as the crowd cheers louder the needle on the meter moves on the meter.
Buckle up for this tutorial! Motion designer and Premiumbeat blogger Evan Abrams gives you a quick crash course on creating your own Applause O Meter in AE in just over 10 minutes. The tutorial starts out by showing you how to create the visual elements needed for the crowd activated meter. Then, Evan will demonstrate two techniques for using audio amplitude to drive motion in After Effects:
Writing expressions that drive the rotation of the needle based on keyframes:
v=thisComp.layer(“Volume Control”).effect(“Volume”)(“Slider”) ;
a=linear(v,0,100,-75,75);
w=wiggle(8,v/5);
a+w
Or actual sound to animation based on imported audio imported into AE:
i=thisComp.layer(“Audio Amplitude”).effect(Both Channels”)(“Slider”);
linear(i,5,30,1,100)
Evan is an After Effects pro, so you may have to start/stop the video often to catch up with his syncing animation to audio workflow. Although the tutorial details every step necessary to create a noise-o-meter, you can apply the same principles to any After Effects project where you want motion to correspond to audio or sound.
Full Video Transcript:
[color-box color=”gray”]This is Evan Abrams for PremiumBeat.com, and today we’re going to be making an applause-o-meter, or noise-o-meter in After Effects. Now this is something that use live events to gauge the amount of clapping that the audience is doing, and it’s basically just a decibel meter.
So we’re going to be linking audio into the needle, but they also use just straight up key frames in order to do this to elicit the audience to make more noise and show more noise than there is. So it works basically by having someone yell for them to make noise and then, [clapping 00:34] just like that.
We’re going to make this in After-Effects, we’re going to do both the key- framed and the audio driven version and let’s get to it. The first thing to do is make a new composition and it doesn’t really matter the presets. We’re going to use HDTV108025, call it whatever you like, and set the duration up to about a minute.
Then we need to make a new background, it can be solid, make it whatever color you like. We’re going to go with yellow here, just because that’s kind of a pretty color I guess. Then we’re going to need to make the needle, and we’re going to make that out of a shape (?), call it needle. Then we’re going to add a rectangle to that, and then change the shape.
You’re going to need to unlink those properties, so you just don’t make a square, but we’re going to make a rectangle about 50×250, then move it’s position up -125. That aught to do it, then we need to add a fill to that, give it a fill that’s maybe 20% dark, then we’re going to add a poly-star. Then change the poly-star to have three points, change it from a polygon, give it three points. Move it up, and then scale it down a little bit, a radius down to about 50, I guess.
That looks about right. And we’re going to duplicate it and make it a little bit more visually interesting by adding a stroke to a layer
underneath. Just setting the stroke to like a red, then putting it up to like 16, 16 points is probably good. Then duplicating it again, and then setting that to be a white, but not totally white, 95 is good. You never want to go full white on things. Setting that up to 32 stroke, then select all of those and go layer, layer style, and give it a drop shadow. Just to make it pop a little bit.
Take those, take needle two, and needle three and parent those to the first one, because we don’t want to be moving too many objects around. And as you can see when we rotate it, everything sticks together. So needle is complete.
Up next we’re going to make the gauge, we’re going to make a new shape layer again, label it gauge. Then we’re going to add to it, an ellipse. Bring up the size of that ellipse, to be outside where the needle is, because obviously the border of this needs to be larger. About 950 should do.
We’re going to add a rectangle, and this rectangle is going to be used to cutoff the bottoms. So make this rectangle larger than the circle, and then we need to make it taller and move it down so it covers the bottom half.
Then we’re going to add another ellipse to make the center, which we’re also going to cut out. It doesn’t need to be too big. Now we’re going to add a merge [paz] to this, and you’ll see it adds a fill in a stroke for us. Now change the merge path to subtract, then you can just set the fill to clear because we don’t need that.
Then go ahead and change the border down to be that 20% darker color, and we now have a lovely gauge to go around the outside. We’re going to duplicate that. We want to separate these, because we’re going to do something interesting with them in a little bit. Set that to be a solid color, use the color white, that off-white that we used before, and then take away its stroke, because it doesn’t need it.
Then set it below everything, just on top of the background. Now we need to make the tick marks that go around the outside of this gauge, because it’s not a good applause-o-meter if you can’t tell how loud it is. We’re going to use the proportion grid to line it up in the center. Then just draw a line using the pen tool right in the center.
Take away its fill, because it doesn’t need one and make sure it has a stroke applied to it. Make sure it’s the right color. Then we will be adding a repeater to this which will duplicate it without us having to do a lot of work. Then change the repeater properties to have more copies and we’re just going to transform it.
Take the default, 100 away from the position and put 10 on the rotation, because we want it to rotate every 10 degrees and then change the offset to where it needs to be and then change the number of copies to fill out the rest. So that’s a pretty quick way to bring that up and take down the stroke a little bit.
Now we’ll just select those, move to layer, we’ll go down to layer styles, and we will add a drop shadow to those. Now we’re going to setup the background here, taking that fill and the background. We’re going to set a track mat to punch a hole in that, and then move it up to the top of the stack. So it kind of overlays all of the things we’re looking at.
Then we’ll duplicate the background layer and make a white version. Bring that down to the bottom, so now you can see we don’t have to look at the bottom part of the needle, and everything is covered up. Next we need to make the red zone where we know that things are going to be getting too out of control. So duplicate that bottom layer, and go layer up to solid settings, and then we’ll change it to be a red solid for this one.
So, about 90 from the saturation, maybe 100 on the darkness, Okay, that’s good. Now we’re just going to use a radial wipe to remove the amount of this layer that we don’t want. Set that radial wipe up to whatever percentage you think is fair. Then change the start angel to be where you think it should be. That’s seems about right.
So that’s most of our design elements all taken care of. We’re going to go ahead and pre comp the red solid so that that the radial wipe stays where we want it to be, and then we will move everything down, just to get it in the right place. You can lock that background layer, because it will never move, and we just want to move the mask that’s on top of it.
We’ll shift this down more into the center so that it fits. Then we will add some text layer, call it the noise-o-meter, so people know what we’re talking about. We are just about ready to start adding some expressions and making this thing move.
Let’s size this up a bit using B-bass new and we’re just going to apply an inner shadow to this. Remove that position grid, go layer, layer styles, add an inner shadow just for a little bit of visual interest. Add an inner shadow to that one too. Just tweak its settings just a little bit so that it’s not so harsh.
Okay, we are ready to add some expressions. So make a new null object, and this will be one of our control layers. This will just stand in for the volume while we do the key frame commands. We add a slider control to that, which will stand in for the volume. Then we’re just going to go ahead and set some key frames so click the stop watch and we’re going to go from 0 up to about 100. Go ahead as many frames as you like, it’s not totally important at this point, just so that you can see that the value is going from 0 to 100.
Then we’re going to take the needle, it’s rotation pull it up by hitting R, hit Alt, click on the stopwatch, so we’re going to create an expression and that’s going to be first setting the variables V= and then [inaudible 09:00] up to the control slider there, and then hit a semicolon to end that. And we’re going to type in linear expression, linear bracket,[V, 0, 100, -75, 75. So we’re remapping the values, 0 to 100 to -75, 75. Meaning that it’s going to rotate those values as the other values move from 0 to 100.
Now this is all good, but, it doesn’t take into account the wiggling we want to have happen when things start to get a lot louder. So go ahead and add a new line in here. We’re just going to squeeze an A = in front of the linear and then put a semicolon at the end. So the linear is now generating a new variable called A, and then the next line is going to be A+W, where the W is going to stand in for how much wiggle is going to happen.
Then we just have to define W=[wiggle] and then the parts of the wiggle are going to be 8x a second, V, for the volume; which will generate some interesting results because it’s going to be waving a round way too fast because the volume is too high. So, we’re just going to go back to the V,
and then we’re just going to divide that by say 25, or 5, or whatever you
need to get it under control.
And that pretty much wraps up how to use key frames to define all of this motion, but if you’re interested in using real audio to define what it’s doing, we’re going to have to take this one step further. So we’re going to go ahead and import some audio. Go ahead and click in your project panel and then import some audio.
I’ve got the intro clip for this that I’m going to use. And then drag that down onto your timeline hit LL to bring up its wave form. You can see there’s actual values to work with. And then we’re going to go animation, key frame assistant, convert audio to key frames, and after waiting an appropriate amount of time, we’ll have an audio amplitude over the top that will have values in it for the left and right, and both channels combined.
We don’t need the left and right, so just delete them. And then as you can see the values on the slider here have a certain range to them that we then want to map into that volume slider. So hit Alt and click on the stop watch for the volume slider, and then pick whip it to the slider of both channels.
Now you can see something is happening, but it doesn’t quite get as far as you want because the value of both channel sliders is too low to make what we want to have happen. So we’re going to use another linear expression and we do this by first setting a variable, I = and then that pick whip value, semicolon at the end. And then we’re going to say linear [I say 5, 25, 1, 100. So this will remap the values 5 to 25 to the values 1 to 100.
And that’s pretty close, but in order to know what values you actually have to be remapping, you’re going to have to open up the slider and have a look at those values as they’re graphed out. And you can do that by selecting the slider, hitting the graph, and you can see all of these points everywhere.
If you change the view of the graph, you can see what those values actually are, and you can see it seems to hover under 15 units and it only goes above that up to around 25 units towards the end. Even then there’s not a lot of those. So you want to use these values to tell you what you’re going to be remapping and to where.
Close that, and then we will edit the values to say it caps out at 30, and that seems to work pretty well. So now you can see when you scroll through, you’re going to be able to see the needle moving as the voice comes in and getting far more erratic towards the top end of the graph, and you’ve pretty much finished off the noise-o-meter.
Feel free to make it look like whatever you like. Perhaps you like something grungier going on, and you might be able to map these expression to all sorts of interesting things, but this is the basics of how to make a noise-o-meter that is run by key frame, and one that is run by a voice.
You can export this and then use it as show graphics in live places, and in general everybody’s going to clap loud so don’t worry about it. So this has been Evan Abrams for PremiumBeat.com.
I want to thank you very much for watching, and subscribe to our channels, and come around to the website if you want to see more things on After Effects and interesting projects you can make. The blog is full of interesting tips and articles, and I’m sure you’ll love it. So again, I’m Evan Abrams, thanks for watching, and I’ll see you around the internet.[/color-box]