
How to Change the Color of Exterior Lights in After Effects
In this video tutorial, learn how to change the color of location lighting in After Effects — including a free project file!
You’ve probably noticed the rise in neon-toned exteriors in modern movies. (See the opening shot in the trailer for John Wick: Chapter 3.) This lighting seems like it would be out of reach for our own projects, right? However, with a few basic effects in After Effects, you can easily turn an average exterior shot into something from a Hollywood blockbuster.

In this tutorial, we’ll look at using the Hue & Saturation effect, with simple masks, to change the color of exterior lighting. This technique can really help match an exterior establishing shot to the tone of your project. (Which makes it a great technique to use on royalty free footage.)
Ready to give your location a neon exterior look? Let’s get started!
Download the Project File
(These assets are free to use in any personal or commercial project. By downloading these assets, you agree not to sell or redistribute them.)
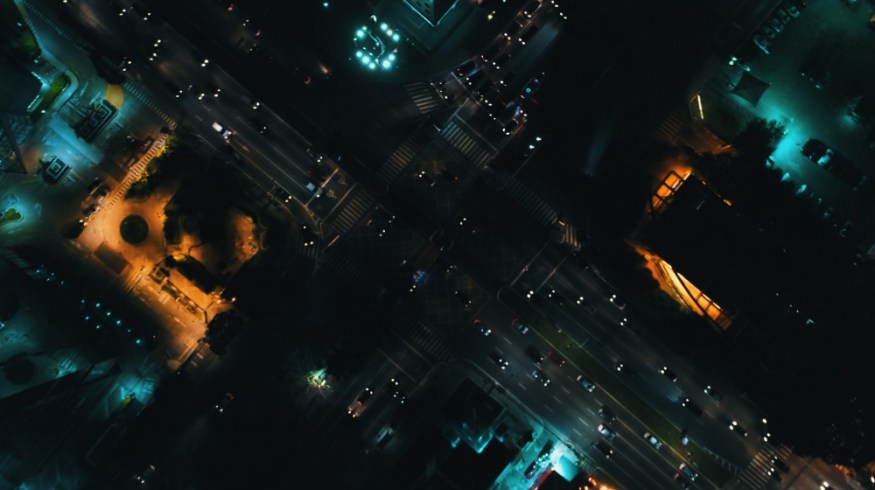
Ideal Shot Use Cases

If you’re planning on using this effect in your own project, there are a few ideal shot use cases. The best uses are on night exterior shots, specifically drone aerials or stationary city skylines. For nighttime drone shots, keep the movement minimal and going in only one direction. This drastically simplifies the masking and keyframing you’ll need to do. You can also use this effect on dark interior shots that have a lot of contrast. (Think background lamp lights or wall lighting away from your subject.)
Tips for Filming
If you film your own exterior shots, here are some things that will make editing your shots in post easier. First, film your shots with a warmer or cooler white balance. This creates an orange or blue “wash” over the area lit by the lights. This will make it easier to adjust the color tone in post. Next, make sure your scene has high contrast. You can film with a picture profile that has more contrast, or you can add contrast in post using an effect like Curves or Lumetri Color. Finally, the less noise you have in your footage the easier things will be in post. I recommend filming with a lower ISO, but understandably, this isn’t always possible for night scenes. So you may want to de-noise the footage in post. (A popular denoiser plugin I frequently use is Neat Video.)
Masking Lights

First, you’ll need to mask out the light area where you want to change the color. Create an adjustment layer, then use the Pen Tool to mask out around the light area on the first frame of your footage. Follow along the edge of where the light naturally feathers out. I recommend having “RotoBezier” checked on, but you may want to check it off for shots with lots of buildings and straight edges.
Hue & Saturation

Next, apply the Hue & Saturation effect to the adjustment layer. Rotate the Master Hue to begin changing the color of the lighting. From there, you can adjust the feathering level of your mask. (I typically set my mask feathering between 20 to 60 pixels.) If necessary, you can boost the color saturation with the Master Saturation slider. For an extra bit of punch, you can apply Lumetri Color after the Hue & Saturation effect, and bring up the highlights.
Keyframing
Keyframing the lighting effects is fairly simple. On the first frame of your footage, create a keyframe for Mask Path. Then move to the final frame. Double-click on the edge of the mask. You should see a grey square outline appear around the mask. Move the mask back into place over the lights. (Adjust individual points as necessary.) This should automatically create a second keyframe for your mask. Scrub through the timeline to make sure the mask moves correctly through your shot. Make adjustments in the middle areas if necessary.
Final Compositing Tips

Once you have completed the look of your lights, add an adjustment layer over all of your footage and apply Lumetri Color. Use this layer to finalize your grade. I recommend tweaking the exposure and highlights to see what looks best. You may even want to adjust the overall color saturation. You can also apply a LUT using Lumetri Color and adjust the intensity level to see how it reacts to the different lighting. If noise in your image is still an issue, you may want to overlay some film grain to help neutralize it.
Interested in the tracks we used to make this video?
- “Tropical Cruise” by Cymatix
- “Faraway Dream” by Sound Fox Music
- “Atmospheric Future Bass” by Klimenko Music
- “Michelle” by Julian Bell
- “All That Glitters” by Benjamin Fletcher
- “Lovely Travel” by Make Music
- “Midnight Coup” by Bedlake
Looking for more filmmaking tutorials? Check these out.
- Video Tutorial: Harness the Power of Presets in Adobe After Effects
- Video Tutorial: How to Create Karaoke Graphics in After Effects
- Changing the Audio Editing Game with PremiumBeat’s Track Stems
- How to Create the VHS Look in Premiere Pro + Free VHS Effect Presets
- Working with High Frame Rate Proxies in Adobe Premiere Pro


