

How to Create a Low-Budget Crash Zoom from Two Shots

The crash (or snap) zoom is a cinematography technique you’ll see in big-budget films. Here’s how to create it at home.
The crash (or snap) zoom is a cinematography technique you’ll see quite often in big-budget films. Quentin Tarantino frequently uses it to snap the viewer’s attention to specific items on screen, such as the tip of a shotgun or the blade of a Hattori Hanzo sword. He also famously used it when introducing Calvin Candy, Leonardo DiCaprio’s colorful character in Django Unchained. And, oh how the memes have flowed since…
You’ll also find crash zooms in CG-heavy films, as it helps bring a sense of realism, and sometimes even a documentary feel to these worlds. Zach Synder digitally crash-zoomed into a shot of a flying Superman in Man of Steel, while George Lucas used it heavily in the Star Wars prequels. And, when J.J. Abrams isn’t busy flaring out his lenses, he’s crash-zooming into starships as well, in both Star Trek and Star Wars.
This technique, however, isn’t limited to big-budget action films. In this tutorial, I’ll show you step-by-step how to create a low-budget digital crash zoom in Adobe After Effects with only two static shots.
Step 1: Capture a WS and a CU
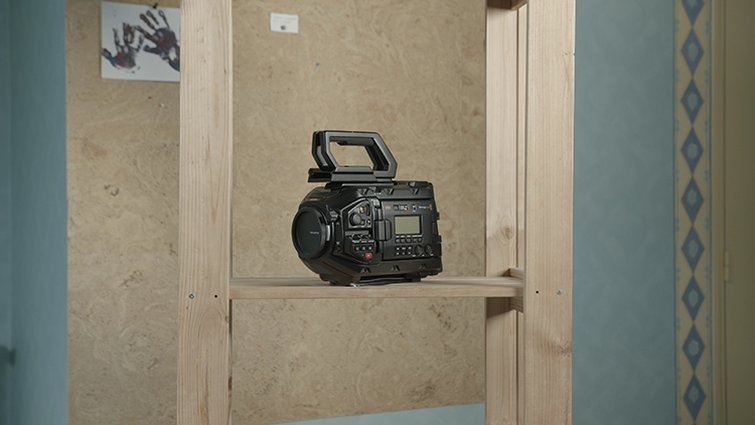
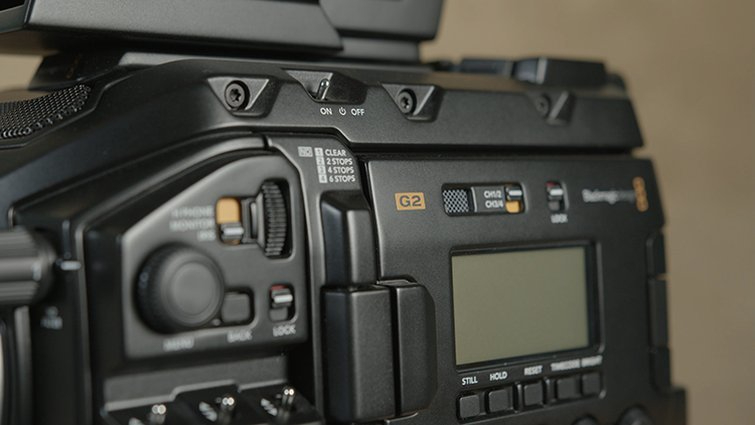
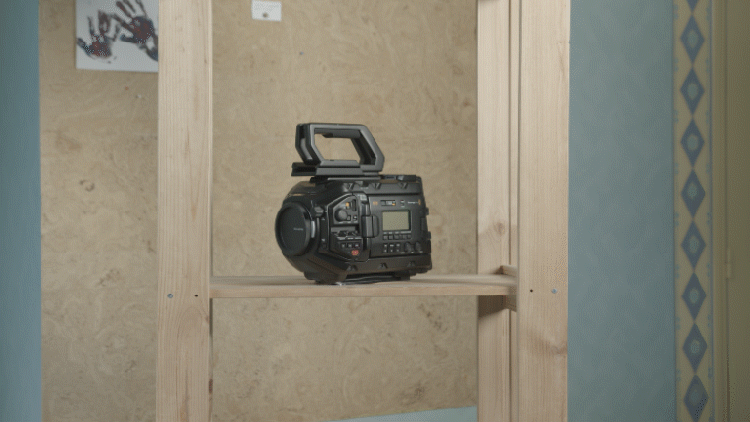
In this example, I’m shooting a basic product shot of a camera for a review video, and I want to add some movement to the shot. More specifically, I want to quickly zoom in from a WS into a CU of the G2 logo on the side of this camera.
To perform a proper in-camera, Tarantino-style crash zoom, I need a parfocal zoom lens. This type of lens allows you to keep your subject in focus while zooming. Unfortunately, all I have is a basic 18-35mm DLSR lens, certainly not the tool for capturing a banging crash zoom. Luckily for this technique, the lens doesn’t matter.
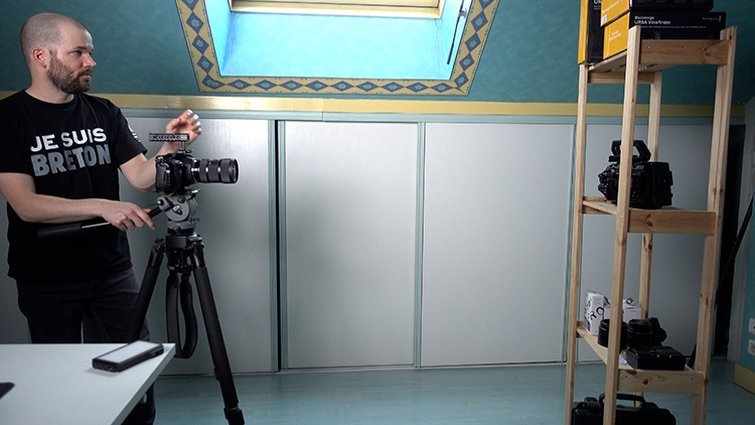
All I need to do is put my camera on my tripod and capture a static WS, then simply move the camera closer and capture a static CU of the logo. Now, I’ll bring these clips over into Adobe After Effects.
Step 2: Align the Clips
Since this is essentially a very basic composite shot, I’m using After Effects to put it together. While I can achieve this same effect in many NLEs, it’s much easier with the tools in AE.
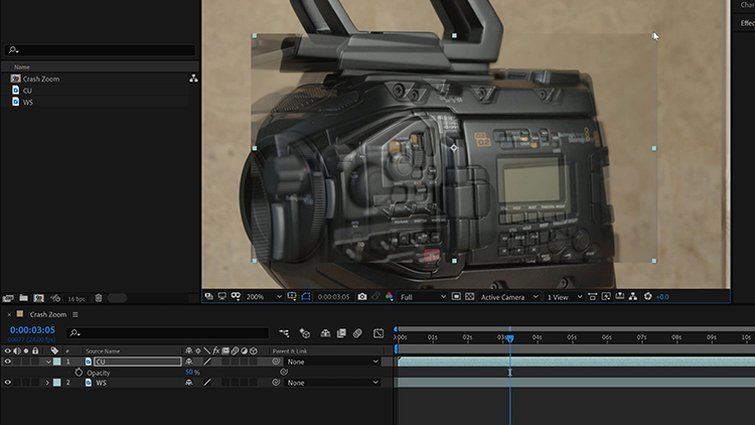
Once I have the clips in a new comp, I need to line them up. I’ll place the CU shot above the WS, bringing the Opacity of the CU to 50 percent. Next I can adjust the Scale and Position to perfectly align the CU with the WS. With the shots lined up, I’ll turn the Opacity of the CU back to 100 percent and bring it back underneath the WS. Now I’m ready to animate.
Step 3: Animate the Crash Zoom
To make the animation as simple and user-friendly as possible, I’ll use a control layer. This will allow me to keep the majority of the keyframes on just one layer. For this, I’ll create a new Layer > Null Object and rename it Crash Zoom. Since I’m zooming in on the G2 logo on the side of the camera, I’ll reposition the Null Object directly over the logo in the comp panel. Now, I’ll parent both layers to the Null Object.
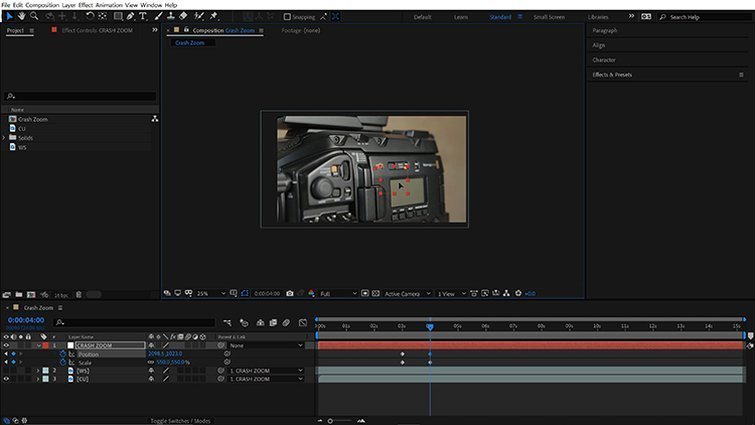
With everything rigged up, I can now create a one-second animation via adding Position and Scale keyframes to the Crash Zoom layer. To make this process easier, I’ll turn off the visibility for the WS. Now, I can clearly see the CU shot as I scale and position the Crash Zoom layer via the controls on the comp panel.
With the zoom animated, I’ll turn the visibility back on for the WS. Now, I can animate the WS out by keyframing the Opacity from 100 percent to 0 percent over the course of one or two frames.
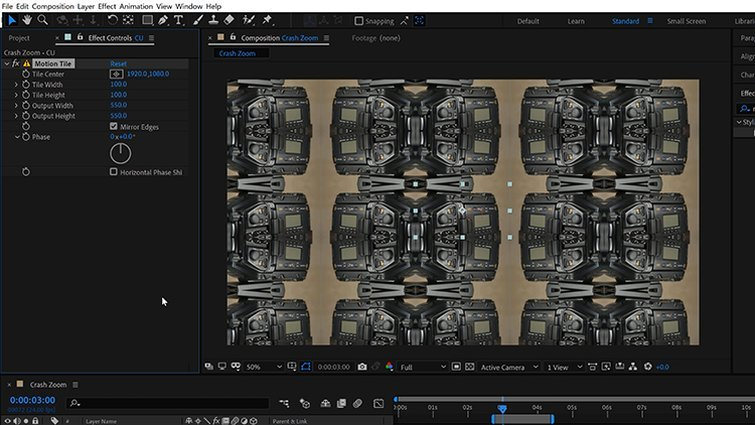
Step 4: Cover up the Cut
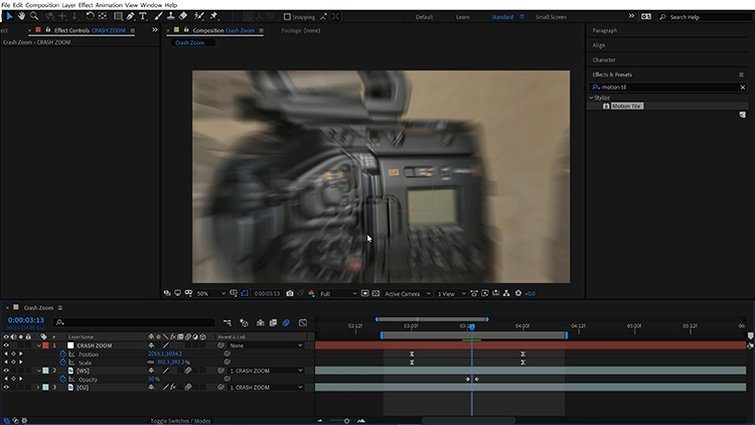
With the crash zoom animation roughed in, I’ll now focus on covering up the transition between the two shots. I’ll start with the closeup. To extend this shot to the edges of the frame, I’ll go to Window > Effects & Presets and apply the Motion Tile effect. I’ll set both the Output Width and Height to 550, and then turn on Mirror Edges.
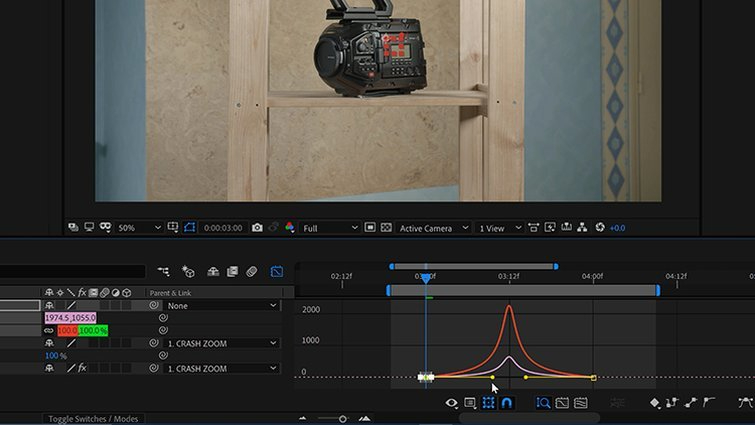
Next, I’ll grab the keyframe on the Crash Zoom and apply an Ease Ease. I want the animation to really fly in quickly, so I’ll open up the Graph Editor and adjust the influence of my keyframes. I want the speed to be at its fastest just when the WS fades out. To get it perfect, I’ll need to play around with the Opacity keyframes of the WS, as well as the speed curve of the Crash Zoom.
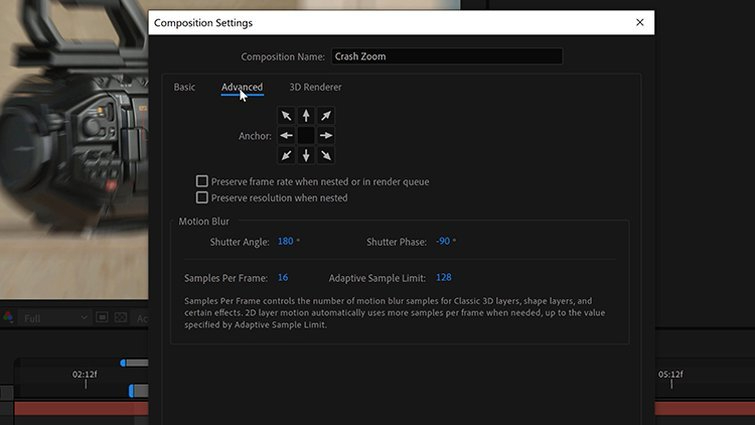
Finally, I’ll enable Motion Blur via the switches in the Timeline panel. I saved this for the next to last step, as it’s pretty render-intensive. To increase the motion blur, I can open up Composition > Composition Settings and navigate to the Advanced tab. Under the Motion Blur section, I can raise the Shutter Angle to increase the level of blur.
Step 5: Add Camera Shake
I now have a perfectly-timed crash zoom animation with my two shots blending together seamlessly. The shot, however, still looks a bit too digital. As a final touch, I’ll add some handheld camera shake. For this, I could tinker around with creating some wiggle expressions from scratch. However, why do that when Premium Beat already has FREE animation presets available?
These 15 camera shake presets include both HD and 4K versions for a variety of different focal lengths. They even have several zoom options, if you’re working with footage that has the resolution to spare. Once installed, it’s as simple as applying one of these presets to a Null Object, then parenting to the Null. Check out the full tutorial.
Here’s the final crash zoom!
The great thing about this technique is that you can quickly add motion graphics elements, as the Crash Zoom is already animated separate from the layers. To add an element, just parent it to the Crash Zoom and switch on the motion blur. Some anime speed lines might work nicely here as well.
Cover image via The Weinstein Company.
For more filmmaking tips and tricks, check out the articles below:


