Video Tutorial: Create a DIY Wireless China Ball Light

No more looking for an outlet when you’re setting up lights on set. This DIY light kit offers mobile, cinematic light for under $200.
Every filmmaker has run into this dilemma — you found the perfect shooting location, but you have no power for lighting. Whether you can’t afford a $200 generator rental or there’s no 200-ft stinger to connect to an outlet, lighting on location can seem impossible. Well, not anymore.
This rig was designed by filmmaker Michael Mullins to light an outdoor documentary shoot. We liked it so much that we wanted to share it with all of you. Let’s get started!
Gathering the Parts
Here are the parts you need to complete this build:
- 12-volt lawn and garden rechargable battery
- AWG battery connector
- 24-inch China Ball
- Hanging lantern cord
- 750-watt power inverter
- 3-in-1 light socket splitter
- 3 100-watt-equivalent LED bulbs
- Painter’s pole
- Battery charger
You can find all of these parts online for just over $200.
Assembling the Rig
Once you have assembled all of your parts, it’s time to put them together to create this piece of gear. Remember, you’re working with electricity, so be extremely careful with the battery and wires. It may be only a 12-volt battery, but it can still pack a punch.
Connecting the Battery to the Power Inverter

For this step, take your battery and the screws out of the box and set them on the table. Take out your battery connectors and slide the bolt through both of the holes once you have lined them up, then secure them with the nut. Make sure to tighten them with a pair of pliers for a secure connection.
Remember, once the cables are connected, DO NOT touch them together! They will spark and cause a serious safety hazard. You can always cover one of them with a piece of electrical tape just to be safe.

After the cables are secure, it’s time to connect them to the power inverter. This is the easy part — all you have to do is unscrew the caps on top and connect them with the corresponding-colored wire. Screw them back on once you have connected the wire, and you now have an active connection!
Securing the Battery to the Inverter

Take some electrical or gaff tape, and lay a strip over the live connections on the battery. You don’t want live connections out in the open, especially when this thing is going to be in a backpack. Once you’ve done that, begin taping the inverter to the front of the battery. It’s a lot safer to have these two connected so they don’t come loose in a backpack. Two wrap-arounds will do the trick.
Setting Up the China Ball

Grab your hanging lantern cord, your three lightbulbs, and your light splitter. Attach the three bulbs to the splitter, then attach that to the hanging lantern cord. Plug it in to the power supply, turn it on, and create light! (Hopefully, you get as excited as I did.)
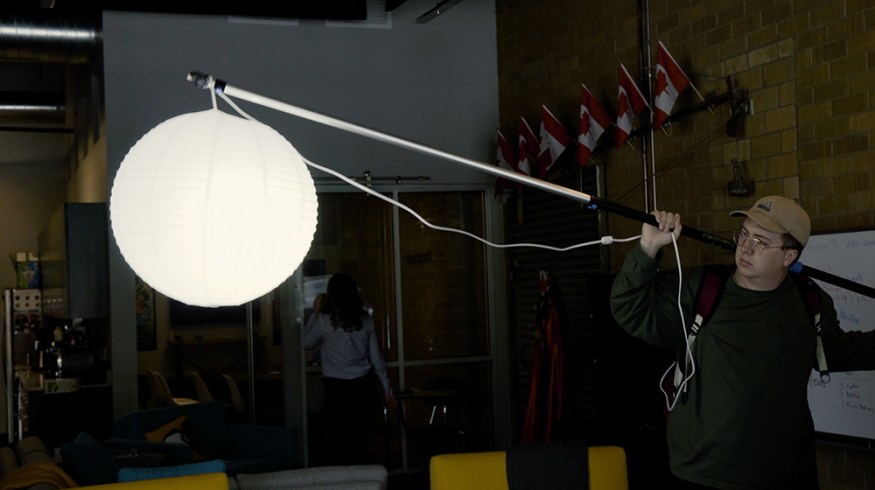
From here, you just slip the lights inside of the assembled china ball, then loop it around the hook on top to keep it secure. Grab your painter’s pole, and wrap the top of the cable around it. Secure it with a few loops of tape.
Go ahead and load up your backpack, turn it on, and . . . Congratulations! You have your very own portable light source!
How to Charge the Rig
The battery on this rig will last just about eight hours, so make sure to connect it to the battery charger after your shoot. All you have to do to charge it is connect the charger clips to the battery’s open connections — no need to disassemble the whole thing.
What Can You Use This For?
There are endless possibilities when using this rig. No more downtime on set to set up lights and c-stands; just turn it on and put it in the right place. This rig will primarily come in handy during outdoor night shoots. (You won’t have to deal with the pain of generator noise using these.)
You can also use the power bank for any number of things that need an outlet, such as a phone or camera battery charger. Just make sure you don’t plug anything too powerful into it so you don’t fry the battery.
The world is now your well-lit oyster with this rig. Go forth, and make some cinematic content without worrying about outlets.
Looking for more video tutorials? Check these out.