How to Create Custom Lower Thirds in Final Cut Pro X
Follow these simple steps to create your own custom lower thirds in Final Cut Pro X.
Utilizing lower thirds is an easy way to add production value to your video project and a super-effective way to unobtrusively share vital information with your audience.
Here’s the fast five-step process for creating your own lower thirds in Final Cut Pro X.
No time for video? Read the transcript below!
What’s a Lower Third?
A lower third is a graphic that sits in the lower third of the video frame, hence the name. This graphic is utilized to introduce a subject to the audience with their name and title. It also serves to orient your viewer with who the subject on screen is and how they specifically relate to the story.
You’ll notice these graphics in documentaries, corporate videos, and other “real life” video content. Ultimately, lower thirds eliminate the need to have the subject verbally state their name and title, which can feel very on-the-nose and out of place.
While there are many lower-third templates available, learning to create your own custom lower thirds can ensure the information you want to convey to your audience is as effective as possible. Additionally, creating your own lower thirds helps you maintain a consistent aesthetic across your entire project.
Lower thirds should simply convey information and not distract from the main story, so fight the urge to include gratuitous animations or fluorescent color palettes. Keep it simple.
Building a Lower Third
FCPX includes a ton of built-in lower thirds that you can just drag and drop into your project. Nonetheless, it’s easy to create your own custom lower thirds with just a few steps.
Step 1

Make sure you complete this process twice – once for the name and again for the title. Image via fizkes.
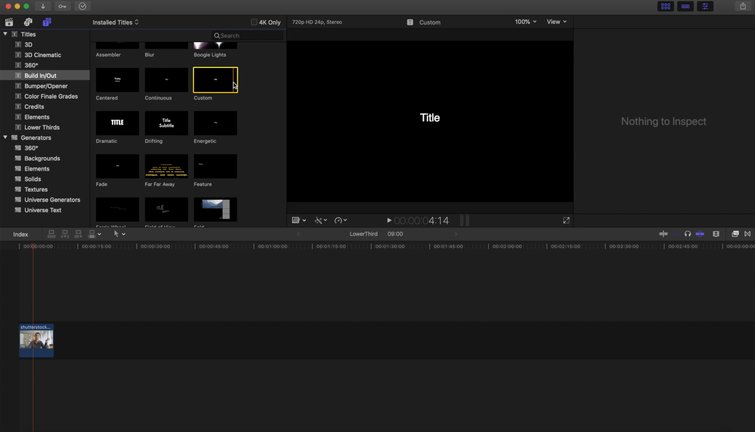
Once you’ve chosen your clip, click on the Titles sidebar within FCPX. Under the Titles folder, click on Build In/Build Out, select the custom title, and drop that on top of your clip. Do this twice — once for the person’s name and once for the person’s title.
Step 2

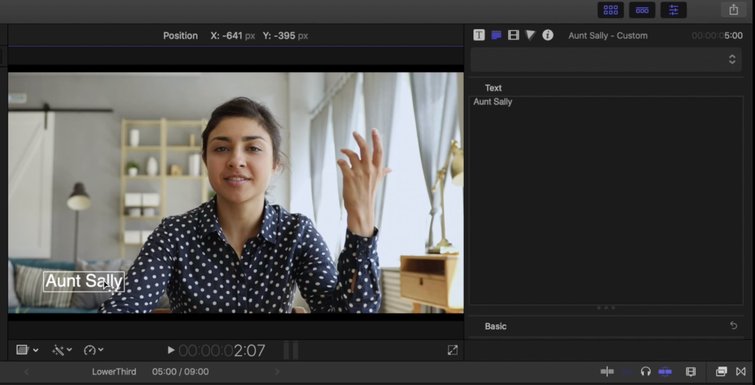
Once you’ve changed the first title to your subject’s name, place it in the lower third portion of your frame. Image via fizkes.
You now have your raw graphics for both the name and title. First, change the first Title to your subject’s name. Place this in the lower third portion of the frame.
Step 3
Once you have the subject’s name, add their title. This can be their job, area of expertise, or relation to the story as a whole. Once changed, move this right next to their name.
Step 4

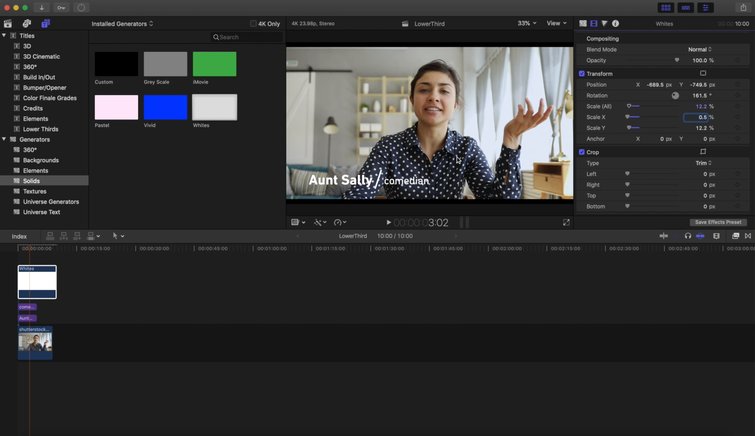
Under the Generators Tab, create a bright, white solid, size it, then place it between the name and title. Image via fizkes.
Now that you have the subject’s name and title, spruce things up a bit to make it a little more aesthetically pleasing. Under the Generators Tab, create a new, white solid — make sure it’s a bright white.
Work that shape down to the right weight, place it between the name and title text, and rotate it 161 degrees.
Step 5

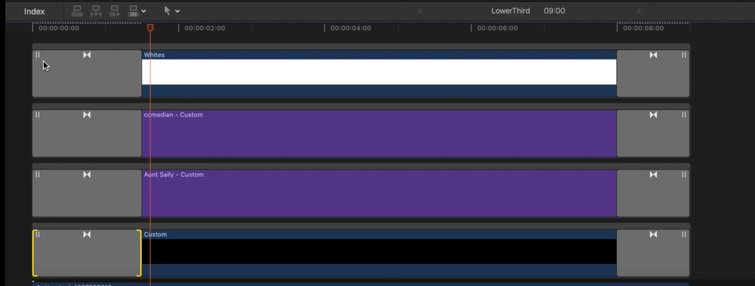
Ease the graphic into your scene with Cross Dissolves. Image via fizkes.
Once all this text is placed, add Cross Dissolves to all of your lower thirds layers to ease the graphic into your scene. Select all the layers associated with your lower third and press Command+T. Adjust cross dissolves as needed.
Overall, this is a quick, efficient way to craft your own lower thirds, all within FCPX.
Get more tips, tricks, techniques, and hacks for working in Final Cut Pro X:
- How to Take Control of Transitions in Final Cut Pro X
- How to Quickly Stabilize Footage in Final Cut Pro
- Using Motion Graphics Templates for More than Lower Thirds and Titles
- How to Sync Video with Professional Audio in Final Cut Pro X
- How to Export A High Resolution Movie Out of Final Cut Pro X
Cover image via fizkes.


