
Create a Cyberpunk 2077-Inspired Boot-up Display in After Effects

Find yourself gawking at some of the elements in the latest video game from CD Projekt RED? Replicate a similar effect in After Effects.
Even if you’re not wired into the video game world, it’s more than likely that over the past month you’ve heard some grumblings about the recently-released video game Cyberpunk 2077. The less-than-stellar console release was even covered by the likes of The New York Times and The Guardian—and wiped almost a billion dollars’ worth of value from the company.
Nonetheless, we’re not a video game industry website, so I’ll stop there with the reports on the game Cyberpunk 2077. However, with the console issues aside, the game looks visually stunning on PC. Additionally, it’s filled to the brim with cyberpunk interfaces—which I love. There’s something eye-catching and aesthetically pleasing about interfaces and devices set in the future that are more reminiscent of yesterday’s tech than the technology of tomorrow—see Blade Runner or Terminator.
There’s one sequence in the game where your main character has just received a new eye transplant, and his system must reboot.
It’s a classic trope of the cyberpunk, and even the sci-fi genre as a whole.
Additionally, as in the sequence below from Terminator 2 (not from the cyberpunk genre, by the way), while the sequences are usually busy and look complicated to replicate, they’re built and filled with basic shapes and text that shouldn’t be too hard to replicate.
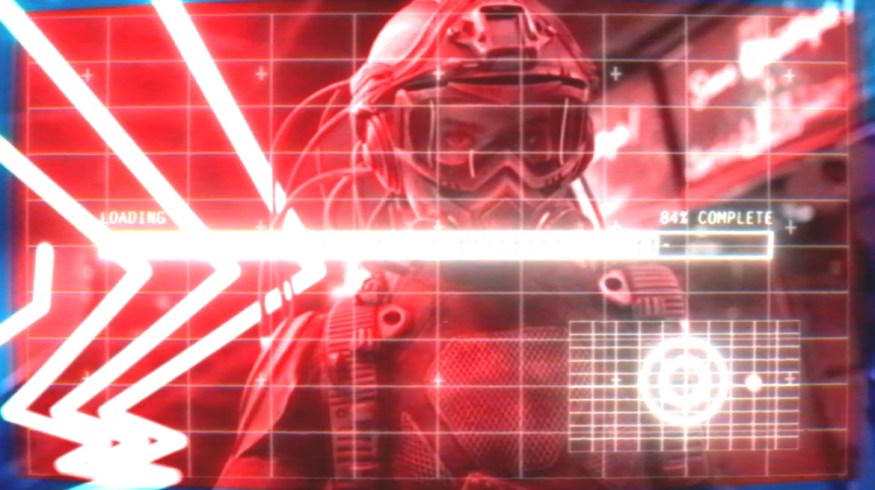
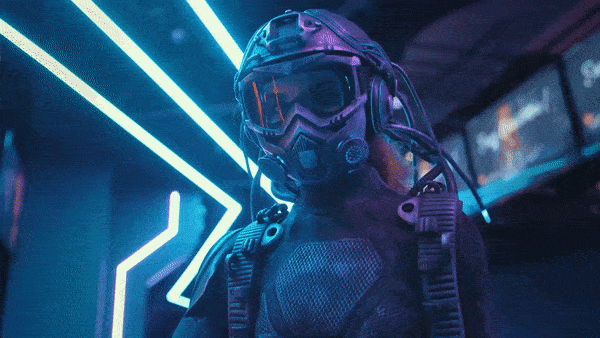
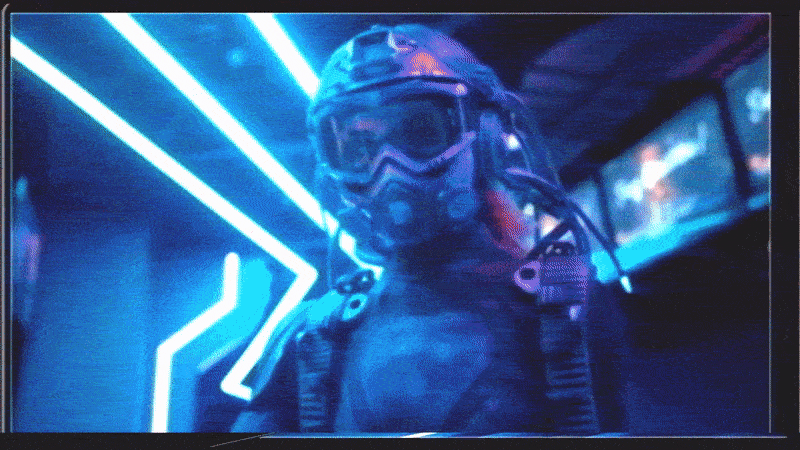
Let’s take a look at how we can go from this…
To this…
Due to the many moving parts of this sequence, it might be more beneficial to specifically follow the text as opposed to looking for clues in the screenshots. Even then, I recommend swerving off the laid-out path to create something new.
First, add two color solids, and make sure the color of the second solid matches that of the intended look. In my case, I used a crimson red.
I’m going to change the blend mode of the red solid to hue and slightly decrease the scale so it doesn’t fill the entire composition. Then, I’m going to add a Generate Grid Effect to the first solid, and align that so it fits into the red solid (it doesn’t have to be perfect).
Numbers—Lots of Them
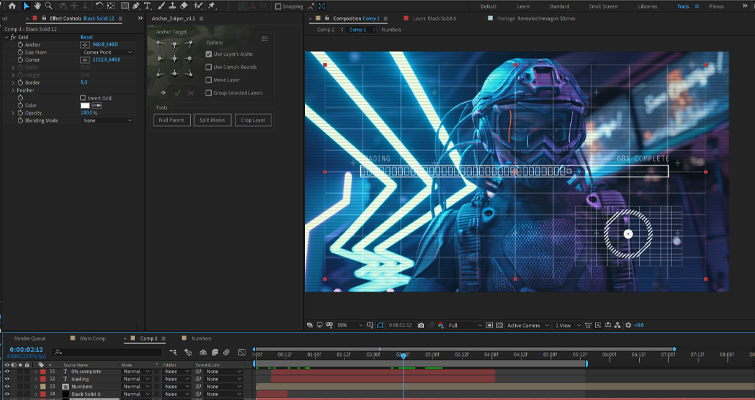
First, like any formulaic dystopian interface, we need numbers and lots of them. We want a system boot-up that’s more “binary Matrix” than “clean Apple.” To do this, add a solid layer to your composition. Then, in the Effects panel, add a numbers generator to the solid.
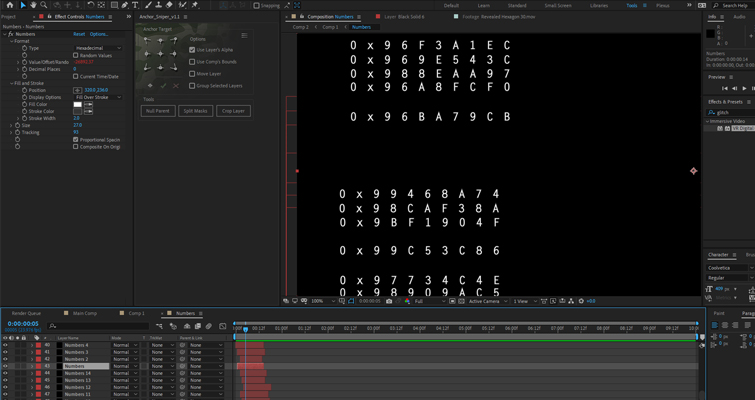
We then want to configure a few settings.
- We’re going to change the type to Hexadecimal.
- Select random values.
- Increase or decrease the value/offset/rando to an insane amount. The crazier the number, the more sporadic the values will be.
- Position the numbers to the top-right of the screen.
- Change the size to 25.
- And increase the tracking so the characters are spaced out.
Now, you’re going to want to replicate the solid layer several times until you have an instance like the screenshot below.
To give the generators variety, slightly alter the value/offset/rando between each layer.
Each section should only last a second (or even less). You want to offset the layer position so they appear at varying times on the composition. For a more significant effect, I’d duplicate the numbers, pre-compose them, and position them over the composition’s other side—do this two to three times.
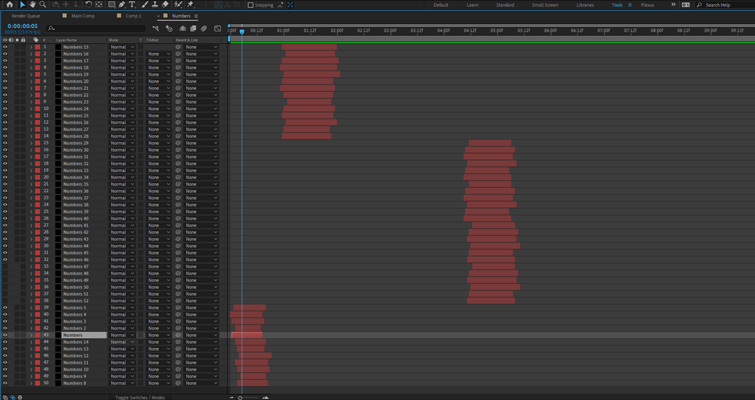
With the numbers complete, pre-compose all of the files.
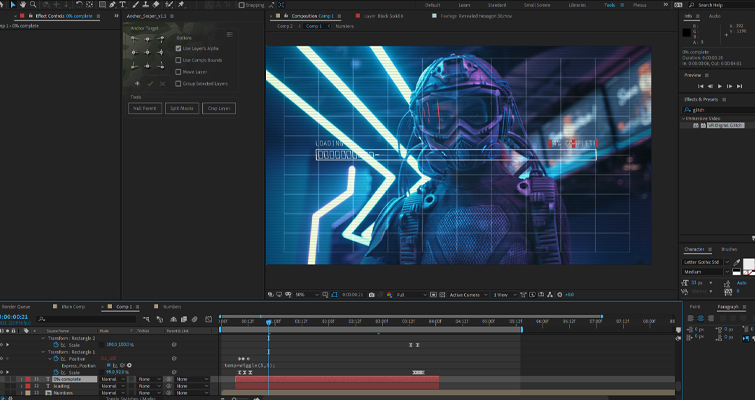
Loading Bar
Next, we’re going to create the typical bootup loading bar. This looks like a tedious animation, but it’s simply several duplicated files.
First, create the exterior of a loading bar using the shape tool.
Next, create a separate shape—a smaller rectangle to fit into the larger bar and to represent a singular step of the loading process. We’re then going to press S to bring up the scale properties, set a keyframe, and animate the scale properties over a couple of frames.
- First frame – 0%
- Second frame – 50%
- Fourth frame – 100%
Next, select the loading bar layer and the newly created rectangle. In the Skew properties, hold the stopwatch to add an expression and add:
- content(“Rectangle 1”).transform.skew
- wiggle(33,20)
Now, we’re going to duplicate the smaller rectangle several times within the pre-composed layer until it looks like this:
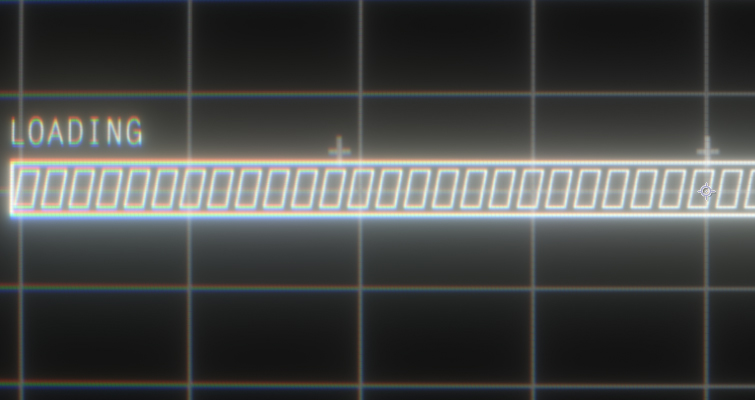
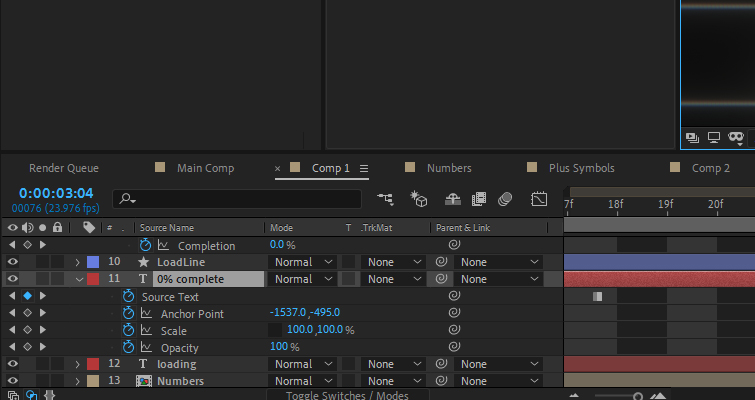
Above the loading bar, use the Text tool, then add 0% complete. Next, open the Text Properties until you find the Source Text. Here we can add a keyframe and alter the text accordingly as the loading bar proceeds.
Next, write “loading” on the left side of the bar, and add the Typewriter Effect to the text. The default effect is fine as-is.
Pre-compose all shapes and text, and use the scale keyframe method listed above, but in reverse order.
- Final frame – 0%
- Second from last frame – 50%
- Fourth from last frame – 100%
Additionally, on the precomposed composition, we’re going to also add a wiggle expression to the position to keep it moving.
- temp=wiggle(5,5);
- value+[temp[1], 0];
Bootup Text
Would a boot-up sequence really be complete without several instances of text flashing across the screen? No, it wouldn’t.
Using cliché computer keywords, write a paragraph of text, and add the Typewriter preset to the text. Depending on how accurate your project is, you may want to research keywords that would make sense for the moment.

Before the Typewriter preset has been able to display all words, move a few seconds forward. Once again, select the source text property as we did in the Percentage Complete section, then select the stopwatch and change the first word to complete. Next, move a few frames forward and change the second layer of text to complete. Continue to do this until your paragraph of text is entirely changed to complete.
Populating the Space
Pulling inspiration from the Terminator sequence, we’re also going to add a small grid to the bottom-left.
To do this, we’re going to add a new Solid layer, then add a Grid Generator from the Effects panel. You can leave the settings to their default values, but we need to decrease the scale to sit neatly in the bottom-right. Additionally, I’d add a grid wipe to the layer and have the transition complete over a few frames.
Next, we’re going to add numerous shapes from the FREE Premium Beat Accent Pack so it fits nicely into the grid. I’m also going to add a few shapes from this pack throughout the load up.
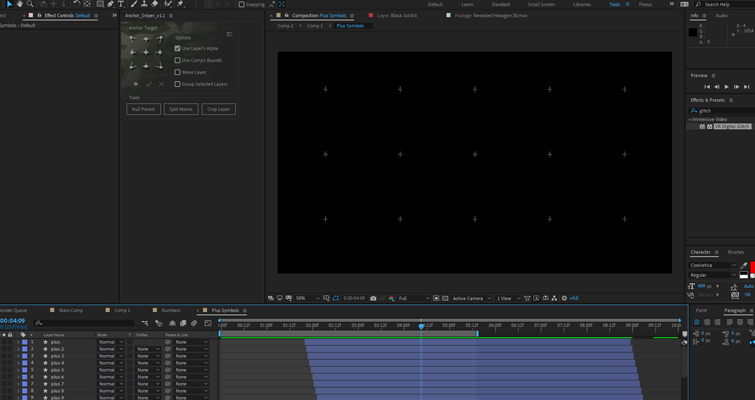
Before moving onto the look, we’re going to add a new Text layer for the final set of animations and adding nothing but a plus (+) symbol. You’ll then equally duplicate the plus symbol until it’s evenly spread throughout your composition. Sixteen is an equal amount for a 16:9 composition.
Offset the position of each plus symbol a few frames so they appear in order throughout the composition.
Given the Sequence Style
To solidify the effect, we’ll add a series of visual tweaks to give the boot sequence that cyberpunk flavor.
First, add a white solid, then use the Mask tool to create a thin rectangle that expands across the entire composition.
Now, press T and then P on the layers to bring up the opacity and position. Hold ALT while selecting the stopwatch on the Opacity setting to bring up the Expression editor. Then, add loopOut(type = “cycle”, numKeyframes = 0) to the field.
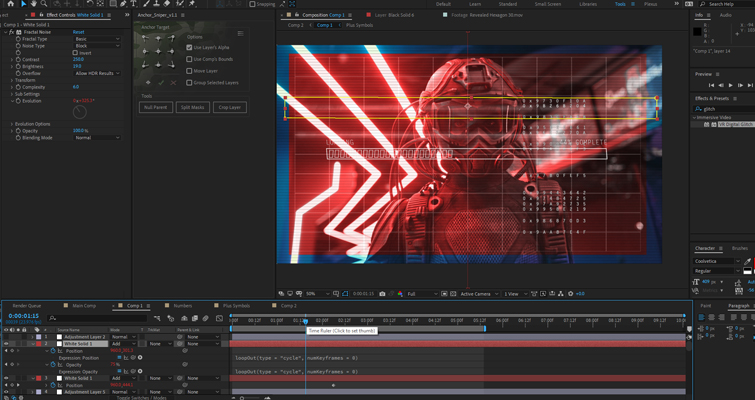
Now, add this exact information to the position, duplicate the layer, and then set it a little lower.
These white lines should skirt across the screen like an old TV scan line. However, they don’t look like a scan line at the moment, so we need to do few things.
- First, change the blend mode to each scan line to add.
- We’ll add fractal noise and change the noise type to block and increase the contrast and brightness.
- We should also give the mask a feather of 20-25.
Finally, add three adjustment layers.
On the bottom adjustment layer, add an Optics Compensation effect and slightly increase the field of view until we start to see visual distortion to the image.
We’re then going to add a Venetian Blinds effect to the middle adjustment layer. Change the angle to 90, and the transition complete to 25, with a width of 20. You could also duplicate this effect so it’s more pronounced.
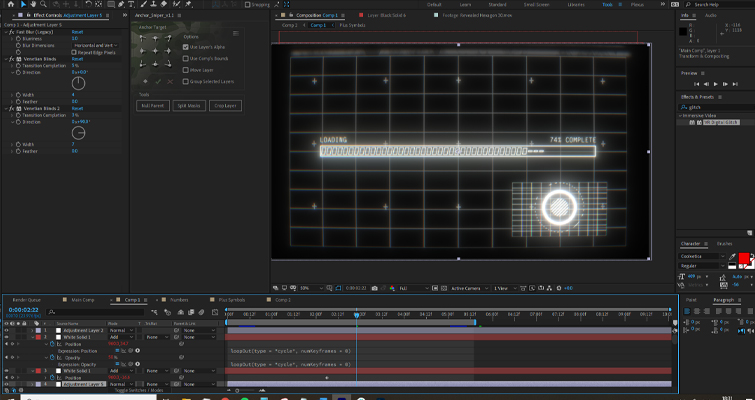
On the final adjustment layer, I’m going to add the free plug-in Quick Chromatic Aberration, and slightly offset the rotation by one point.
I’ve also used a layer of VHS noise mixed with a displacement map to create the opening and closing of the boot-up screen. However, for the most part, everything above will be enough to give you a cyberpunk-inspired boot-up sequence.
Reading back through this guide, I often found myself asking, “Who is even going to need this? It’s so specific.” But, as noted earlier, sometimes knowing how a specific element is created is enough to veer off into a different direction and create a unique effect.
Cover image via KASPORSKI VITALI.
For additional tips on After Effects and related info, check out these articles:


