

Monitor Overlays in Premiere Pro 7.1

Keep an eye on essential metadata with the new Monitor Overlays in Premiere Pro 7.1.

The October Creative Cloud update for Premiere Pro adds Monitor Overlays. This useful feature ability lets you choose what information (timecode, markers,multicam sources) to see overlaid on the source/program monitors. Let’s jump in and look at the basics of working with Monitor Overlays, and how to make a custom preset for your workflow.
Note: Adobe Media Encoder has also added Monitor Overlays. Read about that here.
Monitor Overlay Basics
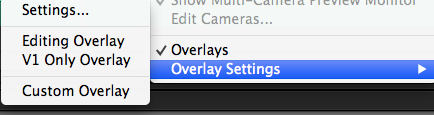
Monitor Overlays are accessed by the dropdown menu or the wrench (settings) in Premiere Pro.
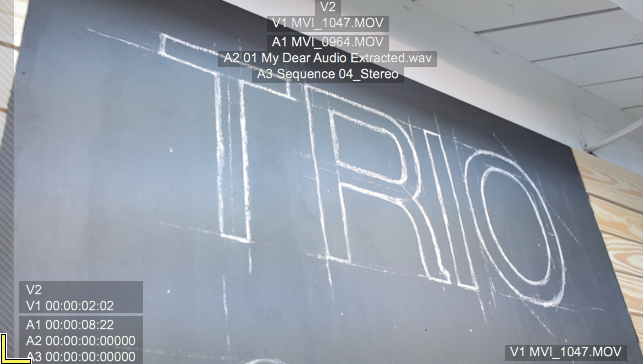
The screenshot below shows the Monitor Overlays:
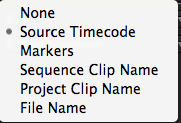
You have 4 quadrants where you can overlay information. The options are Source Timecode, Markers, Sequence Clip Name, Project Clip Name, File Name.
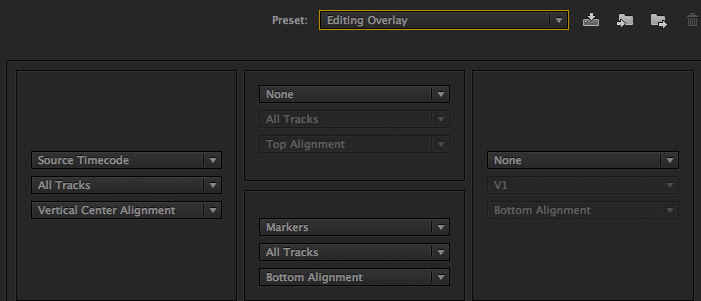
The information can be displayed for all tracks or specific video and audio tracks, and has 3 alignment options (top, center, bottom).
Below the 4 Quadrants are additional options. The first is the option to show Camera Name or Source Timecode for Multi-Camera Sources.
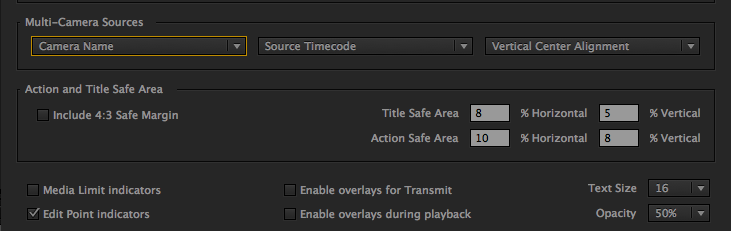
Next you can show 4:3 Title Safe, which is useful when you need to display text/titles on 4:3 televisions. Below that are options for indicators and overlays. In my example I have the indicators turned on and playhead at the first frame of a clip. The indicators show me the in point is also the beginning of the media. The indicators are colored to give you more info at a quick glance: media limit is gray lines and edit point is yellow.

If you are using a third party solution to monitor your video choose the “Enable overlays for Transmit” option. Additionally, you can check “Enable Overlays during playback” to see the overlays when playing the video.
Customizing Monitor Overlays
I suggest customizing the Premiere Pro overlays to work best for your needs (select Overlay Settings > Settings). Make your changes, then click the “Save Preset” icon and give it a name.
I use a minimal custom setting that I can view while the video is playing, which shows me Source Timecode, Markers and Clip Name on the bottom of the screen. For me, this is just the essential info to see while the video is playing, without being too overwhelming.
Red box in Screenshot shows the Save Preset icon:


When my clients needs to see more detailed information, I don’t enable Overlays during playback. To make this switch from ‘overlays on’ to ‘overlays off’ I’ve made a shortcut (control + 0) so I can quickly toggle the monitor overlay on/off. If you find yourself needing to access the Overlay Settings often, make a shortcut for that too (I use control + shift + 0).
The Monitor Overlays in Premiere are a great feature addition, but I would like to see a shortcut to toggle between my different custom overlay settings, as well as a broadcast safe overlay. Maybe this will come in future versions.
Are using the new Monitor Overlay feature? Share your custom settings in the comments.


