
NAB 2019: DaVinci Resolve 16 — What’s New and Updated

Blackmagic Design has announced DaVinci Resolve 16 at NAB 2019. And once again, this update is full of useful features you need to unpack.
The internet has been ablaze this week with the news of Adobe’s content-aware fill tool in the spring After Effects update. It seems like forever ago that we had such a substantial addition to an Adobe application that also made this much noise. Blackmagic, on the other hand, has completely reinvigorated Resolve with each new update. In 12.5 the editing page was finally good enough to pull users away from Premiere. In 14 (they skipped 13), Blackmagic added the Fairlight audio page, a page dedicated to professional audio mixing. Finally, in version 15 we were treated to the Fusion page, where Resolve users could eventually employ advanced VFX compositing without leaving the software. And with each iteration of Resolve, we saw a number of other updates, both big and small.
Well, it’s that time of the year again, and at NAB, Blackmagic announced Resolve 16. Before NAB, I assumed the majority of the updates would only be small course corrections and a few requested features, but some of the new additions pack a powerful punch. Let’s take a look at what’s new — specifically the new editing features.
Cut Page

Blackmagic founder Grant Petty said after a night of watching training videos that he felt disgruntled by trainers who spent time setting up bins and organizing their media. Grant preferred the days when you would just drag all your media onto the timeline, cut, and delete what you didn’t need. So, introducing the Cut Page . . .
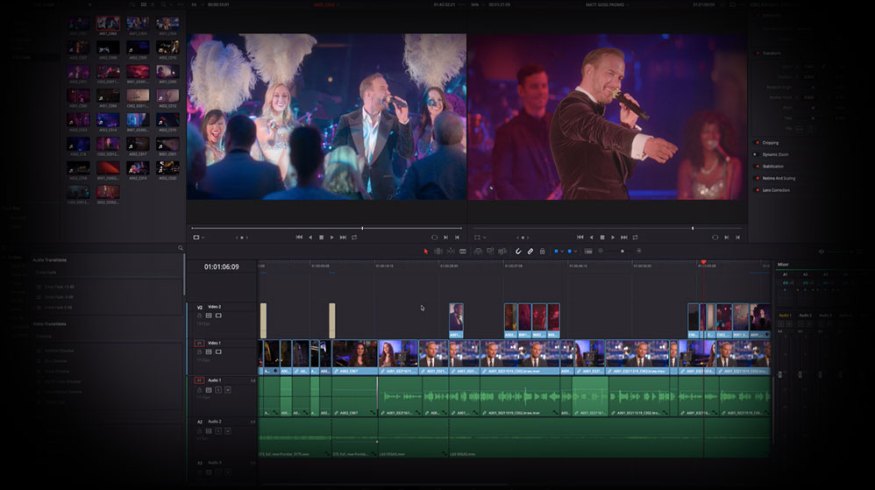
The Cut Page is the 7th page added to Da Vinci Resolve, and it’s designed to cut the complexity of the edit page and to increase the efficiency of quick editing. If the edit page is about capability, the cut page is about speed.
Petty explains that editing has evolved into two cultures: more traditional editors and people like YouTubers who are editing 2-3 videos a day and bypassing the typical editing structure. The cut page is for them.
It’s designed to work on a smaller monitor, so for those working on a MacBook on set, or content creators working on the go, there’s now a larger field of view of the timeline and viewer, which isn’t bogged down by unnecessary panels or fixed UI settings. Even the trim tools and selection tools have been combined into one. It’s simple.
There’s an additional timeline that displays all timeline clips at full length with minimalistic design — no clip thumbnail, no clip name, no audio waveform.

This timeline allows the editor to make quick changes to the overall timeline without zooming out of the base timeline. For example, if you have a zoomed-in a portion where you intend to make a contextual edit but realize you should have deleted or trimmed the clip further down the timeline, instead of zooming out and losing your place, you jump up to the dual timeline and edit there. The secondary timeline has its own playhead, which will allow you to make edits while the playhead of the primary timeline remains fixed. As Petty said “It’s not just a fancy timeline.”
Compressed Viewer
On the cut page, the source viewer now shares the same space as the timeline viewer. However, unlike the edit page (where if you chose to have one viewer and make an edit from the media pool) the viewer switches to the timeline viewer. This compressed viewer will remain on the clip from the media pool. This allows the editor to keep throwing clips in from the media pool without having to reselect the clip.
Smart Insert
Long gone are the days when you accidentally inserted a clip to an area you didn’t mean to adjust. On the cut page, we have a smart insert button, which will drop footage from the source viewer to the nearest edit point.
Multi-Cam Match Frame
As Grant stated in the presentation, editing multi-cam footage can still be a slow process, as you only make the edit after you see the point at which you want the camera to change. On the cut page, after creating in and out points on a different clip, you can select source override. Resolve will place it on a new track and match the position of the new multi-cam clip at the exact moment to the base clip. This enables quick, multi-camera edits without a multi-cam timeline.
You can also use this feature to add a close-up of the shot you’re working from. Create in and out points, select the close-up button, and Resolve will drop the clip on top of the base track — but slightly zoomed, so it looks like you’re working with two cameras from the same position with different focal lengths. If the position properties are off, there’s a quick settings bar you can adjust to correct the shot.
Source Tape
Another new feature you can find on the cut page is Source Tape. Sometimes it may be too tedious to individually quick-scroll through multiple clips, as you need to scroll or select over each clip to view the contents. When you click “source tape,” everything in your bin becomes one large list. This allows you to scrub through the entire contents of your bin on the source viewer.
Even though you’re looking at the contents of your bin like one media file, when you insert the clips into the timeline, they smartly revert to their individual clip nature; therefore, if you make an edit, the clip is only going to react as the individual recorded clip, not as the entire source tape.
In Page Quick Export
All pages now feature a quick export function. If you need to deliver a quick proxy file, or if your video is simply going to YouTube (meaning you don’t need all the refinement of the delivery page), you can simply hit the quick export button and export your video using a range of basic render settings.

Since Resolve has had a YouTube render preset on the delivery page for several years now, it’s long been speculated that one day you would also be able to upload directly to YouTube, and with Resolve 16, that’s now the reality.
New Timeline Settings
One of the most requested features for Resolve is the ability to change timeline settings once you’ve created a project. Before, if you had one timeline at 4K 24fps, and you wanted to create a new timeline at 1080p and 60fps, you couldn’t. In 16, we get this much-needed feature. Perhaps an even more significant addition is the ability to change the frame rate of a timeline that is already populated with media.
Adjustment Clip
Similar to the After Effects layer adjustment tool, on the edit page, you can now add an adjustment clip, which will apply the added adjustment to all clips beneath it. For example, if you want to add a vignette, or perhaps any ResolveFX effect, to every clip within a portion to the timeline, you can now apply the effect to the adjustment clip and extend the adjustment clip across the desired area.

DaVinci Neural Engine
I get freaked out enough when I open my iPhone photo app and see it’s automatically made photo albums from photos based on people and places I’ve visited, and now Resolve can do this, too. (But with Resolve, it’s less creepy and more practical — and simple to use!)
On the edit page, select a group of clips, right-click, and select Analyze Clips for People. Resolve will then analyze the selected clips and find individual faces. You can then label the characters and create smart bins from them.
If you’re working on a project with a number of scenes involving a variety of characters, this is a brilliant way to quickly find clips that you wouldn’t be able to find using metadata.
Resolve Editor Keyboard
Logic has produced Resolve keyboards for the last few years, running from Resolve 15 back to Resolve 12 — along with a Resolve keyboard skin for Mac keyboards. However, since Blackmagic is a hardware company first, It was perhaps only a matter of time before they produced their own Resolve editing keyboard.

It will be interesting to see how this keyboard fares next to the Logic keyboard, as Logic has been a user favorite across all NLEs for many years. They’re reliable, functional, and packed full of useful features (like dimmable lights with five selectable levels).
Blackmagic’s Resolve Keyboard is entirely metal, with keys from e-sports keyboards — this means they respond to the lightest touch and are easy to clean. And it has a jog dial.
As many editing purists like to point out, being able to edit without removing your hands from the keyboard is a plus. With the addition of various editing tools that you need to select with a mouse, that’s not always an option. The jog dial seeks to fix that issue by allowing editors to search, skim, and position their clips using the dial.
The keyboard will release in August for $995. In comparison to Logic’s $135 model, that’s quite the jump. (Perhaps you’ll want to wait for our review before you pick one up . . .)
Color Page — Object Removal
After a week of filmmaking blogs and tech blogs going wild over the After Effects Content-Aware Fill tool, I don’t think I need to tell you how object removal works, but we do need to tell you that Resolve now has that feature, too. If Resolve’s tracking and stabilization tool is anything to go by, I might have to make an early judgment and say Resolve’s object removal tool may be better.
These are just the significant takeaways from today’s live demonstration. Resolve 16 is filled with new additions across every page, and you can be sure to find write-ups and video tutorials on the new features in the comings weeks here at PremiumBeat.
(Read the full Resolve 16 announcement.)
Lewis McGregor is a certified DaVinci Resolve trainer.
Looking for more from NAB 2019? Check out these articles.


