A Six-Step Method to Cut Down Your Interview Videos
Editors on interview projects face an overwhelming task: reducing hours of footage into just minutes for the final cut. Eliminate that stress with these six steps.
Video editors, how many times have you encountered the following scenario?
A director has just returned from a shoot with a hard drive full of interview footage. There’s an energy in the air as you discuss ideas and contemplate what this piece could become.
You settle in and prepare to start cutting, thinking about the limited time you have to reduce five hours of interviews into the twenty minutes of gold that will form the backbone of your video. There are so many decisions to make — it’s overwhelming.
You struggle to find a starting place. And even when you do get started, and you’re well into the edit, you begin to feel like you haven’t made any tangible progress at all, and the whole thing begins to drag.
After facing this sort of situation far too many times, I’ve developed a beautifully methodic process that’s enabled me to work efficiently at this stage of an edit. I’ve used it consistently for years now, and it’s impressed a few directors along the way.
Here are six steps that’ll help you avoid brain fog so you can start cutting interviews sooner.
1. Transcription
Getting your interviews transcribed is the best piece of advice I have for anyone cutting these types of videos. There are many, many advantages to getting your interviews transcribed. If the director suddenly wants to find a particular soundbite from a particular interview, you can easily search the transcription for particular key words or phrases. You can also simply skim through the interviews when away from the edit suite. You’ll find that the benefits are endless.
The task of locking down the transcription can fall to an intern, if that’s an option. Alternatively, if you have the budget, you can send it off to a transcription website.
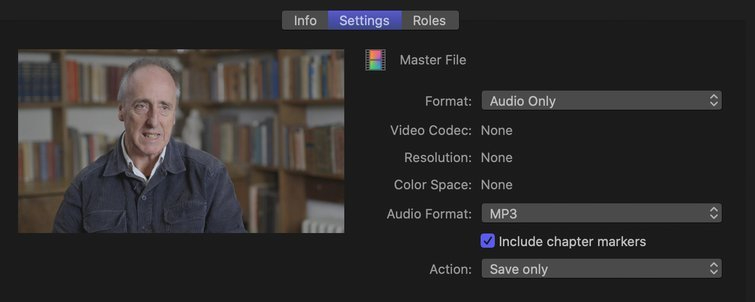
Before the transcription, it’s worth forming your MultiCams first, if you’ve filmed from multiple angles, so you can drag the MultiCam clip into your timeline and export the audio from there. That way, the timecodes on your transcription will match the timecodes of your interview timeline. This is vital if you want to keep your process efficient.
Keep in mind, some transcription sites charge per minute of audio. So, if the clip you export is shorter, you’ll pay less. To save money, you can even cut out any gaps in which the interviewee isn’t speaking. For example, during set up or in between questions.
With the transcription service I use, five hours of interviews costs around $450, which, in the grand scheme of a post-production budget, isn’t that significant. Obviously, you can include this in your original quote to the client before production begins.
2. Highlighting
Once your transcriptions have been completed, you can get going with the editing! I suggest downloading them as PDFs, as this gives you fantastic highlighting capabilities.
Read all the transcripts from beginning to end, highlighting anything and everything that might possibly be used in the edit. I usually open the PDFs in Preview, which allows you to use different colors when highlighting.
3. Create “Good Content”
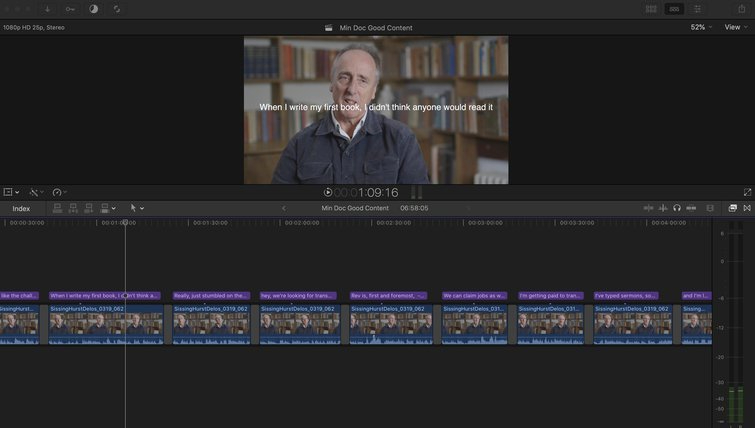
Now, it’s time to get back into your editing software. The next step is to go through all your interviews, cutting out any of your highlighted segments from each interview into a new project (or sequence, if you’re a Premiere user). I suggest naming it Good Content, or something similar.
Before you copy each section over, add a text slide above each one. If you copy and paste the text from the transcript of what’s being said in each highlighted segment, you’ll only need to drag the playhead over a particular clip to know exactly what’s being said, at that point, without having to watch it through. This can be a huge timesaver later on.
Once you’ve copied all your selects into this new project, you can progress to the next step.
4. Create “Good Content Ordered”
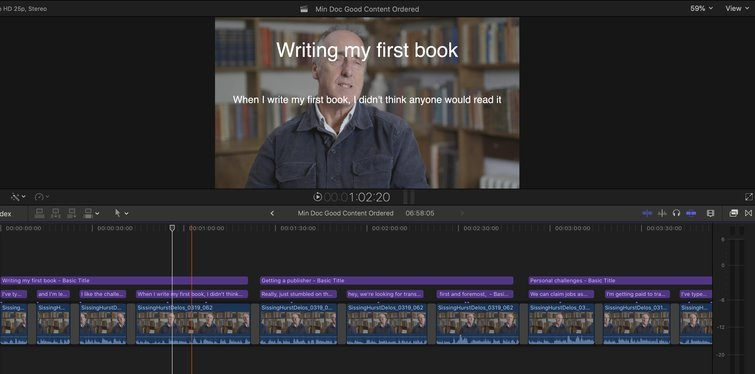
It’s time to start rearranging your sound bites according to theme. For example, if it’s a piece about someone going on an expedition, the themes might be Preparing Before Going, Getting Started, and Returning Home. I often use a large text slide to label each section, as shown above.
This part of the process will be made easier by the text slides you’ve just created. Hopefully, at this point, you know the general structure that want your content cut/stringout to have, so you can arrange the sections into the order they would go — should they be used in the final video.
5. Create “Content Cut”
This is the most creative part of the process and, for many, the most enjoyable part. First, duplicate your project and rename it Content Cut. Because your footage is now in order, you’ll be able to see when you have repetition in what’s being said and can quickly delete it.
This is the stage to get busy deleting and whittling down your cut until it’s the length you want your final piece to be. It’s worth leaving spaces between sections, as you’ll inevitably have gaps in your final video in which you can let it breathe a little.
You may also choose to cut certain soundbites in half or connect them with other bites. It’s all about massaging the content until it tells the story you want it to. You may find yourself jamming together three different short sections of three different parts of an interview to create the sentence you wish they’d said.
6. Create “Refined Content Cut”
Duplicate your project file once again and rename it Refined Content Cut. This stage is where some real finessing takes place — cutting out the “umms” and “errs.” Reconsider which parts can be cut down, even if only by a few words here and there.
This is your final content cut. It’s inevitable that you may find yourself going back and slightly amending the content cut at later stages in the edit. However, this will be made so much easier by the various timelines you’ve already created at each stage. You can go back to the Good Content Ordered project and grab a bite that you’d discarded, but now think would work. Once again, the text slides come into play to make your life easier.
Although this process is time consuming, it does actually save time over the long-term, particularly when a client starts requesting particular soundbites (that you now have conveniently stored in one of your projects).
Obviously, you can adapt this process to a way that works best for you. Hopefully, it’ll enable you to create your content cuts more efficiently, without feeling overwhelmed.
While you’re thinking about video editing, check out a few more resources that can help you improve your cuts:
- An Insider’s Guide to What Makes Good Reality TV
- How to Create Continuity When Using Stock Footage
- Beware the Pitfalls of Video Editing with Temp Music
- Best Practices for Video Editors Working with an Audio Team
Cover image via FrameStockFootages.


