Post-Production Tip: Isolating and Hiding Noise in Your Footage
There are dozens of ways to reduce noise in your footage, but today, we’re diving into DaVinci Resolve for one of the most power noise reduction techniques around.
In this article, we’ll take a look at DaVinci Resolve for some powerful tricks for isolating and reducing distracting noise without losing detail in your shot.
In a previous article on noise reduction, we covered many of the basic components of noise in footage. We’ll keep working with the same still frame from the underexposed clip I shot for a documentary a few years back for even more image polishing today.

Getting Set Up
-
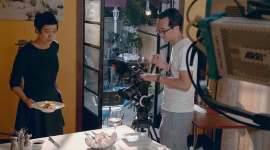
Load in Resolve

We’ve loaded our clip into Resolve’s media pool, added it to a timeline, and are in the color tab. Now, we click the “Nodes” tab 3 times. (No, I don’t know why once wasn’t enough.)
We’re going to select the starter node and apply some basic corrections to bring this clip to proper exposure.

Once we’ve gotten it dialed in, I’m creating a new node by pressing Alt+S for Windows or Option+S on Mac.
-
Create Layer Node

From here, we’ll right-click the new node, navigate to the Nodes expander menu, and select Layer Node.

Our single node has split in two, and a “Layer Mixer” now appears after the layer nodes.
Layer Nodes allow the single node grade path to split into two distinct chains for separate, concurrent grading. There are endless uses for the layer mixer, including separating highlights from shadows for work on each individually. Today, we’re using the layer mixer to separate the Chroma and Luma channels to apply more targeted noise reduction without losing too much detail in the shot.
The majority of distracting noise comes from the chroma channels, whereas the noise in the luminance channel usually has a more organic structure and motion similar to film grain. Over-reducing the luminance channel results in extremely mucky and unusable footage.
Let’s split our video to start managing this noise.

-
Desaturate Top Node

To isolate the luminance channel, click the top layer node and navigate to any pane of the Color Wheels panel. All we’re doing is sliding the saturation all the way to zero. Don’t worry if you aren’t seeing any changes yet.
-
Remove Y Information
Now, select the bottom layer node and navigate to the Primaries Bars of the Color Wheels panel. All we’re doing here is working in the Gain controls and sliding the Y slider from 1.00 all the way down.

The image is crazy now, but we’re about three clicks away from normal.
-
Change Blend Mode

To get the image back to its recognizable form, go to the Layer Mixer, right-click, navigate to the Composite Mode expander, and select Add.
Now, you’ve successfully separated out the chrominance and luminance channels and are ready to begin noise reduction.
Noise Reduction
One of the main differences between the free and paid version of Resolve is the Noise Reduction Panel. (For the Resolve Lite users, hang with me: we’ll get to a way to reduce the chroma noise without the Noise Reduction panel in just a second.)
The Noise Reduction panel in Resolve is split into two sections: Temporal and Spatial NR. Here’s a quick primer for readers unfamiliar with the difference in the two techniques.
Spatial Noise Reduction
Spatial NR evaluates common problematic frequencies for noise (high, medium, low). These frequencies are “scanned” in each frame and noise reduction applies in the specified regions of the frame.
Simply, Spatial NR looks at each pixel of a still frame, locates noise, and turns the noise down.
Temporal Noise Reduction
Temporal NR examines the noise profile across multiple frames by “watching” how each pixel’s values change over time. Because most noise is random, Temporal NR can usually quite easily detect the fluttery nature of the most common types of noise.
A blend of both techniques usually yields the best results, so that’s what we’re doing today.
-
Reduce Chroma Noise
Click the bottom (chroma) node, and navigate to the Motion Effects panel of the Noise Reduction controls.
To begin noise reduction, select the number of frames for temporal analysis. Now, unlink the luma and chroma controls on both temporal and spatial reduction before adjusting the chroma reduction on temporal and then spatial controls.

From here, it’s just a matter of dialing in the sliders while watching the areas with the noise that you want to reduce. Based on personal experience, I usually find the best results when the temporal threshold controls are at about half the value of the spatial controls.

Now we’ve selected the top (luma) layer node and are applying a touch of reduction to the luminance channel. I want to bring down a little bit of the grain without giving the footage a smoothed look.

I think I’m pleased with these results for now, so let’s move to the blur panel.
-
Blur Chroma
Even without the Noise Reduction of the full Resolve suite, we can still bring down the distracting chroma flutter in this footage.

All we do is select the chroma layer, then navigate to the Blur/Sharpen panel. We’re blurring the information in the chroma channel. This helps to virtually expand the grain structure of the color noise, which can help to significantly reduce the appearance of noise in most footage.
-
Sharpen Y Channel
With the chroma noise blurred, we can actually go back into the luminance node to add a bit of sharpening if blurring the chroma channel has softened the image up at all.
-
Adjusting Results

The last thing I want to do before checking my work is to add another node after the Layer Mixer and use it to make a few minor adjustments to bring the image up just a little more and really emphasize our noise reduction.
-
Before and After

All that’s left now is to compare the before and after Noise Reduction to make sure we haven’t overdone it.
I think this is looking really great. We’ve brought the exposure up to great levels and reduced the noise so it shouldn’t be a distraction.
Resolve’s ability to quickly separate out the chroma and luma channels into two distinct layers makes it one of the most powerful tools for noise reduction on the market today. And you can get similar results using the free version. I think that everyone who handles any type of video post-production should have a working grasp of the workflow for noise reduction covered in this article.
Do you have a folder of unusable, noisy footage collecting digital dust on your hard drive? Fire up Resolve and see what you can do to fix it!
Cover image via Pro_Vector.
Looking for more post-production tips and tricks? Check out these articles.