

Premiere Pro Tip: Customizing Your Preferences

Learn how to save time by customizing your preferences in Adobe Premiere Pro. Work smarter not harder!
Adobe Premiere Pro offers a wide range of customizable preferences to make your video editing experience smoother. In this post, we’ve tackled 8 of the most widely used (and useful!) Adobe Premiere Pro preferences, including how and when to change them. If you’re a professional Premiere video editor, make sure your preferences are tailored to work for you!
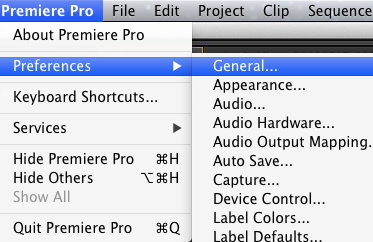
Premiere Pro Preferences>General
1. Change the default length of video/audio transitions in Premiere Pro Preferences – not from the Effects Tab (like you do in FCP 7). For me the defaults are too long, and my suggestions are 15 frames for video transitions, and .1-.2 for audio transitions.
![]()
2. Default scale to frame size – Only check this if you want your stills to match your sequence size. Leave unchecked if you work with large photos and want to animate the anchor/scale (often referred to as the Ken Burns effect).

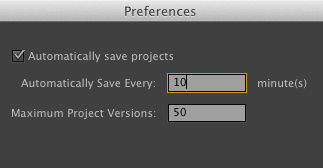
Premiere Pro Preferences>Autosave
3. Autosave – Premiere Pro creates a Folder called AutoSaves (default location is where your project is saved).
This is separate from your Saves, and is a great insurance policy if the app crashes. I save every 10 minutes and a minimum of 50 copies (more if it is a long or ongoing project). How often you should autosave? Autosave files take up very little memory, so it’s best to err on the side of more often. You don’t want to have to redo a lot of work.
It is also helpful when a client says, lets go back to this date and see what we did – believe me, it happens!
Premiere Pro Preferences>Memory
4. Memory shared between apps – Shares your RAM between the Production Premium Apps (at a minimum you want 2 GB of RAM for every core in your machine).
If you want to have multiple apps open, you’ll want a minimum of 16 GB RAM, as Adobe’s minimum spec is 4GB each for the Production Premium Apps (8GB recommended). Check out the Adobe Hardware Performance Whitepaper for more info.

Premiere Pro Preferences>Audio
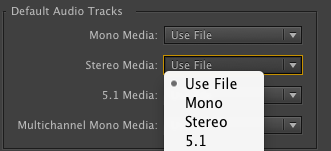
5. Default Audio Tracks – You can specify how audio is handled when a clip is imported. The Default is to Use File, which means if it is Stereo keep it Stereo. If you want to specify Mono or Stereo, you can change this in the pulldown. Editors moving from FCP 7 can change this to Mono, which is the default they are used to.
6. Automatic Keyframe Thinning – This reduces the number of keyframes when you record audio keyframes, so you can adjust them later if needed. Read more about automating audio keyframes in Adobe Premiere Pro.

Premiere Pro Preferences>Playback
7. Playback – Preroll/Postroll – This determines how far before or after an edit the playhead starts/stops when trimming in the timeline. Press “T” to select the edit point, then spacebar to start playing or use the “play around” button.

Premiere Pro Preferences>Trim
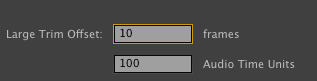
8. Large Trim Offset – This defaults to 5 frames, but if you prefer a larger number you could change this to 10 or whatever suits your needs. When you change this in Preferences you can see the change when you press “T” (to select an edit point.)
What other Premiere Pro preferences do you modify to customize your video editing work?
Let us know in the comments!


