

Tips for Using the Adobe Premiere Pro Project Manager

Use Premiere Pro’s Project Manager to move/archive your projects without breaking connections and getting offline error messages. It’s not a sexy topic, but it is important!

Use Premiere Pro’s Project Manager when you are copying or trimming (removing unused files) your project. If you move the project and the media separately you will break the link and have to reconnect them. You can run into additional problems if media isn’t reconnected properly or some files go astray. The Project Manager serves to simplify this process.
Moving Files in Premiere Pro
Here’s a typical editing scenario: You want to collect your project and media files and copy them to a new location, such as an external hard drive. This is especially useful if you’re planning on editing off-site or need to share a project with another editor.
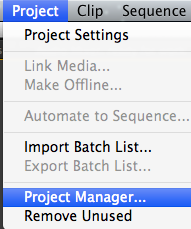
From the Project menu select Project Manager.
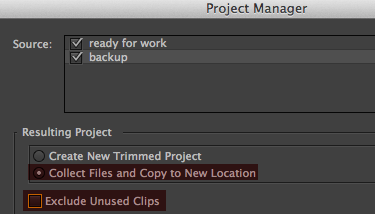
Under Resulting Project select Collect Files and Copy to New Location.
Uncheck Exclude Unused Clips since we want to move all the files.
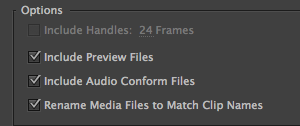
Leave Include Preview Files (rendered effects) & Audio Conform Files checked.
Check Rename Media Files to Match Clip Names when you have renamed your clips in the Project.
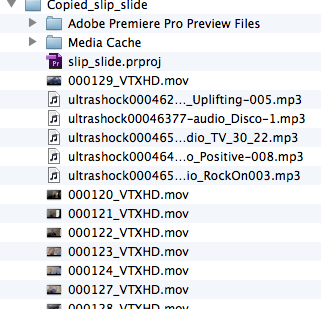
Click the Browse button to choose a location to copy the files/project to. Then click OK. The media and project are then copied to the specified destination. Much more tidy than dragging files around your computer!

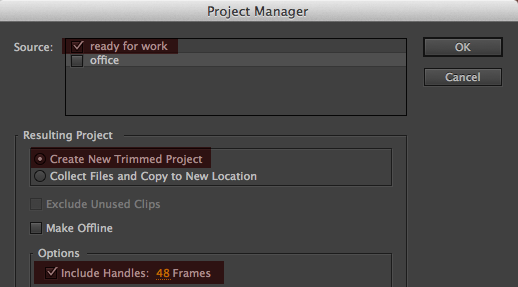
New Trimmed Project in Premiere Pro
When it’s time to archive your Premiere Pro project you can use the Project Manager to create a clean “trimmed version” of it. The trimmed version will remove all unused footage so that the new version only includes the media elements that were actually included in the video(s).
Since we are trimming the media we’ll want to include handles on each clip (this adds time before and after each clip in the timeline). I generally make my handles 2-3 seconds, so that I can go back and make trimming changes or add new transitions if necessary. Although trimming will take out the majority of the footage that didn’t make it in the final videos, handles are useful for giving you that little bit of “wiggle room” in case you need it later on.
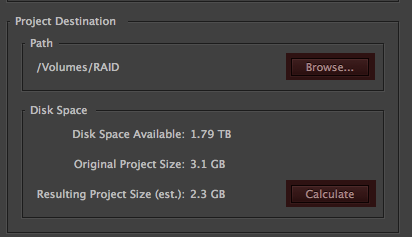
Click “Calculate” to see what the size of the trimmed project/media will be.
Click “Browse” to set a destination and then click “OK”.
‘Gotchas’ with Premiere’s Project Manager
There are a few things to be aware of when trimming projects using the Premiere Pro Project Manager:
- You can’t trim Long GOP footage like H.264 or MXF. You would need to transcode this footage to another format like Pro Res to trim it using Project Manager.
- Footage in a multicam sequence will not be trimmed (because it is nested into another sequence).
- After Effects compositions using Dynamic Link will not be moved using the Project Manager. You have to manually do this.
Need additional help? You can read more about the Premiere Pro Project Manger on Adobe’s help page.


