Streaming on OBS with the Blackmagic Web Presenter
Using the Blackmagic Web Presenter, learn how to stream on Open Broadcaster Software with a few quick and easy steps to get you online in no time.
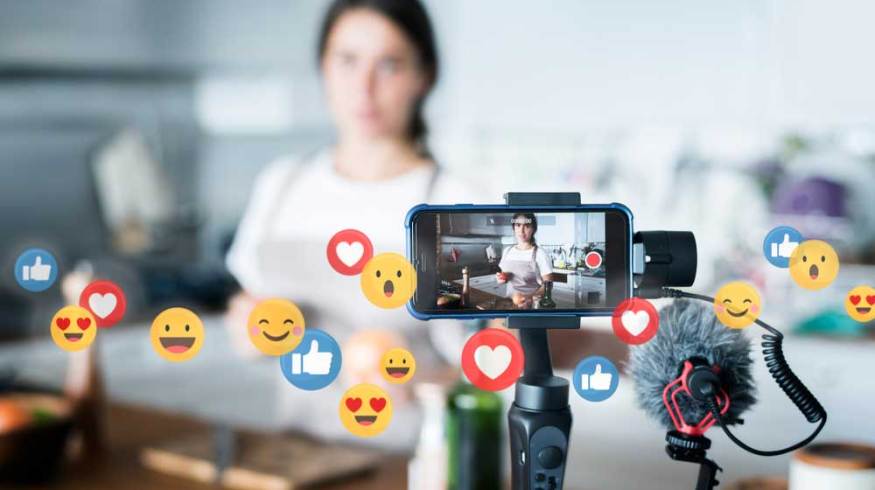
As productions around the world have come to halt and self-isolation has become the new normal, there’s been a massive increase in the number of people streaming content from their homes. I don’t mean television programming from the media giants on your devices; rather, we’re talking about cooks from their kitchens, gamers online, and musicians in their living rooms.
Recently, a local charity and a music venue approached me to help them stream a concert to raise money while the venue is closed to the public. (Note: this was before isolation mandates, and we enforced social distancing — only those connected to this project were on set.)

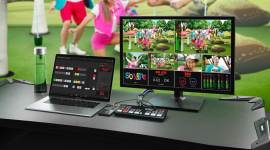
Livestreaming made easy with the Blackmagic Web Presenter. Image via Ari Lozano.
I had the Blackmagic Pocket Cinema Camera 4K, and Dentonfilm.com brought a RED camera. There was an audio engineer behind the sound board, some cables, a laptop, an incredible musician, and the absolutely crucial Blackmagic Web Presenter. The show was a resounding success, and it raised a generous amount of money for all the parties in need.
The Blackmagic Web Presenter
This little box was so clutch — much more than a normal capture device — because of everything it can do. It took care of every need I had in this situation (I had next to no time to prepare). It’s outfitted with a HDMI input, SDI input, XLR input, and SDI/HDMI loop-outs for any external monitor. This will accommodate your cinema cameras, DSLRs, and basically trick your streaming software into thinking these higher-end cameras are actually streaming devices. This is what you get at the base level, but to fully reap the benefits of this box, you’ll need to get the Teranex Mini Smart Panel ($85), which is the equivalent of Mario grabbing a mushroom, fire flower, and star, all at the same time.

Teranex Mini Smart Panel serves as a mini mobile switcher. Image via Blackmagic Design.
This panel slaps right on the front of the box, allowing you to use it as a mini mobile switcher to punch between two sources. It also allows you to add or remove gain from the audio in your stream, apply transitions (e.g. straight cut, dissolve, or dip), and it includes a small LCD display that can function as a monitor, so you know what’s actually being broadcast. With an internet connection, this box, a microphone, a laptop, and a camera, you could put together a professional-looking and -sounding stream from anywhere in the world.
Setting up the Blackmagic Web Presenter
It’s about as simplistic as it could possibly be — you don’t even need any drivers. Just plug everything in, and it’s ready to rock. After running it some power, the LCD screen will power on. Next, you’ll need to connect a USB 2.0 Type A to B cable into the port labeled USB Webcam, and the other end of the USB into your computer.

Assembling this little box is simple and efficient.
Then, plug your cameras into the Web Presenter. It has one HDMI in and one SDI in, so if you’re using two cameras with the same output, you’ll need a conversion box — like an AJA or Decimator — to use both cameras.
Now, for audio, come out of whatever your source is (in my case an audio board) with an XLR and send a mono signal to the Web Presenter. The Blackmagic box will convert this mono signal into a stereo signal and attach it to your stream. This was incredibly useful for streaming live music, and it sounded fantastic.
That’s all you need to do on the hardware side!
OBS — Open Broadcast Software
This free-to-use software has become a staple for streaming. Many professionals in the community regard it highly. It can work with Twitch, Facebook Live, Periscope, and basically any of the major players in the streaming game.
After you download and install OBS, it’ll prompt you to use the Auto-Configuration Wizard. It’ll then ask you how you want to optimize the software to match your needs — it will ask if the stream is more important than a recording. In this case (a live concert), the stream was more important. This is the selection used by most.

Specify what you’re streaming.
Next, it’ll ask you about the Video Settings. Select however many frames per second you have selected on your camera as well as the resolution you’re using. For things like video games, a higher fps (like 60) is desirable for capturing all of the action with less blur, but it’ll consume more bandwidth, so you can select the option of “Either 60 or 30, but prefer 60 when possible,” so that your stream can adjust your fps to prevent lag.

Specify your video settings to avoid lag.
The next step in the Auto-Configuration Wizard asks what service you’re using to stream (like Twitch or Facebook). You’ll need to visit that service to get your stream key. For Twitch, it’s located under Settings > Channel and Videos — the stream key will be at the top of this tab. It’s vital that you don’t share your key with anyone you don’t want to have access to your channel.

Choose your stream service, then visit that service for the steam key.
Back in OBS, with the “Estimate bitrate with bandwidth test” option selected, hit the Next button. At this point, OBS will test your stream. It’ll bounce the signal around to a few different locations, test your video settings, then you’ll find yourself at the main control center of OBS.
Now, go to the Sources window in the lower left-hand section, and hit the + sign, then select Video Capture Device. Under the selection window that says Device, you’ll open it to see two options, one will say FaceTime HD Camera, which is the camera built into your camera. There will also be — if everything is working — an option that says Blackmagic Web Presenter, which is what you want to select. At this point, you should see an image from your camera. Tick the Use Buffering box and hit OK. Make sure your image is filling the entirety of the OBS window.

Once you select the Blackmagic Web Presenter option, your image will appear.
If you’re using an external audio source like I was, you’ll want to go to the Settings option in the lower right-hand corner, select Audio, and then under Mic/Auxiliary Audio, select the Blackmagic Web Presenter. After making sure the other options (like your laptop mic) are disabled, hit OK.

Make sure to select the appropriate audio source for your project.
You’re now ready to start streaming. In the lower right-hand corner, hit the Start Streaming button, then go back to your streaming service to check on your channel. It should notify you that you’re live and should be broadcasting your image to the internet.
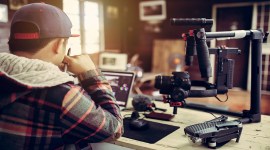
Cover image via Rawpixel.com.
Interested in the tracks we used to make this video?
- “Endgame” by ARTiria Productions
- “Brooklyn Drive” by Chill Study
- “Time Paradox” by Chill Chord
- “Blue Notes” by Mattijs Muller
Looking for more on video production? Check out these links.