

Time Remapping In Adobe Premiere Pro

Freeze motion and vary speed overtime by using the handy time remapping feature in Adobe Premiere.

Use time mapping in Adobe Premiere Pro to create cool speed changes in footage. From slo-mo to super speed, time shifts will add visual interest to your edits!
In this Adobe Premiere Pro tutorial you will learn:
- Creating time remap keyframes
- Changing speeds and smoothing the speed transition
- Creating a freeze frame and time reverse
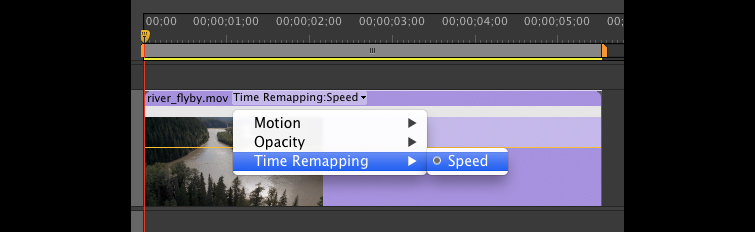
Creating Time Remapping Keyframes in the Timeline
To start time remapping your footage, in the timeline click on the word opacity for the clip you want to speed change. Then, select Time Remapping > Speed from the pulldown menu.
Add keyframes where you want a speed change by holding Command (Mac) or Control (Win) and clicking on the yellow line. This creates speed segments.
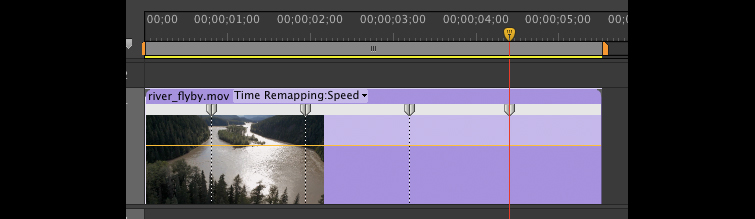
Changing Speeds and smoothing the speed transition in Premiere Pro
Hold Shift and drag down the yellow line (rubber band)to change in increments of 5%. (I changed mine to 50%). 2 “gotchas” to be aware of:
- Time remapping doesn’t effect the audio (it stays normal speed)
- If an another clip immediately follows this one it will trim the time remapped clip.
Adobe recommends time remapping a clip without another clip immediately following it for this reason.
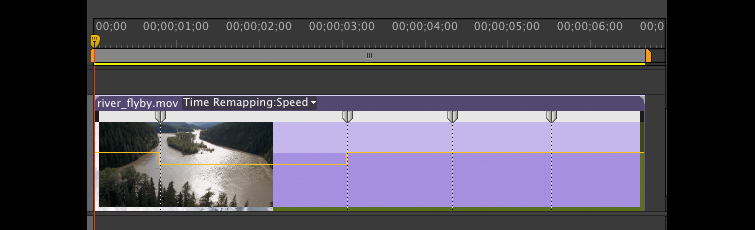
Once you’ve added your time remapping keyframes, click and drag on a speed keyframe to smooth the speed transition.

Creating a Freeze Frame and Time Reverse in Premiere Pro
To create a freeze frame segment, hold Command (Mac) or Control (Win) and Option/Alt while dragging a keyframe.

To create a time reversed segment, hold Command (Mac) or Control (PC) and drag a keyframe.

Use Adobe Premiere Pro’s time remapping tools to give your footage an edgy stylized look!
Was this tutorial helpful for you? Do you have other tricks for applying slo-mo in your video edits?
We want to hear from you in the comments!


