
Video Tutorial: How to Build a $25 Overhead Camera Rig

Using nothing but wood and screws, you can measure out and build an overhead camera rig. We’ll show you how in this video tutorial.
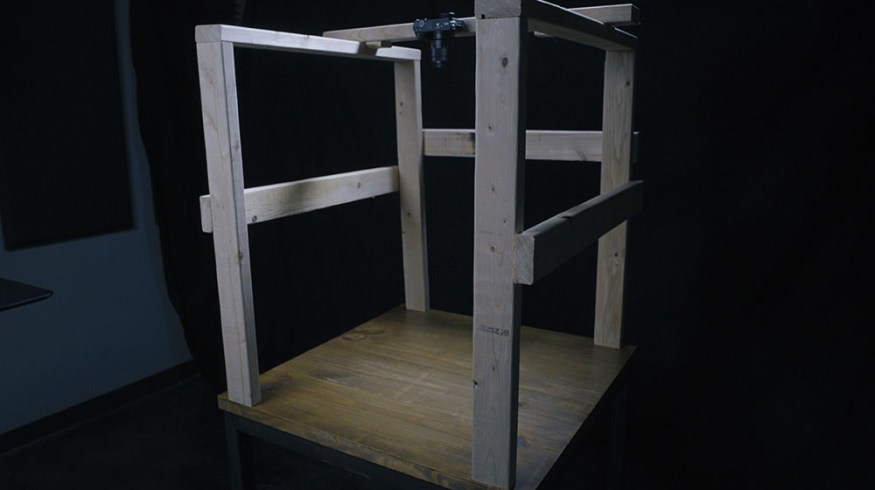
If you’ve ever seen a Tasty video, a Casey Neistat animation, or any how-to video, you’ve seen this top-down shot. Today, we’re going to look at how you can build your own setup for an office or studio. Unlike a C-stand or tripod, this model is a stationary rig, perfect for anybody who needs a one stop-shop for their YouTube channel or freelance projects.
Let’s take a look at how to piece the rig together from the drawing board.
Take Your Measurements

So, the measurements for this build are going to depend entirely upon the space where you’re planning on putting it. If you want the rig to sit on your desk, make sure it’s wide enough without being too close to the edge.
For my build, the boards are 35 inches long — for the most part. You’ll see in the video that I originally planned support beams that were a bit smaller on the sides; however, the wood I bought was warped and kept cracking, so I stuck with the thicker 1 1/2 inch-wide beams that I used for the four main support beams.
- (8) 35 inch long boards (1 1/2 inch wide).
- (1) 33 inch back support beam (1 1/12 inch wide).
- (1) 38 inch camera mount board (1 1/2 inch wide).
Be sure to use “construction screws.” The length and width of the screws will vary based on the widths and lengths of the beams. Just make sure they’re long enough to connect.
Designing the Camera Plate
For the camera board, you can use a couple of different methods. As you can see in the video, you can attach the camera directly to a 1/4 inch-wide hex bolt. The camera will be secure as long as you screw it in all the way, but if you want to be extra cautious (if you’re using rented gear) you can also attach a quickdraw plate like you’d use on a small tripod or gorilla pod and screw the camera in that way.
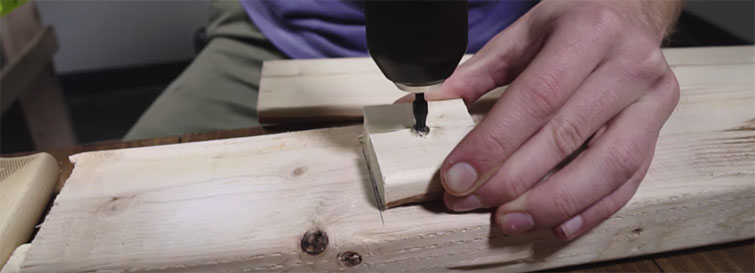
To keep the board on track and prevent it from moving around on the top support beams, I recommend attaching two small pieces of wood on the bottom of the board. The little piece might split, so be ready to try out bigger sizes (like I did).
For more DIY builds like this, check out our past coverage:


