Post-Production Tips: Using a LUT at the Beginning of a Node Tree
These techniques explore the workflow benefits of working with a LUT at the beginning of your node graph rather than at the end.
Long gone are the days when you needed a third-party plugin to import and apply a LUT. LUTs are now so commonplace that an NLE, or compositor, would feel dated if it didn’t accommodate them. However, in programs like DaVinci Resolve, which works in a node-based structure, the question is On which node do you apply a LUT? I’m not even talking about film emulation creative LUTs, or technical LUTs. Just a standard camera LUT you would use when you’ve filmed with logarithmic exposure.
We’ve extensively covered the difference between the various type of LUTs, so I won’t go into too much detail here, but briefly, the idea in shooting in a log exposure curve is that you can retain more highlight and shadow detail — and also manipulate the image without detrimental effects.
You’ll find that you can download many LUTs to correct LOG footage from the camera manufacturer’s website — or they’re included in Resolve from the get-go. But, where do we apply the LUT? There are many places where you could apply it — the first node, the third, the last — you can even apply it to the source clip itself. And, by applying the LUT to the various places, you will get different results. So let’s troubleshoot some issues that occur when using a LUT at the very beginning of a grade.
When using a LUT that transforms LOG footage, it’s reasonable to assume that you need to apply it somewhere near the beginning — or perhaps to the source clip, itself. First, let’s rule out applying a LUT to the source clip for creative grading. It’s convenient if you want to quickly add contrast and saturation to a clip for a quick export. However, if you plan to later color correct and color grade the image, this method will leave you handicapped because you’re unable to adjust the LUT properties — as you would if you’d applied the LUT to a node. Unless you remove the LUT from the clip, you can’t disable it; Resolve looks at the LUT as if it’s part of the base image data.
If you did want to add a camera LUT (or even a creative LUT), you just right-click a clip’s thumbnail on the thumbnail viewer, and add a LUT as you would a node.
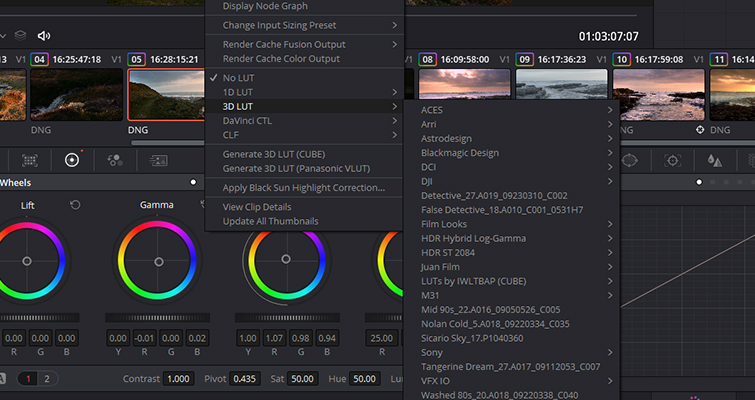
With that covered, we can acknowledge that we need to add the camera LUT to a preliminary node. But which one — the first? The second? And, if we add the camera LUT to the second node, is there a benefit?
First, let’s look at adding a camera LUT to the first node. In the image example below, I’ve placed my BMUM4.6K to Rec.709 LUT, on the first node. As you can see, I must have slightly overexposed while filming, as I have clipped highlights.
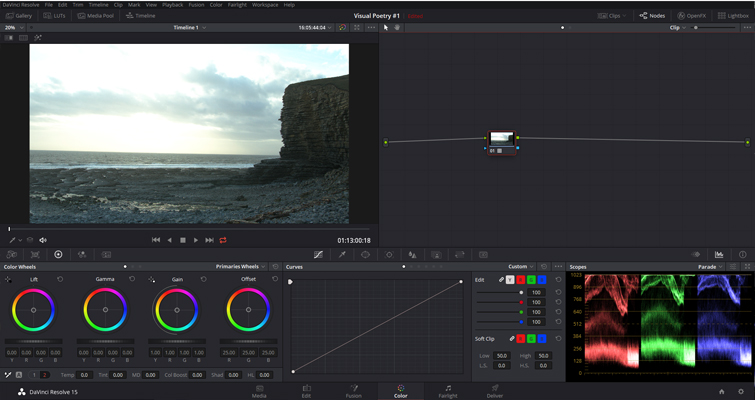
To fix this, many would create a new node and then color correct on a node, independent from the node that houses the camera LUT. Here’s the problem. If I lower the highlights on a secondary node, Resolve is lowering the highlights from the entire image, using the first node as a base reference. We’ve then completely lost all of the salvable details in the sky.
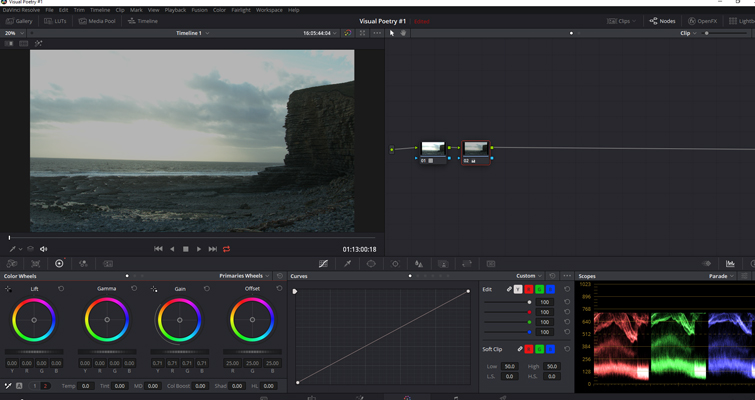
You may think that this is also what would happen if you jump back to the node with the LUT. However, the Resolve manual clues us in on something worth noting:
LUTs that you add to a node, impose their transformation after all other color page adjustments, applied by that node. This means that you can use the color and contrast controls to trim whatever effect the selected node’s LUT is having on the image. For example, if the contrast adjustment, made by an applied LUT, clips the highlights of the image too much, you can use that node’s contrast controls to lower the highlights, restoring detail to the image.
Just as the manual states, when I lower the highlights on the node with the camera LUT, the highlights are better rescued.
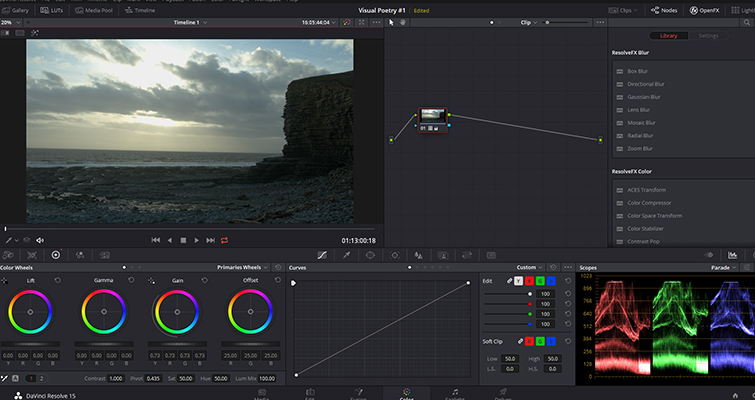
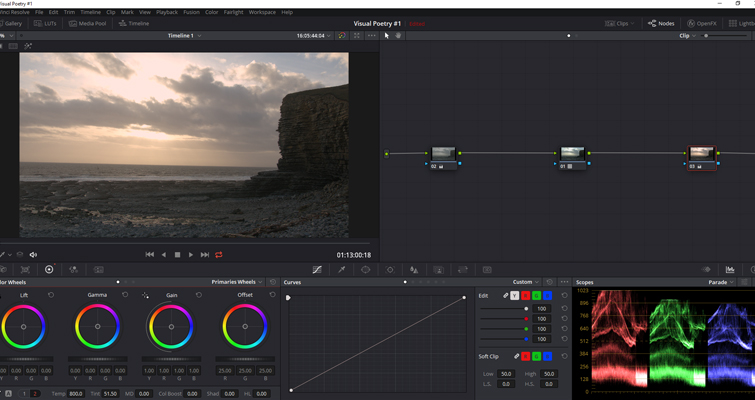
Alternatively, another popular method is to use a three-node structure.
- Node 1: Adjusts the LOG footage to a reasonable starting point.
- Node 2: Contains the camera LUT.
- Node 3: Corrects color and contrast miscalculations.
This method leaves the camera LUT on a node, independent of other corrections and creative applications. If you need to increase the shadows, you can do so by adjusting the black point on node 1. If you need to remove that green tint, you can do so on node 2. And then, of course, you can continue adding as many nodes as you see fit to get the creative grade you want.
As I said in the introduction, there’s not really a standard procedure to follow. Some filmmakers prefer to add their camera LUT at the end of their node graph. Yet, as Avery Peck suggests, you may find it harder to get a successful skin tone qualification when doing so. To hear his explanation, watch this tutorial.
Looking for more post-production tips and tricks? Check out these articles.
- How to Create the Double Exposure Effect in Four Manageable Steps
- How to Use FREE Cinematic Video Effects With Your Footage
- 7 Master Cinematography Techniques from Iconic Directors
- How To Rotate Your Footage 180 Degrees Without A Multi-Axis Rig
- 3 Easy Stereo Recording Techniques For Your Next Project


