
Video Tutorial: Create Retro Horror Movie Titles in After Effects
In this video tutorial, learn how to create some 80s-inspired, retro horror movie titles in After Effects.
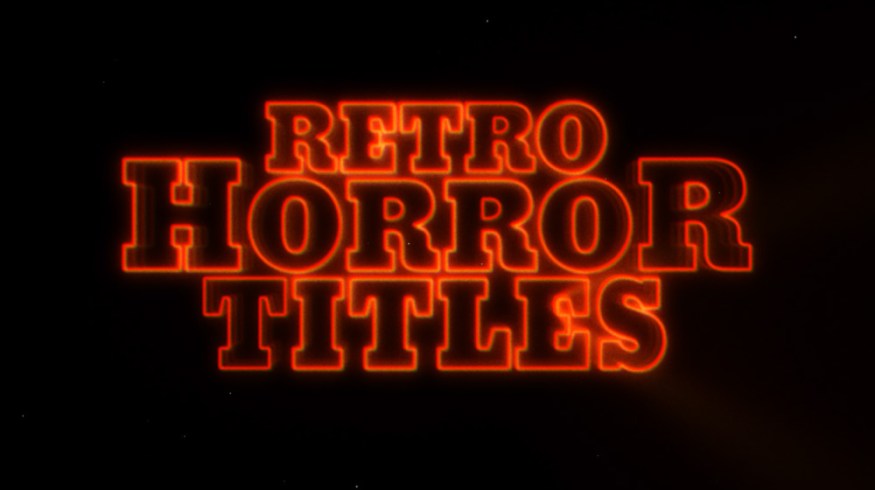
For a lot of people, the horror movie genre peaked in the ’80s. Influences, call-backs, and homages to ’80s horror can still be seen in modern horror films.
That’s the inspiration for this tutorial. We’re going to create some retro horror movie titles in After Effects, using only FREE plugins and assets. (Be sure to download the FREE project file with the video assets to follow along!)
Download FREE Horror Movie Titles Here
Title Design
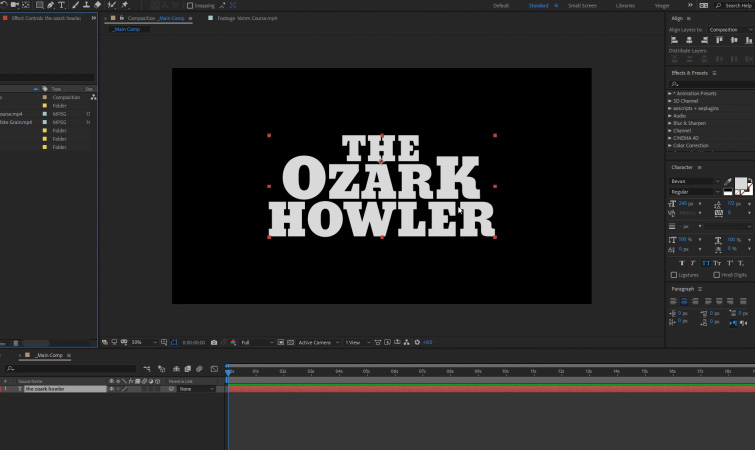
First, you’ll need to design the general layout of your movie title. To do this, simply use the text tool in After Effects and create a title. You can then format the layout of the title using the various text settings in the Character and Paragraph panels.
In my example, I used the font Bevan, which is available for FREE from Google Fonts. Experiment by making some of the words or letters bigger or smaller than the others.
Video Copilot Saber Plugin
Saber is a free plugin from Video Copliot, and we’re going to use it to create a “neon” effect on our movie titles.
Once you have Saber installed, simply apply the effect to a Solid layer. Then, change the Core Type to Text Layer, and select your text titles. For the look of our titles, I recommend starting with the Neon preset that’s available in Saber.
You’ll likely need to adjust the Glow Spread, Glow Bias, and Core Size settings for best results.
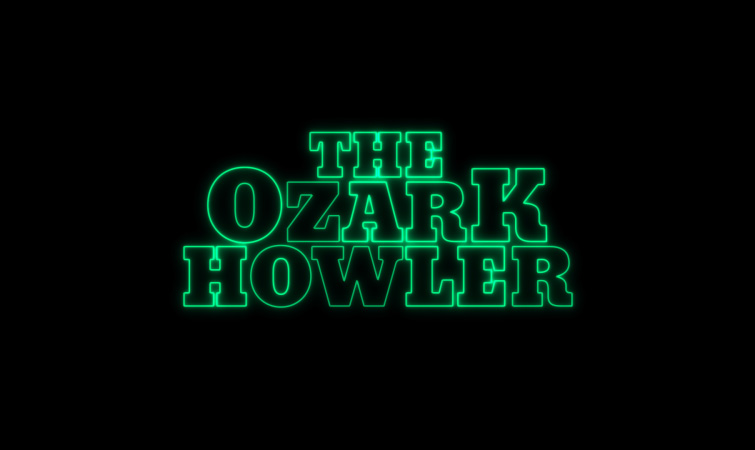
You can refine the look of your titles even more by enabling the Flicker settings available in Saber. I highly recommend checking on the Mask Randomization option, which will allow each letter to flicker independently. This creates a neat shimmer effect.
To finalize the look of the neon titles, try playing with the Gamma, Brightness, and Saturation in the Render Settings.
Animating the Titles
To animate our movie titles, we’re primarily only going to need to keyframe two different settings. The first is the Scale of our title Text layer. In my example, I scaled my text from 110% to 90%. I suggest doing this over a long period of time, around 10-12 seconds.
Next, for the animation of the title, all you need to keyframe is the Start Offset setting in the Customize Core settings of Saber. Set the Start Offset to 100%, then have it keyframe down to 0%. (You can keyframe it at the same speed as your scale animation.)

Finally, you’ll need to Precompose your title text layer and Saber layer together. This will make it easier to work with later on.
Making the Titles Look Retro
Now, we need to make our movie titles look more like they were from the 80s. First, apply a Gaussian Blur effect to your precomped titles and set the Blurriness to 4.
Next, we can add some chromatic fringing using the Channel Blur effect or using the FREE plugin Quick Chromatic Aberration 2.
Finally, we can overlay some realistic film grain on top of everything. This provides nice texturing to the glows. You can download 5 Free Film Grain Overlays from Shutterstock!

More FREE Retro and Horror Assets
Looking for more FREE files to accent your 80s horror movie titles? Check out our free Synthwave and Vaporwave Graphics Pack. It has plenty of elements to help you stylize your 80s titles even more!
Also, if you need some more scary sound effects, check out the Free Horror Sound Effects Pack from RocketStock. The pack includes thirty different scary-themed sound effects!
Interested in the royalty-free tracks we used to make this video? Give them another listen:
- “Roadgame” by Nicholas Ripamonti
- “Dream Waves” by Cymatix
- “Chill Off” by Make Music
- “True Professional” by Ricky Bombino
- “Miami Nights” by Ben Beiny
Halloween is around the corner. Let’s look at some articles that may interest you:


