

Streamline Your Workflow with Adobe’s New 3D Tools in After Effects

Get up and running quickly in After Effects with Adobe’s new 3D tools, perfect for both advanced users and beginners.
Oftentimes, you’ll find that updates to After Effects will bring in overhyped and unnecessary new features. This is certainly not the case with the latest update. Adobe recently overhauled AE’s 3D workspace, introducing new tools that help streamline workflows. These new features will make life easier for advanced users, and make learning 3D easier than ever for beginners.
Let’s have a closer look.
Control Layers with the New Gizmo
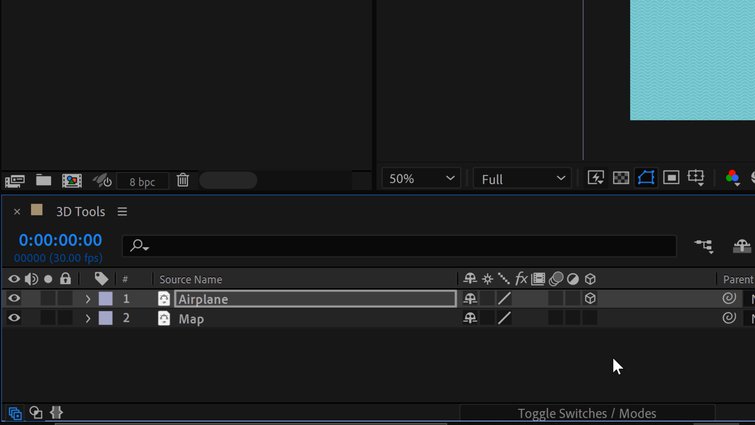
To enter the wonderful world of 3D in After Effects, you must first set your layers to 3D. This is as simple as activating a layer’s 3D switch in the sequence. If you can’t see the switch, press the Toggle Switches/Modes button at the bottom of the panel. Once a layer is enabled, you’ll notice a fancy new layer control tool in the comp. This is called the gizmo.
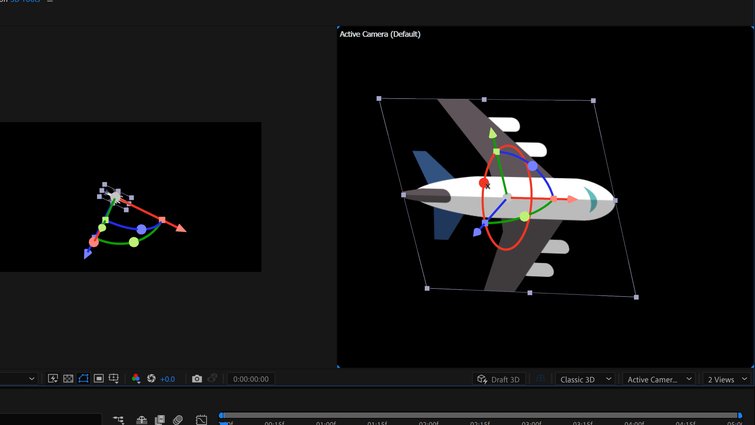
This fancy new gizmo gives you complete control over your layer directly within the comp panel. Quickly change Rotation, Position, and Scale parameters via manipulating the gizmo’s various shapes. Each axis has its own color: Z is blue, Y is green, and X is red. The arrows change position, the circles change rotation, and the squares change scale.
If you do most of your work in a specific parameter, you can customize the gizmo to only show that parameter. Also, if you’re doing detailed work and you need your layers in specific areas of your comp, check out the new tooltips. When manipulating a layer’s gizmo, these tooltips show pixel distance, coordinates, and other important information.
Now that you know how to manipulate layers, let’s take a look at how to move through 3D space.
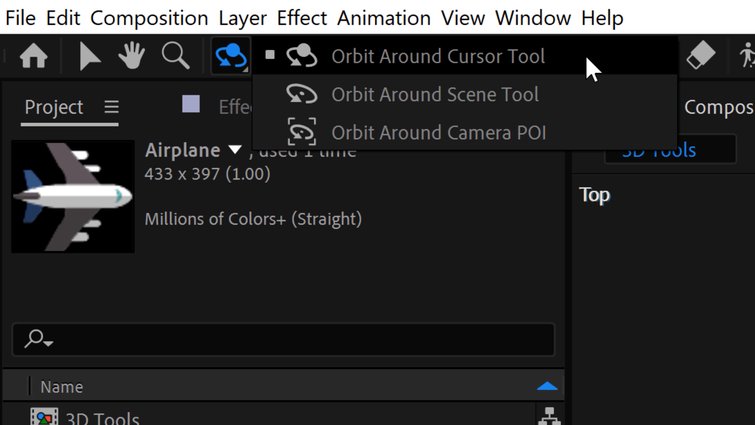
As soon as a layer’s switch is set to 3D, you’ll notice that three new navigation tools become available in the toolbar. These include Orbit, Pan, and Dolly tools, each of which have variations. These tools can react in relation to the cursor, the composition, or a camera’s point of interest.
Use keyboard shortcut keys 1, 2, and 3 to quickly jump between these three tools. Or, simply toggle through with the C key. When making your way around 3D space, I find it helpful to switch the comp to show two angles. For this, go to View > Switch View Layout > 2 Views. Specify each camera angle via View > Switch 3D View.

The coolest feature of these new navigation tools is that you don’t have to create a camera layer to use them. After Effects allows users to fly through space using the default camera. Once you find an angle you like and you’re ready to animate, go to View > Create Camera from 3D View.

Animate a Camera
With my new camera created, I’m ready to animate a move. Using the new navigation tools, I can quickly isolate layers and place the camera exactly where I want it to go.
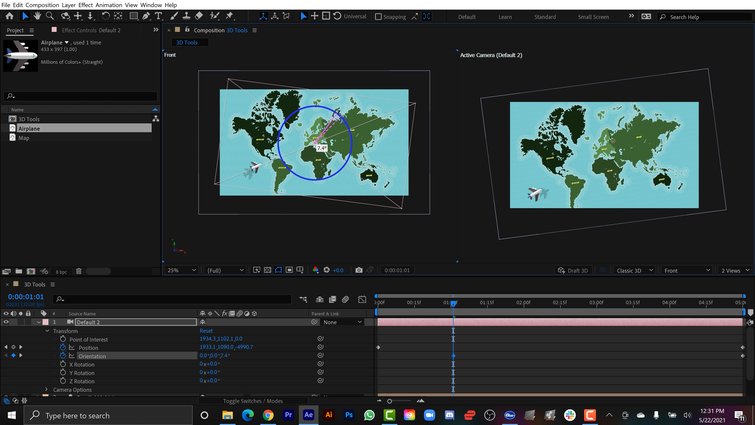
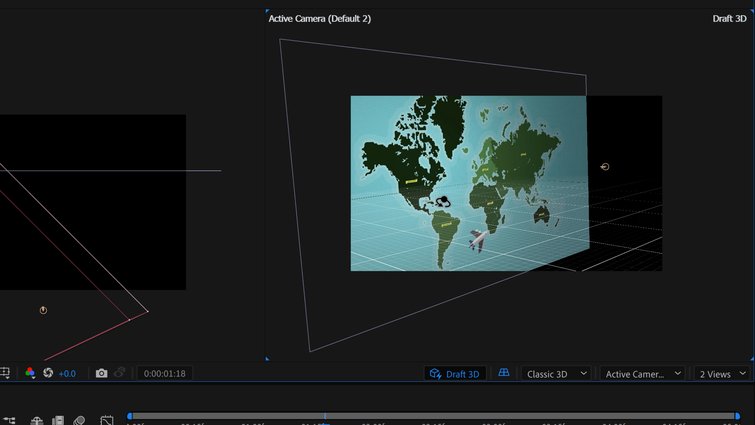
For example, in this scene, I have an airplane flying over a map. The plane is closer to the camera in Z space by nearly 700 pixels. I can easily jump between focusing on the camera or the map by using the Orbit Around Cursor, Pan Under Cursor, and Dolly to Cursor tools. To quickly select the Airplane, I’ll simply place the cursor over that layer. Or, to zoom in to a specific point of the map, I’ll place the cursor over that area and use Dolly to Cursor.
In addition to controlling the camera’s point of view, I can also control the camera via the new gizmo controls of my layer. I’ll grab the Z rotation of my camera layer to quickly add a Dutch angle move to my animation. This is especially easy to do when viewing your composition from two angles.
Work Quickly
Adobe has added a few final touches to make the 3D experience extra smooth.
Activate Draft 3D mode to harness the power of the Real-Time Render Engine to speed things up. Once enabled, you can turn on the 3D Ground Plane. You’ve probably seen this in other popular applications like Blender and Cinema 4D. If you’re working on an especially intricate project, this will help you to avoid getting a layer lost in some Z axis wormhole.
These new tools make it incredibly easy to get up and running in an After Effects 3D environment. So, what are you waiting for? Go animate something!
Want to listen in on the music used to make this tutorial? Check it out!
- The Prophet by Origami Pigeon
For more animation tips, tricks, and advice, check out these articles:
- What’s New In Cinema 4D S24 and Redshift Rendering Comes to Mac
- New Maxon Subscription, Including Cinema 4D, Red Giant, Redshift
- Animation Fundamentals: Easing, Anticipation, and Follow Through
- Create Wiggly Text and Animations Using the Line Boil Effect
- How to Create Matte Text Animations in After Effects


