How to Composite Shots Together to Pull Off HDR
Let’s look at the surprisingly easy, effective way to pull off HDR looks in post-production.
One of the trickiest parts of filmmaking is capturing light in ways that might not be possible with the camera you have. What do I mean by that exactly?
Well, our camera’s sensors and capabilities only extend so far, as most of the equipment we can afford is fairly limited in terms of image quality. However, with just a little planning and editing, there are ways to capture footage that looks truly cinematic and screams “high production value.”
Let’s take a look at how you can pull off a densely complex image with HDR (high dynamic range) using nothing but a simple DSLR.
What Is High Dynamic Range?
Before we talk about the how, let’s talk about the what. Ever since cameras were invented, photographers have dreamed of capturing images that are closer to what’s captured by the human eye, images where light and darkness and a wide range of color are balanced in a way that makes every detail truly pop.
Unfortunately (and in broad strokes), even the most sensitive cameras simply can’t compete with the human eye’s high dynamic range and the human brain’s real-time processing power. Essentially, it’s the difference in life-like results and, well, actual life.
Nonetheless, with the arrival of HDR technology, we’re getting closer than ever before.
Most of the confusion surrounding HDR stems from the fact that multiple technologies have emerged, all calling themselves the same thing.
Photography HDR, which first cropped up in the 1990s, used multiple exposures, at different settings, to create an effect that was somehow “more than real.” And, while still used, it’s widely seen as dated.
Next came HDR screens that were able to display brighter whites and more vivid colors than had previously been possible. To take advantage of this technology, which was built into the new UHD Rec 2020 standard, you needed to master a separate HDR version of the film. Because of the cost of the equipment needed, it’s been slow to be adopted by mainstream studios.
What we’ll be talking about today is the third, and most recent, way of creating HDR, a technique similar to the previously mentioned photography method — using multiple exposures in a video camera to overcome the ten-to-fifteen stop limit of the LOG footage. Here’s how it works.
Shoot the Scene in Multiple Ways
HDR works best when the exposure ranges are in separate parts of the image. The sky, the mid-ground, and the foreground, for instance. This makes it easier to mask the separate parts of the image from one another.
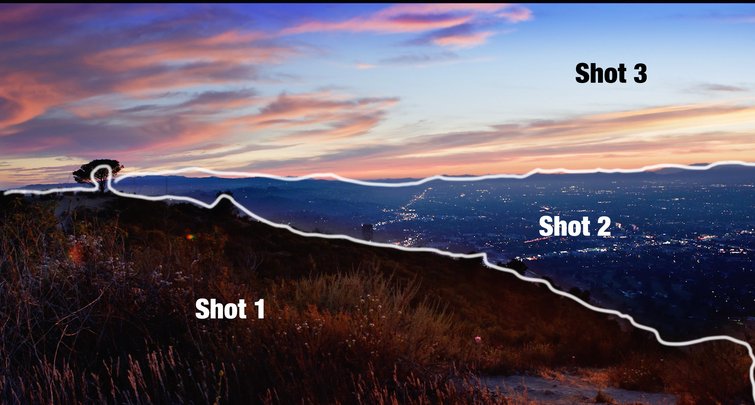
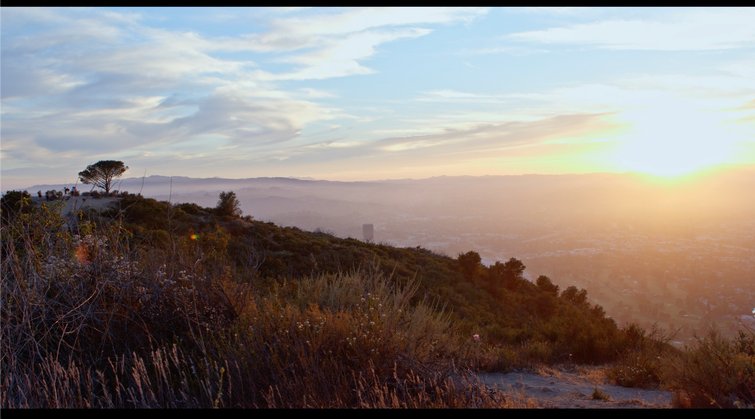
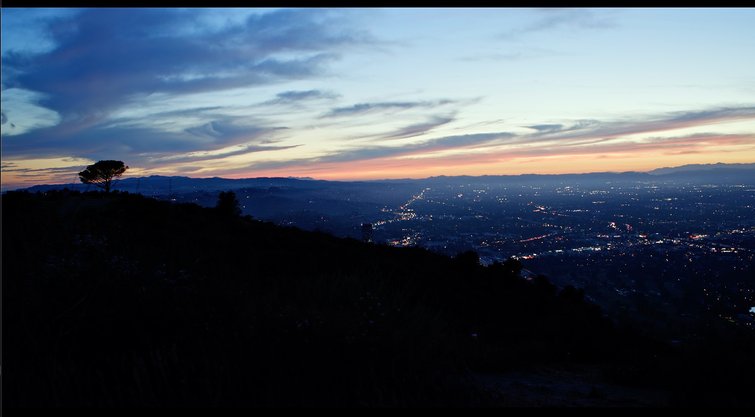
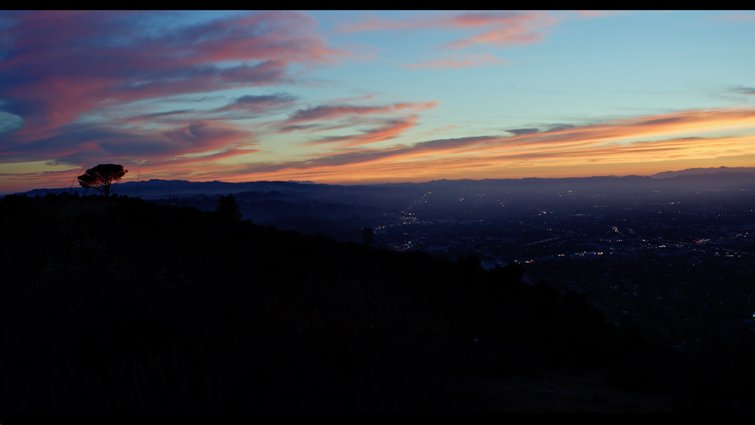
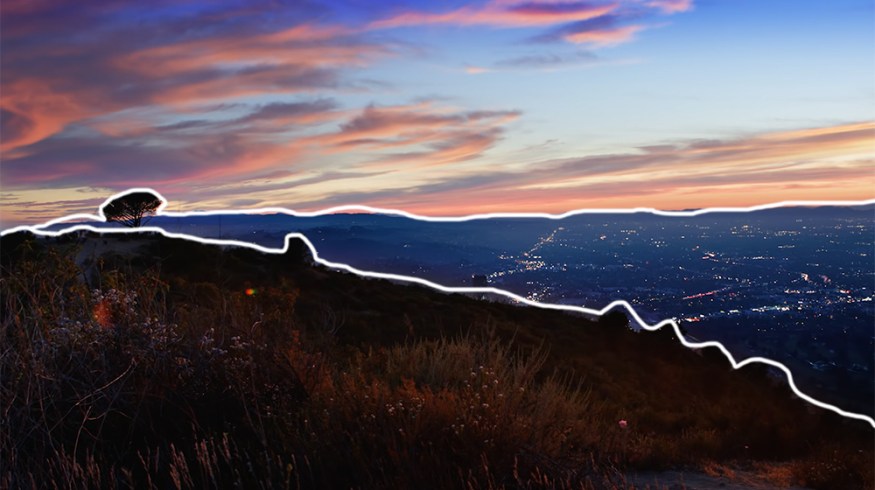
For this example, I took three separate exposures — one for the sky, one for the city, and one for the hill in the foreground. As long as I don’t move the camera, I’m not limited to shooting the three exposures at the same time.
I can shoot the sky when the sun is setting, when the light is at its most interesting and beautiful. Then I can wait forty minutes until the city lights come on, and the city looks its best. This gives me absolute control to create the best scene, without being limited by what was happening in any given moment at the location.
So, for this first example, I wanted to capture the detail in the brush to give some context to the shot, so I exposed for the foreground. That means everything on the ground in front of the lens, all the way up to the tree on the far left side of the frame.
Then, I exposed for the city streets and lights down in the valley. These were far away, so I made sure to leave a wide field in focus, keeping the aperture around f/8-f/11.
Lastly, I exposed for the sky. This gave me all the detail, contrast, and color I wanted, without any part of it being blown out from exposing other parts of the frame.
Now that we have all three shots, it’s time put them together in post.
Compositing Multiple Exposures in a Final Shot
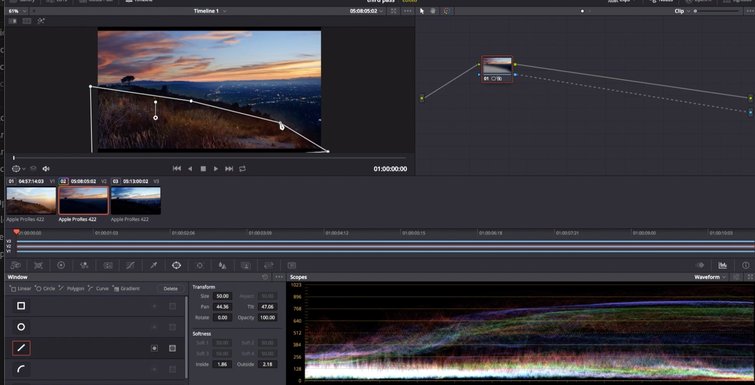
To import the images, stack the clips on top of each other and mask out the sections you want shown in the final shot.
By importing the three exposures into software — I’m using DaVinci Resolve, but you can pull this off in the program of your choice — you can combine them into a complete image. It’s as simple as stacking the clips on top of each other and masking out the different sections you want shown in the final shot.
So, for this particular example in Resolve, we’re using masks and blend modes to combine the images. I used a simple rectangular mask for the sky and a high degree of feathering to separate it from the background. Then, I used the pen tool to create a custom mask for the foreground, because I needed an angle that followed the slope of the hill.
If you’re doing a series of these, you might want to create a template with the layers stacked and pre-masked, and just load in the new images every time you begin a new shot.
The final result almost looks like CGI, and it was very quick and easy to create.
HDR Shines at the Right Time
As we’ve seen here, HDR is a pretty straightforward process, but not suitable for every shot. It works wonderfully for landscapes, interesting weather situations, establishing shots, and transitions.
Just remember, to get the best results, it’s best used when the shot meets the following criteria:
- There’s no camera movement.
- There’s a wide difference in dynamic range within the shot — like very bright highlights and very dark shadows.
- The dark areas appear in different areas of the shot than the bright areas.
HDR offers an effective way to add production value and capture jaw-dropping, detail-rich scenes with just a camera, some compositing, and a little imagination. Your viewers won’t believe their eyes.
Looking for more post-production video tutorials? Check these out:

