Video Tutorial: Create a Callout Graphic in Adobe After Effects
Need to point out a specific part of your image with custom callout graphics? Check out these step-by-step instructions for your next project.
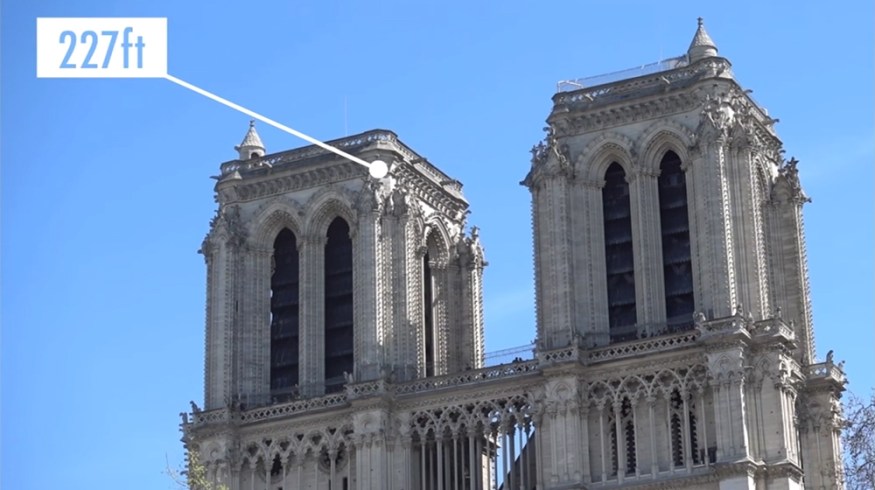
In this tutorial, we’re going to create a callout graphic to help illustrate the height of one of the towers of the famous Notre Dame cathedral in Paris. First, we’ll set up the four main visual elements of the graphic: a circle, a path, text, and a basic background for the text. Then we’ll bring the graphic to life via keyframing and tracking. Let’s get started.
Create
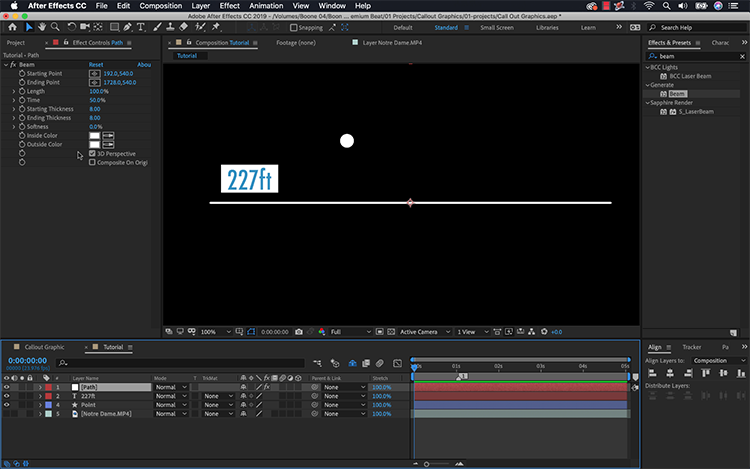
First, for the circle, I’ll create a small ellipse using the Ellipse shape tool. Holding the Shift key will constrain the proportions. Next, I’ll add text reading 227ft, and then use the Rectangle shape tool to create a simple white rectangle background for the text. I’ll grab both the text and rectangle and perfectly place them using the Align panel. Once in place, I’ll parent the rectangle to the text layer to make sure that the background follows.
For the path, I’ll go to Layer > New > Solid and then add the Beam effect via Effect > Generate > Beam. The Beam effect gives me tight control over the start and end points of a path, which is the real key to making a good callout graphic work. For the attributes, I’ll set Length to 100%, change both the Inside and Outside colors to white, and put the softness at 0. Now I’m ready to connect these elements.
Connect
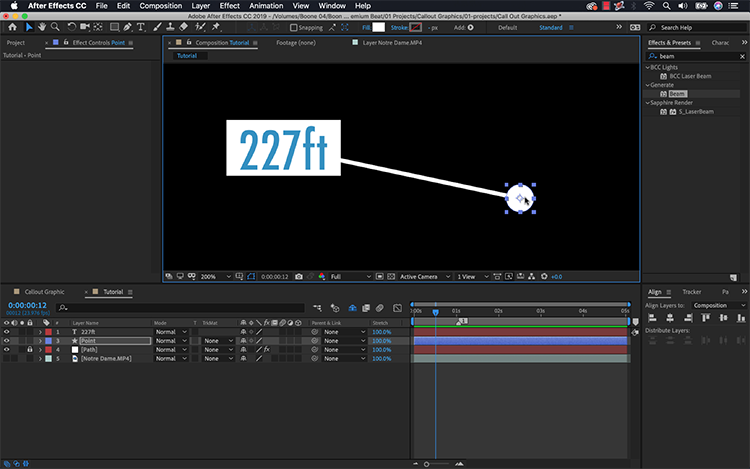
To make the callout animation work effectively, I need to connect the elements in a specific order. I want one end of the path to attach to the circle element and the other end to attach to the text. This is quite easy, as the Beam effect has keyframable start and end points. I’ll use the starting point for the circle and the ending point for the text.
To view the Beam effect on the timeline I’ll first select my path layer and press keyboard shortcut E. Next, I’ll grab both the text and circle layers and press P to bring up Position. To connect these attributes, you can simply use the property pick whip of the start/end point of the Beam effect. If you’re using an older version of AE, you’ll need to first add an expression by Alt-clicking the stopwatch icon next to the attribute to view the property pick whip.
Finally, I’ll connect the start point of the Beam effect to the circle’s position attribute, and the endpoint to the text’s position attribute. Now when I move either text or the circle layer, the path will follow. With everything connected, this graphic is ready for animation.
Animate
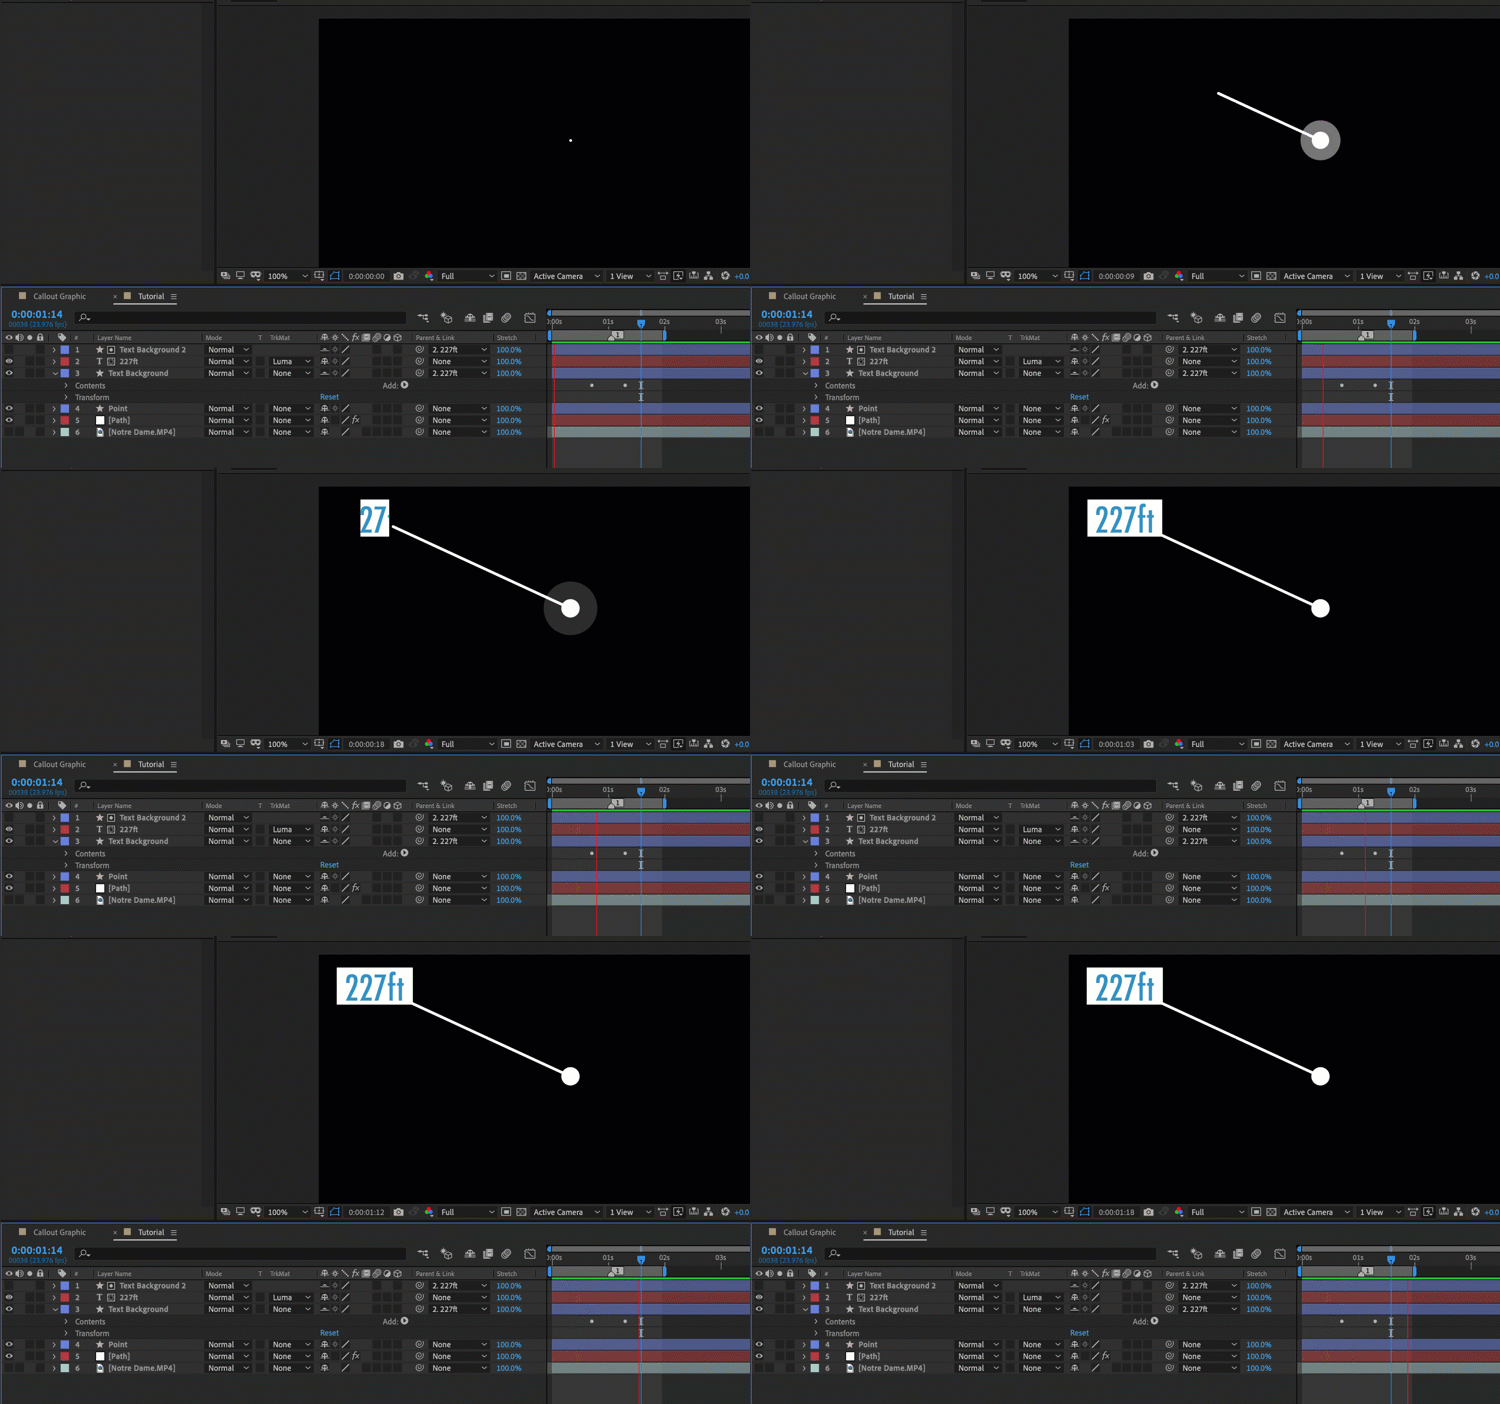
The first element to animate is the circle, so I’ll start there. For the circle, it’s as easy as animating the scale from 0. To create a small blip effect, I can duplicate the circle element within the shape layer and then change the scale and opacity to create a small radar-style look. For the path, I’ll need to reopen the Beam effect attributes of my path layer. To bring the path to life, keyframe the Time attribute from 0 to 50%.
Next, I’ll animate the text background rectangle by keyframing the X scale attribute of the shape element from 0 to 100. Then I’ll duplicate the rectangle, move it just above the text, and change the Track Matte of my text layer to Luma Matte. Now when the background layer animates on, it reveals the text at the same time.
Track
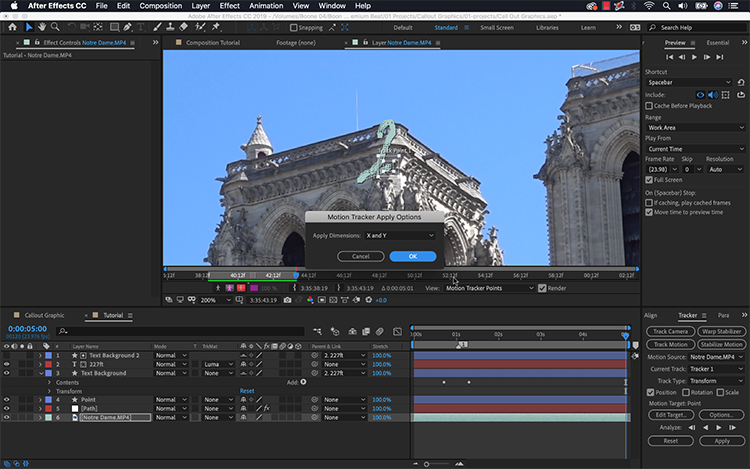
My graphic is now animating on screen, but it’s still lacking something — movement. The callout is referencing the height of the tower of the cathedral, so I want the graphic to point there. Since this is a moving handheld shot, I’ll ideally want the point of the graphic to move along with the camera. I can achieve this via a single-point track.
First I’ll select my cathedral video layer and then go to Window > Tracker. I’ll bring my playhead to the beginning and then select Track Motion in the Tracker panel. This will bring me into the Layer panel, where I can track the movement via my track point. After finding a good track point, I’ll go to Edit Target and select the Circle layer. Now I’ll analyze and apply the track. Once applied, tracking keyframes will apply to the Position attribute of the circle layer. For more versatility, I could track the motion to a Null layer instead.
Voilà! I now have a functional callout graphic.
Interested in the tracks we used to create this video?
- “Start Living” by Vincent Tone
- “Soul Summer Vibe” by Mattijs Muller
- “Pathfinder” by Tonemassif
- “Edge” by One Wave
- “Dissonance” by Tonemassif
- “Bach – Brandenburg Concerto No. 3 in G (1st Movement)” by Wilfred Symphony Orchestra
Looking for more After Effects tutorials? Check these out.
- Video Tutorial: How to Create Anime Speed Lines in After Effects
- Video Tutorial: How to Fine-Tune Keyframes in Adobe After Effects
- Video Tutorial: How to Morph Graphics Using Adobe After Effects
- How to Create an Animated Circle Burst in Adobe After Effects
- Video Tutorial: Create an Action Promo With After Effects


