
Create a Retrowave Background Loop with Adobe After Effects
In this video tutorial, learn how to create a retrowave background loop in Adobe After Effects, including a free project file!
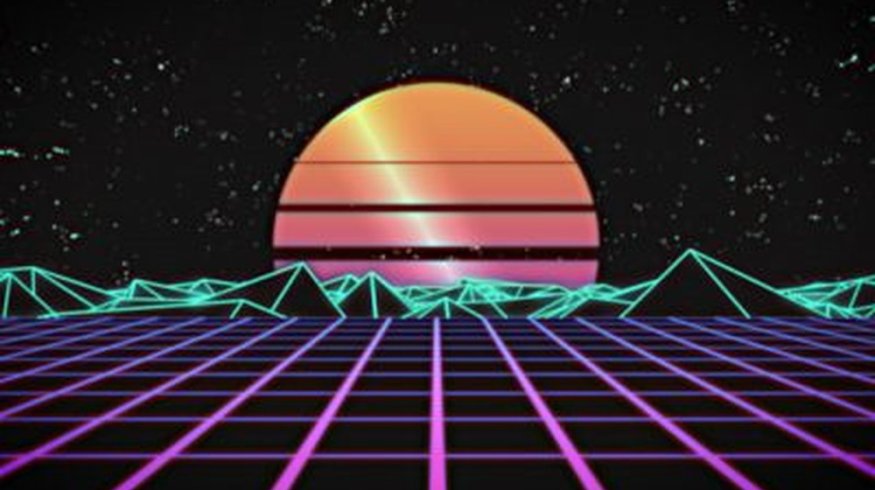
More than ever, artists are integrating ’80s-inspired elements into their video work. retrowave (sometimes referred to as synthwave or outrun) typically has a neon, futuristic feel too it, combined with the nostalgic look of ’80s design. In this tutorial, we’re going to create a looping retrowave background in After Effects. No third-party plugins needed!
Ready to dive into some ’80s nostalgia? Let’s get started!
These assets are free to use in any personal or professional project. By downloading, you agree not to redistribute these assets.
Floor Grid

Begin your retro-’80s adventure by creating a floor grid.
Nothing screams the ’80s more than a neon floor grid, which is surprisingly easy to create using a square-shaped solid layer with the Grid effect. The default grid settings work perfectly. Then, we can make the solid a three-dimensional layer and position it as the floor. To animate the grid scrolling, use the Offset effect. Finally, because the grid is white, give it some color by using a Luma Matte with a solid that has the Gradient Ramp effect applied.
Spinning Stars

Loop your star background for a more three-dimensional feel.
Creating a starry background in After Effects can be tricky. And, a looping animated one, even more so. But, by using the Fractal Noise effect with some high contrast, we can get something that looks quite similar to a night sky. Looping the star background can also be done using the Offset effect. However, the issue we now face is that the star background looks very two-dimensional. So, to give the stars more of a three-dimensional or spherical look, apply the Optics Compensation effect, then check Reverse Lens Distortion and set the Field of View to around 95.
Sunset Animation
Creating the sun is as simple as masking out a sphere and applying the Gradient Ramp effect. Creating the looping animated lines is a bit more complicated. It requires us to make a matte animation in a new composition. Essentially, we have a white background with black lines that loop. After we’ve created one of our line animations, loop it using an expression. After the matte animation is complete, place that composition above the sun layer, and set the sun layer Track Matte to Luma Matte. Now, the lines will loop onto the sun.

Create looping, animated lines around the sun.
Now, apply the CC Light Sweep effect to the sun to animate a retro light sweep across it.
Making Everything Look Retro
Giving all of our visuals a VHS aesthetic ties everything together. To do this, we can use a combination of effects on an adjustment layer. The first is the Lumetri Color effect, which we’ll use to fade the black levels and turn down the sharpness. Next, use two copies of the Channel Blur effect to emulate some chromatic aberration. Set one of the Channel Blur effects to only blur on the horizontal axis, and the other to only blur on the vertical axis. Finally, for a more processed look, apply the Unsharp Mask effect and turn up the Mask Radius setting.

Add a subtle shake to your image to complete your retro look.
To achieve a subtle shake on the footage, create another adjustment layer above everything and apply the Transform effect. Then, apply a wiggle expression to the anchor point setting of the Transform effect.
Project File Extras
Be sure to download the project file for additional Retrowave loops. The project file includes the primary scene we created here, along with some extra assets — such as the low-polygon mountain images.

Shake it up a bit by altering your color palette.
It also includes some bonus retrowave and vaporwave backgrounds, the latter of which is more ’90s-inspired.

Begin your next adventure with this ’90s-inspired vaporwave background.
Interested in the tracks we used to make this video?
- “Stranger Things Among Us” by Julian Bell from PremiumBeat.com
- “Star Drive Engaged” by Emmett Cooke from PremiumBeat.com
- “Pink Drive” by Krisztian Vass from PremiumBeat.com
- “Bushido Belief” by Tonemassif from PremiumBeat.com
- “Ocean Tranquility” by Cymatix from PremiumBeat.com
Looking for more on After Effects? Check these out.


