DaVinci Resolve 15 Video Crash Course — The Edit Tools
In part three of our six-part video series The DaVinci Resolve 15 Crash Course, we cover the edit tools you need for adjusting your clip placements.
Welcome to part three of the PremiumBeat Resolve Editing crash course. If you’ve been following along since episode one, we won’t keep you waiting. As usual, you’ll find the video tutorial below, and an abridged transcript of the tutorial underneath the video to recap on any elements you may have got lost on within the video. However, as always, to fully follow along we recommend you watch the video for the full experience.
Trim Tools
In episode 2 we went over three-point editing and inserting a clip onto the timeline from the source viewer. However, sometimes when you edit a clip onto the timeline, it still needs some fine-tuning. Instead of going back to the source monitor, making the correction and replacing the clip, we can use the trim tools to implement the adjustment.
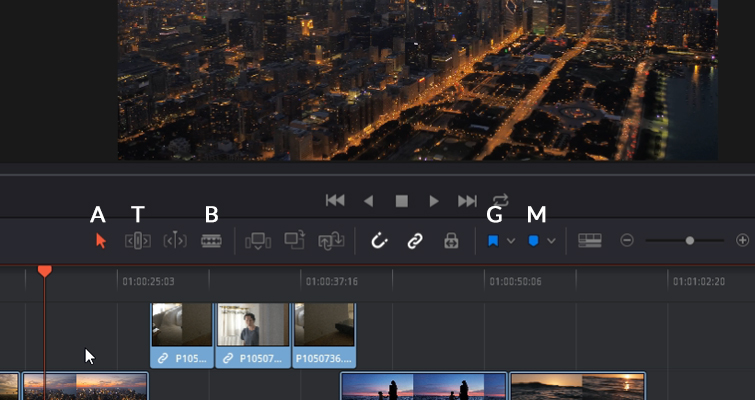
First, we have the primary and default selection tool, which you also get to by pressing A. I’m sure everyone, even if you’re completely new to Resolve, will understand what the selection tool will do. You can move and rearrange clips, or extend and decrease the duration of a clip. And see these little white handles at the beginning and end of each clip? Well you can drag these inward so it will create a fade in or out. What’s more, you can do this with both the video and audio clips. You can also adjust the volume of an individual audio clip by moving the volume bar up or down.
Next to the selection tool is the Trim tool. But since that’s going to be our primary focus of the episode, I want to jump to the blade tool instead (B on the keyboard). The blade tool will splice clips up into smaller clips for further adjustment or deletion. What’s nice about the blade tool is that unlike the other tools, a preview appears when we hover above the clip. That way we don’t have to move the playhead to see what we’re splicing.
The blade tool will also splice any linked audio. So, let’s say you want to remove this section of the video, but have the audio remain. Usually you hit B and splice at the points you want to delete, but then you have both the video and the audio react to the edit. But in this instance, we don’t want that. So, you can unlink the clips by right-clicking on either the audio or the video and hit Link Clips. I know that says we’re linking them, but if there’s a tick next to the action it means we’re turning that feature off.
Similarly, we can also deselect the linked selection button. This works equally well. It allows you to splice just the audio or video, and lets you move the audio or video individually. However, as noted by the chain-link symbol on the clips, they are still intrinsically linked and will become as one if you turn on the linked selection button.
While we’re here, you may have noticed when I moved the audio away from the video, this red time code appeared.
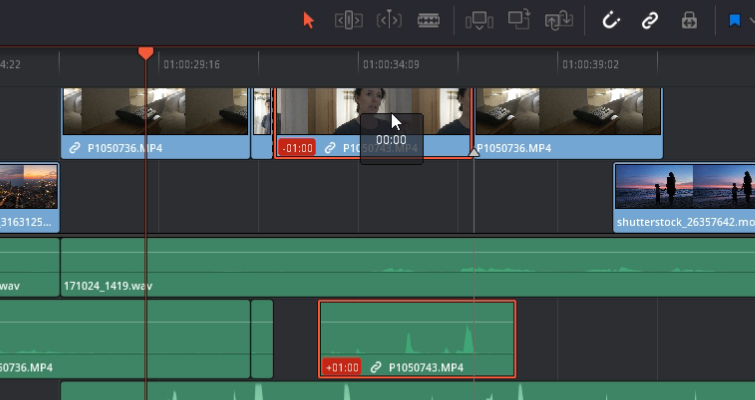
That’s there to tell us that the connected media is out of sync. If this isn’t an intended edit, you can right click and select move into place. This will take the media that you clicked to the new position, or slip into place, which will keep the media in its current position, but slip the footage into place. Not too sure what “slip” means? Well, let’s jump to trim edit mode and find out.
Try Trim Edit Mode, which you can also enter by pressing T. When you’re in Trim Edit mode, you can complete different trim edits depending on where you place your cursor on the media clip. This is a much faster process for performing edit tasks. You no longer have to hit various keyboard shortcuts or find the particular edit tool icon.
So, let’s look at what tasks you can perform and how they work. Before doing so, turn auto select back on. We need that on to get the full benefits of the trim mode, as some trim edits won’t perform properly without it.
Roll Edit
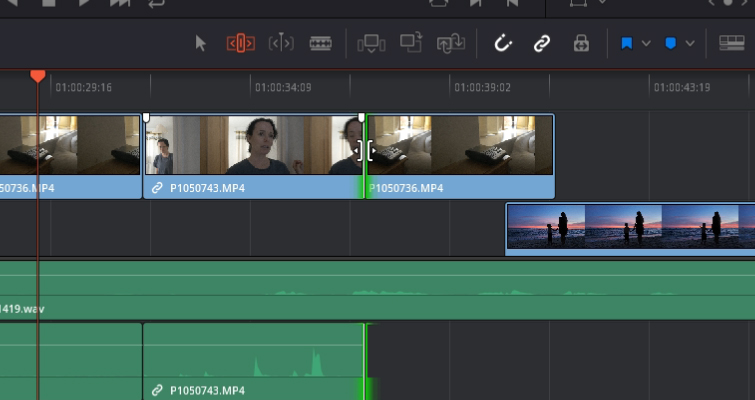
You will find this edit under the trim operations in any guidebook or manual. You can also perform a roll edit in the selection mode. Simply place the cursor directly within an edit point, which is where one clip connects to another. In doing so, the cursor will change to this icon.
With a roll edit, you’ll increase or decrease the length of a clip while increasing or decreasing the length of the adjacent clip. For example, in this video clip, I don’t want the woman to walk into the doorway. I want her to be already standing there. I could decrease the length of the clip from the start to the point where I want to be removed, which would give me what I want. But, then we’ve left a space, which we could cover by extending the preceding clip. But that’s one click too many. We can do it by merely roll editing.
Ripple Edit
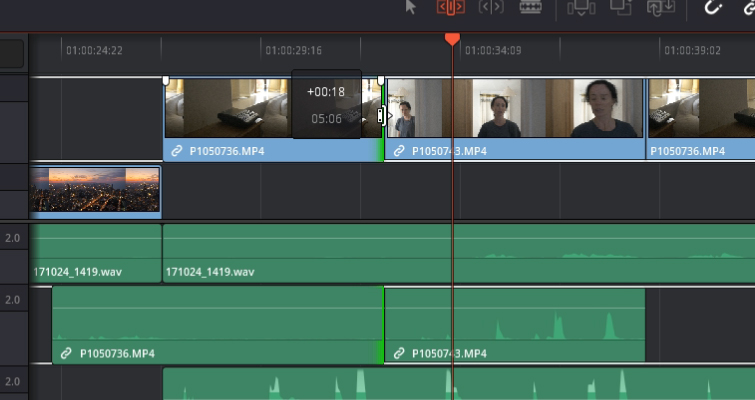
To perform a ripple edit, bring your cursor slightly in from the edge of a clip. The following icon will appear and allow you to proceed with a ripple edit.
With a ripple edit, when you increase or decrease the length of the clip you’ve selected, all other media clips on the timeline, providing they’re on a track with autoselect active, will move forward or backward with the clip. So when you increase the duration of a clip, it ripples all of the other media. This means nothing other than the length of the timeline is changed.
If the edge of your clip is highlighted in green, that means that the clip still has unused footage. So, you can extend it. If the edge is red, that signifies that there’s no more footage to work from.
Slip Edit
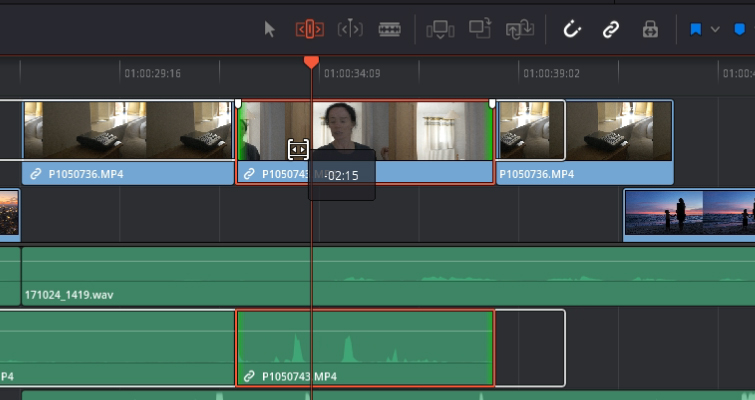
It’s very easy to accidentally perform a slide edit instead of a slip edit, since the area from one tool to the other is minimal.
To perform a slip edit while in Trim mode, place the cursor on the thumbnails of the track, or virtually the middle area of the clip. The slip edit is quite easily my favorite trim tool. It will slip the placement of the media to a different section than what’s marked when inserting the clip to the timeline.
If I double-click this clip and bring it into the source viewer, we can see what the marked in and out region is. We still have all the media available to the left and right of our marked points. The slip edit will allow you to move the media to a different section of what’s available. Keep in mind, if your clip is short and you insert the entire clip onto the timeline, you won’t be able to perform this edit.
Slide Edit
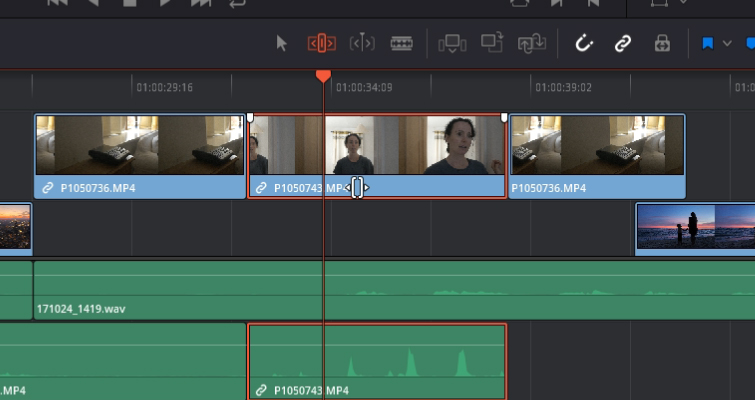
To perform a slide edit, place the cursor underneath the thumbnails where the title of the media clip is placed. If you have a minimized view of the tracks, it may be harder to position the trim cursor correctly.
A slide edit allows you to slide the clips position along the track. In doing so, it will also increase or decrease the position of neighboring clips. So, it’s kind of like a roll edit, but you’re moving the position of the selected clip on the track instead of extending or decreasing either side. You’ll also see a four panel split screen in the timeline viewer showing you the new endpoint for the previous clip, the new start point for the proceeding clip, and the in and out section of the clip being moved to allow you to move the clip with precision.
These are the trim tools. When I first got into editing, I didn’t use these as I felt like they were a gimmick. It was only after a few years that I saw how beneficial they were. If you’re new to editing, get to know these tools sooner rather than later.
Markers & Flags
With the trim tools covered, let’s look at using flags and markers. As this is a crash course, there’s a good chance that you’re entirely new to editing. So, using flags and markers to highlight errors or to include information for the audio editor to see may seem a little overkill when it’s more than likely just yourself editing. However, they’re great for bookmarking a particular clip to remind you to fix an error, or to let yourself know that a clip needs to be reshot.
To place a marker on a clip, you need to have the clip selected. Hit the marker button or press M, then by pressing G or the Flag button, you flag the clip instead. You can then double-click the marker or flag, and insert the details you need. You can even change the color-code clips to let you quickly find specific issues.
The difference between a flag and a marker is that the flag will just flag the clip as a whole, whereas a marker will mark the frame of that clip. Alternatively, if you don’t want to mark a clip specifically but just that moment of the timeline, perhaps to remind yourself to insert an SFX of a footstep, you can deselect the clip and just hit M on the timeline to create a timeline marker. It will also appear on the timeline when fully zoomed out, so you can quickly jump to a marked selection. In Resolve 15, Blackmagic also introduced an impressive annotations feature. But in the spirit of keeping this episode short, I’m going to be cheeky and direct you to the write-up of the feature over on the blog.
To conclude this episode, let’s introduce you to a feature I’ve talked about quite a bit: the auto select.
Auto Select
The auto select might be one of Resolve’s most important edit functions to understand. It will directly affect how the clips on your timeline respond to edits. For example, here I’ve marked a selection on the timeline using I and O to mark in and out. We can see that auto select is active for video track one and audio track one, but it’s not active for audio track two. Audio track two is left out of the edit, even though it’s part of the marked area. You can see if I turn auto select off for audio one but turn it on for audio two, then audio one is left out of the edit.
In essence, auto select is letting Resolve know, “yes, I want to be affected by timeline and track edits.”
Sometimes though it can catch you out. Auto select is on by default. So, for example, let’s say I add this soundtrack to a new track, decide I want it to start at 00:30, and then I delete a video clip from track two which doesn’t have auto-select on. You’ll find that audio 6 slides back to account for the deleted space of the media clip.
I do find it’s best to either have auto select on for all tracks, or to have it completely off.
This was the secondary episode to the edit page and combined with the first segment. You now should have enough knowledge to add clips to a timeline in the correct fashion, and of course edit them. In our next episode, we’ll look at working with audio on the edit page and using some elements of the Fairlight audio page.
Lewis McGregor is a certified DaVinci Resolve trainer.
Interested in the tracks we used to make this video?
- “Relaxing in Vermont” by Chill Study
- “Be Gentle” by Ben Beiny
- “Brooklyn Drive” by Chill Study
Looking for more on Resolve? Check out these articles.


