
Review: DaVinci Resolve 16’s Cut Page — Is It Any Good?

If you’re an editor on the move, DaVinci Resolve 16’s new Cut Page can really improve your workflow. But if you’re not, then maybe not.
The biggest surprise from Blackmagic’s NAB Resolve demo was the addition of a brand-new page called the Cut Page. The new page is intended to simplify and streamline the editing process by removing many of the systematic elements of the edit page. The Cut Page is for those on the go — editors who drop their footage into the timeline then quickly edit, render, and deliver. This isn’t ideal for longer projects, but for short scenes and simple vlogs, the Cut Page is your new home.
In the demonstration, Blackmagic founder Grant Petty said he was frustrated with how YouTube educators would insist on using bins to organize the edit, and three-point-edit clips, onto the timeline. He, on the other hand, was a fan of dropping all media clips onto the timeline and editing the clips as such. Realistically, that’s not practical. However, this is the intention behind the Cut Page, so let’s look to see if that translates in practice.
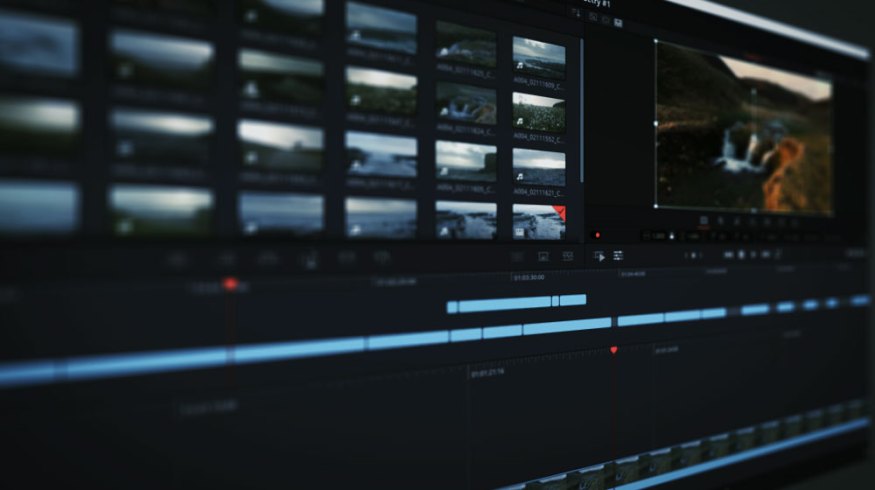
This is the Cut Page.

And, if we mirror it with the edit page with a few panels open . . .

. . . we can see what Blackmagic is trying to do — or more accurately, what they have achieved. It’s compact and streamlined, and as we heard at NAB 1019, the UI is intended to be smaller to accommodate laptop screens.
There’s no extension button for the panels because most tools have designated buttons. Using the title generator, on the Edit Page, I would have to open the effects library, expand the panel, scroll down to the titles (or open the toolbox dropdown menu) then click on titles. On the Cut Page, I just hit the title button, and we’re here.

You can see this ease of access and compressed layout throughout the entire page. On the top left, we have our media pool, and to avoid hopping back and forth to the media page, you now can import from a media source of your choosing. Yes, you could also import a file on the edit page, but that was by taking a file from the desktop (or folder window) and placing it onto your timeline or into your media pool. You had to leave Resolve to bring a file in from the edit page. In Resolve 16, we can import directly from the Cut Page by clicking icon 1 to import individual or multiple files, and by clicking icon 2, we can import an entire folder, which will become a bin.

It’s interesting to compare the sheer size of the media pool on the Cut Page to the Edit Page. On the Edit Page, to explore the media pool, you have to click an additional two times to get decent viewing space, whereas in the Cut Page, we’re instantly see substantial UI space. This is primarily because the media pool has replaced the area of the source viewer. On the Cut Page, we only get the one viewer, and now we get extended space for the media pool, transitions library, titles, and ResolveFX.
Likewise, with the extended space, we also get a new and intuitive way to view your media in the form of compressed mini-clips. When you activate this view option, you’ll see that the beginning and ending of the clip correspond within the thumbnail preview. Whether your media is twenty seconds long or two hours long, the clip is displayed with the same width, and you can view and scrub your content within.

There’s no denying that many of these implementations are smart and unique. At the same time, it’s left me wondering: When would I use this method of previewing my clips? Since you can’t increase the size of the preview, you’re more than likely still going to review the clip on the source viewer, regardless. And with that, yes, the Cut Page does have a source viewer, which you can activate by double-clicking an item from the media pool, and the source viewer will open in place of the timeline viewer. This is similar to how the Edit Page operates when you activate one working viewer only.
We also have one of the most significant elements from the NAB live demo — being able to look at all your clips in the source viewer, as if from a source tape. Instead of individually clicking each video clip in the media poll to bring it to the source viewer, you can now scrub through every single media clip, as if a sequence of shots from a tape-based import.

As you can see in the example above, when using this preview, it lets you know how many clips are currently in the source tape preview, and from which bin. However, I do feel like this is an archaic feature, and in reality, you’re going to be spending more time trying to find the clip in the hours of material than just searching for it in the media pool.
Although to give credit where it’s due, when you’re using the source tape display, it intuitively highlights the current clip in the media pool. Likewise, if you insert part of the source-tape-displayed clip onto the timeline by creating an in-and-out point, and if that in-and-out point spans three individual clips, then those appear on the timeline individually. Therefore, even though it appears as if you’re creating an in-and-out point of what might appear as one large file, Resolve still registers the individual files.
On the Edit Page, you use the inspector to adjust clip properties, such as the size, position, and rotation. You can even add quick effects, such as a dynamic zoom. On the Cut Page, that panel would take up too much UI space, so instead, the properties are neatly tucked away in the timeline viewer itself. When you click the sliders icon underneath the timeline viewer, a Swiss Army knife of tools and adjustable parameters appears.

You can change the position, zoom, blend mode, and virtually 99% of the features in the inspector panel. While I was rummaging around the Cut Page and using the new tools, something was bugging me. I felt like something was off when using this page, and I just couldn’t put my finger on it. When I got to this tool, I realized my complaint: Why aren’t these features on the Edit Page?
On the Edit Page, if you have the media pool open (as well as the source viewer) and then open the inspector, the source viewer closes to make room, and the UI becomes cramped. This new toolbox function improves the UI’s ease of access, while deploying all the features from the inspector. On the Cut Page, I find that these tools, especially the transform tools, are more efficient than the Edit Page’s inspector. Of course, we do have something similar on the Edit Page: the transform tool. But that only allows for manual position changes, rotation, and scaling by adjusting the clip itself — like a photo in Photoshop.

Blackmagic wanted to make the Cut Page a fast page, and these icons and this toolset achieves that goal. However, I wish there were something like this on the Edit Page, and I feel like there’s no reason why there shouldn’t be. When 16 is released from beta, it would be great if we cross some of these features over as a voluntary workaround, similar to how you can fully customize the user interface of Adobe programs.
The most prominent Cut Page feature to talk about is the dual timeline.

I understand the principle behind it, but I don’t know how well it’s going to work in practice. With the new timeline, you can add clips, trim clips, delete clips, and move clips. So, despite it looking like an overall mini-map of everything on your primary timeline, it’s fully functional and works as if you’ve compressed the clip height on the edit page timeline. It is always fully zoomed out to show every clip in the timeline, and you can’t zoom in to a specific section, which may make it impractical for moving clips shorter than 24 frames.
And, just as important, the upper timeline doesn’t show a clip thumbnail preview or clip name. Irritatingly, you also can’t zoom out of the primary timeline underneath. This somewhat negates the feature of the timeline above, as you could click a clip in the upper timeline to jump back to an earlier part of the edit. However, you still don’t know what you’re jumping to; therefore, in most circumstances, you’re likely going to select the incorrect clip. As such, you’ll then need to jump down to the primary timeline to scroll across and find the correct clip you wanted to select.
If the upper timeline had some clip preview, or if the bottom timeline allowed for a slight zoom out, it would save a lot of misclicks.
I have my fair share of grievances with the Cut Page, but it’s not bad. I can see how it’s supposed to work, and to some extent, it works well. But I think my grievances stem from the fact that many of the exclusive features added to the Cut Page could be (and are needed) on the Edit Page. Likewise, many of the useful features on the Edit Page have been blocked from entry to the Cut Page to make it wholly unique. Perhaps instead of a brand-new page, we could’ve had the option of removing or adding panels on the Edit Page — in order to make it a more customizable experience, along with the addition of the new features.
I’m not a software engineer, and I don’t know how that would impact Resolve’s performance (maybe it’s not even possible), but it seems a shame. On the Cut Page, you can quickly add a new video track by hitting the add track button. On the Edit Page, you still need to right-click and select add tracks. Why?
Lewis McGregor is a certified DaVinci Resolve trainer.
Looking for more on DaVinci Resolve? Check out these articles.


