The Best Built-in Color Grading Tools in FCPX
FCPX’s array of built-in tools allows you to get the best color possible out of your videos. Let’s look at how these tools can help you elevate your color process.
Color grading skills take time to refine and develop, and legitimate expertise requires practice and experience. Nonetheless, with the right tools, eye-catching color is well within the reach of every videographer.
Final Cut Pro X features a pretty wide selection of built-in tools that can help video editors nail their desired aesthetic. Take a closer look at a few of them following this general “how to” tutorial that covers the fast and easy basics of working with color in FCPX.
Built-In Camera LUTs
Shooting in any LOG format begs for a LUT to quickly grade the footage back to a palatable REC. 709 color space, and FCPX has a number of high-quality camera conversion LUTs built right in.
As someone who almost always films in Canon LOG 2, having a quick conversion LUT is vital. Sure, you can get similar LUTs in Premiere and Resolve — however, I believe the LUTs in FCPX feel more pristine and polished, and they ultimately yield a better final image.
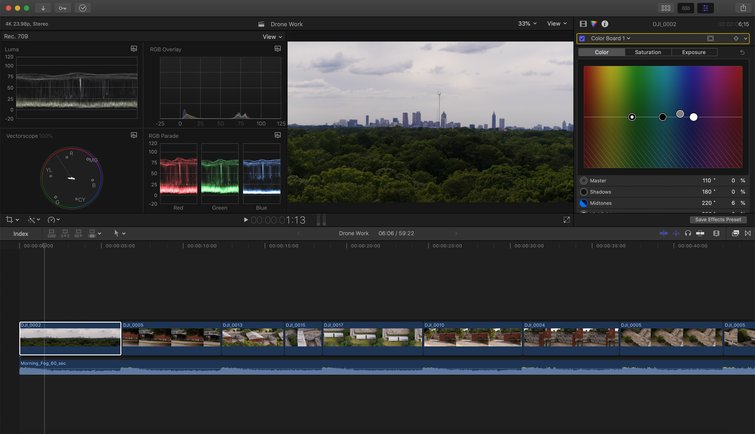
Color Board
I’ve always been a fan of FCPX’s built-in color tools, and the color board has long been one of my very favorites. It’s always felt intuitive and worked perfectly for my workflow. With the most recent update, it’s arguably gotten good enough to give Premiere’s Lumetri Color a run for its money.
The color board allows you to adjust hue, saturation, and tint across four parameters: Master, Shadow, Midtones, and Highlights. I like to use the color board as the very first broad stroke in my color grade, if you will. When I need to quickly balance an image’s color, this is where my session starts.
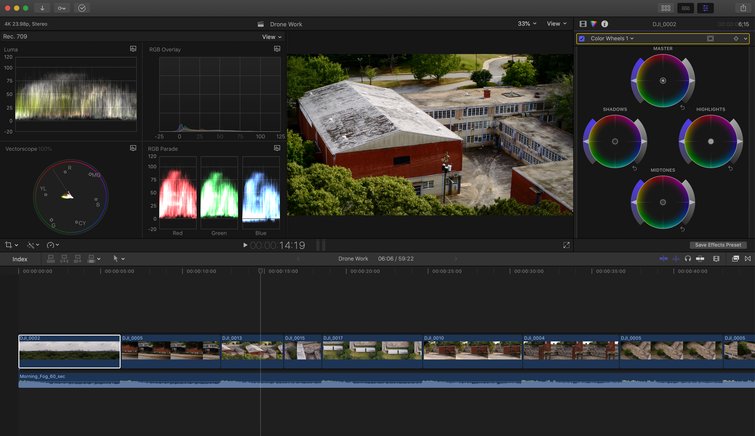
Color Wheels
The addition of color wheels is a gigantic step forward for coloring in FCPX. This robust tool allows for the most minute changes to the coloring of your clips, and it’s a game-changer for video editors and post-production professionals who rely on FCPX.
The built-in color wheels give you access to a deeper selection of color manipulation options, like isolated color selection, exposure adjustments, RGB adjustments across tonal ranges, and easy masking.
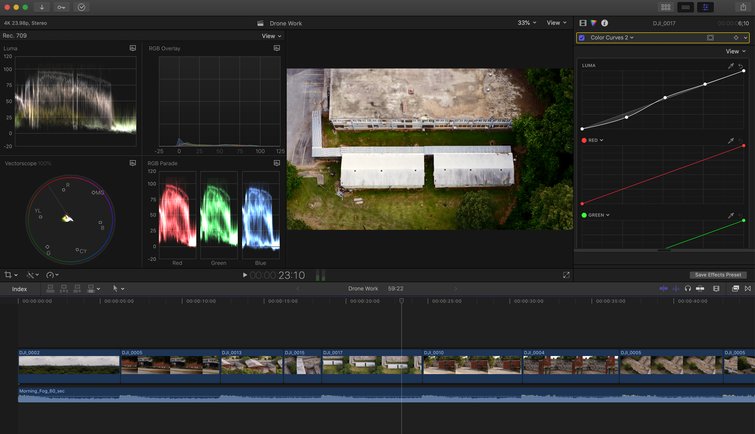
Color Curves
FCPX’s advanced color curves give you the ability to refine your image’s exposure and contrast in order to achieve the most cinematic image possible. Red, green, and blue curves give you the power to really elevate the color and range of your image, well beyond the benefits offered by simply using an S-Curve.
Hue and Saturation Curves

This tool assists in adjusting the hue and/or saturation to a specific highlight area of your image.
By the time you reach hue and saturation curves in your color grading session, you’re almost done.
These curves let you use an eyedropper to adjust the hue and saturation of selected portions of your image. You can isolate even the smallest part of your image by luminance, saturation, or hue to make the finest of final adjustments. This is where you really dial it all in and nail your color.
Get more from Final Cut Pro X with content designed to help you do your best work yet:
- 7 Tutorials on Improving Your Editing with Final Cut Pro X
- 10 Must-Have Final Cut Pro X Plugins
- How to Key Green Screen Footage in Final Cut Pro X
- 4 Simple Ways to Add Text and Titles in Final Cut Pro X
Cover image via meirion matthias.


