The Right In-Air Diffusion for Your Project: Haze vs. Fog vs. Smoke
Today, we’ll take a look at which in-air diffusion best emphasizes dramatic light in your scene — as well as adding production value to your set.
Haze is something that you’ll find on almost every modern Hollywood film set. It’s relatively inexpensive to run, fills up a room very quickly, and is safe to breathe. Furthermore, it hangs in the air for a very long time. Why do filmmakers use it? One reason is that it creates these amazing light streaks — as well as creating a space in the air that captures light, which produces this wonderful, evocative, smoky feeling. It adds depth to your shot because the light has to pass through the haze to get to the sensor, which diffuses the light. The further the light travels through the diffusion, the more color and sharpness it loses. This means that your subject is going to be sharper than the background.
If you compare a shot with in-air diffusion to a regular shot, the one with diffusion feels far more cinematic to the eye, as well as more evocative. It allows you to create a setting where it feels like a cinematic story is taking place, as opposed to a converted garage in Burbank.
Sometimes, filmmakers go overboard with this technique. Ridley Scott, in particular, is very famous for putting a lot of diffusion into every single scene. He has even managed to get it into outdoor scenes, as in All the Money in the World, where the characters are having a casual conversation in the garden. In order to get diffusion into the air, Scott built a garden of burning leaves in the background, which basically gave him an excuse to put diffusion through the entire scene.
It genuinely adds a lot to the scene that you’re shooting and creates the illusion that the scene is taking place in a different world. It allows you to transport the viewer because it looks different from any place we’re used to.
Let’s look at the four common ways to add diffusion to your set.
1. Hazer

Image via Reel EFX.
The first way is to use a Hazer (like the DF-50), which retails at around $1,600 and weighs approximately forty pounds. It’s not particularly light, nor is it easy to transport. However, if you remember to keep the haze liquid topped off at all times, it doesn’t go through the haze liquid very quickly. The main advantages of the DF-50 Hazer is that the haze hangs in the air very well and fills the room very quickly. You can run it for less than a minute, and once it has diffused though the air, it’ll look spectacular.
2. Fog Machine
Another option that filmmakers often try to use is a fog machine. You can get fog machines — often seen at parties and used by DJs — at your local hardware store. They retail for around $25-$100. Fog machines use a different type of liquid, which is far heavier and denser. The diffusion tends to flood into a space, producing a thick, cloudy-looking fog. Filmmakers generally use a fog machine on set to double for smoke. The smoke is not as safe to breathe for a long period of time, as it’s oil-based. It definitely isn’t safe to have around children; however, it does dissipate very quickly. You can fill the room with it and within ten to fifteen minutes, it’ll settle on the floor as an oily looking substance, and then you’ll have to run it again. The reason this system is not recommended for filmmaking is because it’s very hard to level the diffusion throughout the scene.
3. Smoke or Dry Ice

Image via Bondart.
If you’re shooting outside, such as the Ridley Scott example, diffusion doesn’t work because the wind takes it away very quickly. One alternative would be to use a fog machine — or smoke. You can use a bee smoker with wood chips that has a slow burn, which leaves a larger trail and can last longer.
It’s important to note that you can’t use either of these options when there’s wind. You’d have to wait for a perfectly still day (or a still night) in order to shoot. If you’re using a fog machine outside and want the fog to stay low to the ground, you can fill a little box with dry ice that sits at the end of the fog machine. The dry ice cools the fog as it comes out of the fog machine and keeps it very close to the ground, so you can achieve that ’80s music video horror effect.
4. Humidifier
Another way to get this type of effect in a small room is by using a humidifier — or a couple of humidifiers. These are really just machines that use electricity to turn water into vapor. People who have dry throats or trouble breathing commonly use these. If you leave them in a room overnight (depending on the output or model you get), you can actually get a pretty similar effect to a hazer.
A humidifier will cost you around $80, plus a bottle of water. The biggest advantage is that you can use this option around kids — even babies. This is the preferred choice if you need to shoot a scene with a child, where the parents don’t want you using something harmful. Water vapor is 100 percent safe to breathe. In fact, it’s actually good for you. The downside is that you may need to run the humidifiers for hours to fill up the space.
5. Air in a Spray Can

One final way to create in-air diffusion is to use diffusion in a spray can, such as Fantasy Effects. Diffusion in a can is more of a photography tool than a filmmaking tool. One spray can should technically last one night when used as directed. In truth, it doesn’t really put a lot of haze into the air, nor does the haze last for very long. In any case, if you just want to get a quick shot, buy a couple of cans and spray it right before the shot. However, if you’re shooting longer scenes, that go for a couple of hours, it’s very hard to maintain a consistent level with the spray can option. In summary, it’s much better to get the industrial version and do it properly, which is why it has become a default on set. If you’re interested in creating light beams with diffusion in a can, check out Crimson Engine’s video tutorial, specifically on this technique.
Now, you’ve had some insight into haze versus fog versus smoke versus steam versus handheld diffusion. Each one has its strengths and weaknesses. The best approach is to experiment with all of these techniques to find out which one works for you.
(If you need to add haze or fog in post, check out our Vapor Elements pack.)
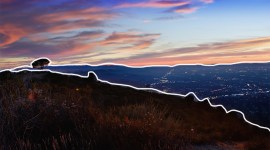
Cover image via Roman Mikhailiuk.
Looking for more on working with haze or fog in your video shoots? Check out these articles.