
How to Layer Text Behind Objects in Adobe Premiere Pro

In this video tutorial, learn how to place text behind foreground objects using basic compositing to create depth and style.
You can quickly and easily increase the production value of your project by using text in unique ways. In this tutorial, I’m going to show you how you can put text behind objects in your scene. In this particular project, I’ll be using a clip of a man walking through a desert. I’m going to make my text to appear far in the background of the shot, slightly covered by the sand dunes. Here’s a before and after.


How can I achieve this look using Premiere Pro? Let’s take a closer look at a simple step-by-step approach.
Step 1: Duplicate Layer

For the first step, I need to duplicate my layer. I can do this by holding the Alt key as I grab and drag the layer up to a new track. To make this trick work, I need to leave an empty track between the duplicate and the original. This is where my text graphic will go once I get everything else set up. I’m essentially creating a composite that will consist of three different layers. Next, I need to add a mask to my top layer.
Step 2: Mask Top Layer

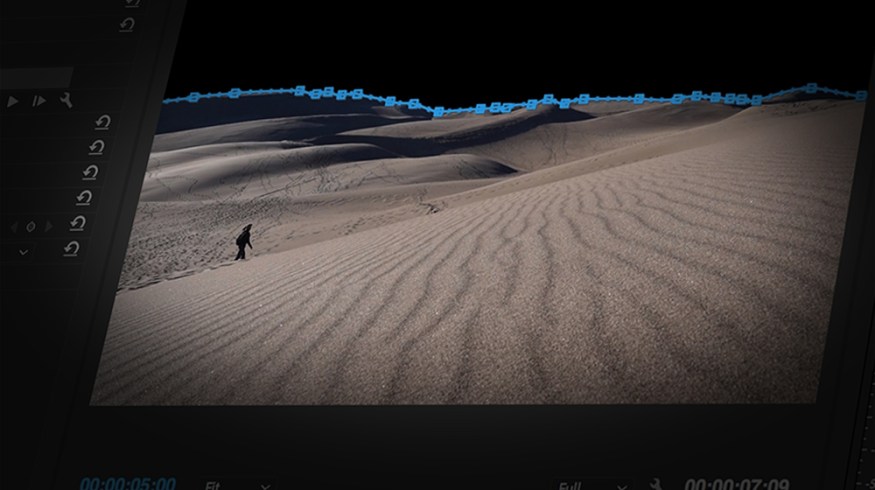
Now, I need to mask out the sky of my top layer. I can apply a mask by using the Opacity mask tools in the Effect Controls panel. I’ll simply grab the Free draw bezier tool and then begin to add a path along the horizon. To make the masking process a bit easier, I’ll bring the zoom of my Program monitor to 200%-400% and then full-screen the panel using the accent grave (`) shortcut key. Now, I have a better view and can apply the mask path in more detail. If you want to mask something that is in motion, simply add the mask and then use the Mask Path tracking tools to track the motion. Now, I’m ready to add the text.
Step 3: Add Text

Using the Type Tool, I’ll add the word “Colorado” to my scene. To work with the text, I’ll need to open up the Essential Graphics panel by selecting Window > Essential Graphics. After I select my font and properly format the text, I’ll drag the graphic layer down between my two duplicate clips. Once the layer is in position, I should see the mask taking effect. Now I can position and resize the text to get it just the way I want it.
Step 4: Fine-Tuning

My composite is nearly finished—now I just need to do some fine-tuning. Again, using the zoom and fullscreen tools in the Program monitor will help check the details of my mask. I can make any necessary adjustments to my mask path using the bezier handles and ensure the mask follows the horizon. I can also further refine the composite by adding a little bit of feather to the mask.
Voilà! Now I have text that is blending in well with my shot.
Looking for more info on Premiere Pro? Check out these articles.


