Using Lighting Effects in Premiere Pro

Here’s how to bring artificial light into your project with the Lighting Effects tool in Premiere or overlaying light leaks and lens flares.
Using lighting effects in post-production can be a saving grace if you didn’t have the resources to pull off an effect in camera. While practical lighting effects are better, sometimes using the Lighting Effects tool in Premiere can save a shot. In this article, we’re going to dive into how you can use the Lighting Effects tool to create spotlights, directional light, or even do some cool color shifting in Premiere. As an added bonus, we’re also going to show you how to incorporate light overlays with opacity tools that you can download for free.
Let’s get started!
Lighting Effects Tool in Premiere

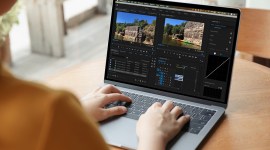
Open Premiere, and drag your clip into your timeline. In your Effects tab, go to the Video Effects tab, Adjust, then drag over Lighting Effects onto your clip. In your Effect Controls tab, you now have access to the lighting effects.

There are many parameters that you can change, but let’s start with the major light types available in the Light Type menu: spotlight, directional, and omni.
Spotlight

Obviously, this lighting effect looks like a spotlight you would find in a hard source on set. It creates a pointed artificial light that you can adjust using multiple parameters:
- Major Radius changes the size of the light source.
- Minor Radius changes the spread of the light.
- Angle changes where the light’s angle of approach.
- Focus adjusts the focus point of the light.
- Intensity changes the power of the light.
Omni

The Omni light type provides a perfectly circular light shape. The Omni light has the same tools as the Spotlight, with the omission of angle, minor radius, angle, and focus.
Directional
The Directional light type adjusts the actual light sources in your clip. You can adjust the light color here or even bring up the intensity. The Directional tool doesn’t seem to have the same power as the other two light types, but you can use it as a de facto exposure dial.
Ambient Light Adjustments

If you would like to adjust the color of the light not being affected by the artificial light you have added, there are the Ambient Light adjustments available at your disposal. The Ambient Light color parameter will shift the color of the light outside of the source. You can also adjust the intensity of the ambient light and the exposure.

If you want even more parameters to adjust your artificial light, shift around the Surface settings (Gloss and Material). These two settings adjust the power and feathering of the light source.
Light Overlays
Outside of the Lighting Effects in Premiere, you can also use overlays to create artificial light in your project. This is light recorded in a studio over a black background and then placed on top of your source clip to add cool lighting effects. You then play with the opacity settings to make the light look like it’s actually a diegetic source in your clip.
Todd Blankenship over at RocketStock has an excellent explainer video about how to incorporate light leaks and overlays into your project. To get started, download these 16 free volumetric lighting overlays available from RocketStock.
Looking for more Premiere Pro tips? Check out these articles.