
How to Make a Lower Thirds Template That You Can Reuse Anywhere
Learn how to make a lower thirds template that you can easily customize and reuse with any project. Let’s get started.
In this tutorial, we’re going to walk through how to create a reusable lower thirds template. To do this, we’ll build the lower thirds in After Effects, then export it as a motion graphics template. From there, we can customize and use the template in Premiere Pro.
DOWNLOAD THE MOTION GRAPHICS TEMPLATE PROJECT FILE
By downloading, you agree not to resell or redistribute these free assets.
Design Guidelines
While creating this reusable template, I thought of four design guidelines to follow. These guidelines should help insure that the template is universal and easy to use.
- Easy to create in After Effects, even for beginners.
- Simple to use in Premiere Pro.
- Adaptable, so it’s easy to customize.
- Render fast in Premiere Pro.
Creating the Lower Thirds in After Effects
First, create a new composition that’s 840 x 120 pixels and name it Lower Third. Next, create a new Solid Layer. Make sure it is Comp Size and name it Background.

Next, keyframe the position of the Background layer so that it slides in and then slides back out after about five seconds.
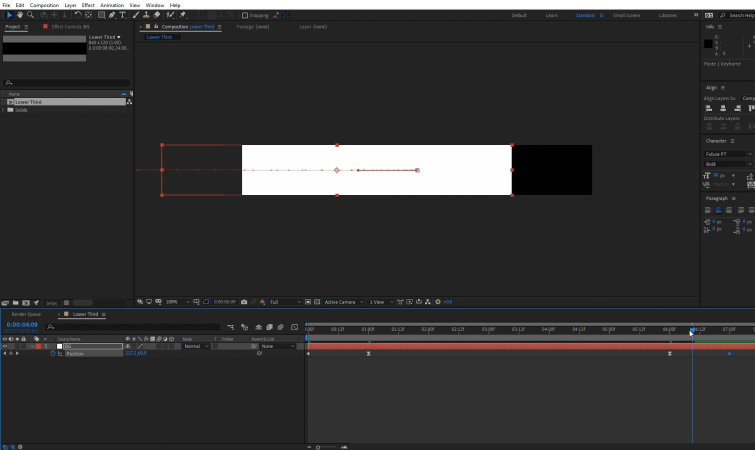
Then, unlink the Scale value on the Background layer. (Click the little chain link icon.)

Now, create and center some text above the Background layer. For my example, I just had the text say “Title Text Here.” We’ll be able to customize it later.
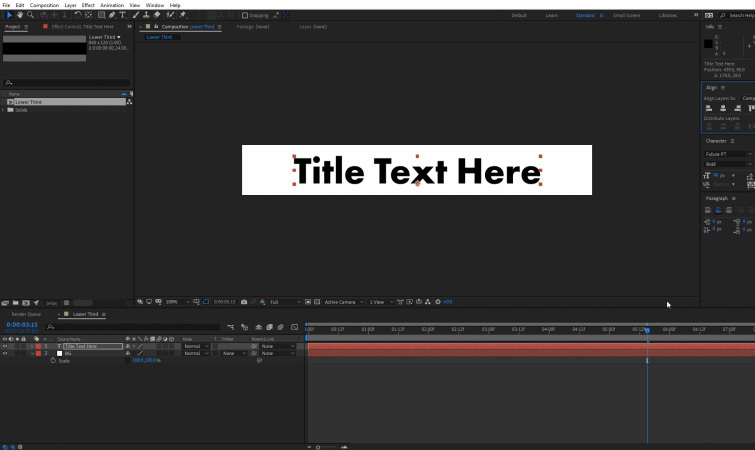
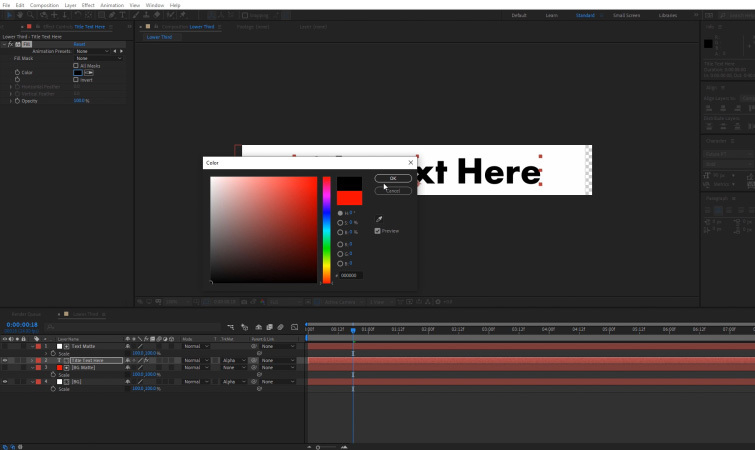
Now, we need our Background layer to reveal the text when it slides in. To do this, we need to create a Matte of our Background layer. Duplicate the original Background layer and move the second copy above the Text layer. Name the second copy Text Matte. Then, set the Track Matte for the Text layer to Alpha Matte.

Unlink the Scale value on the Text Matte layer, then Parent the Scale to the Scale on the original Background layer. The Scale value on the Text Matte layer will turn red after it has been parented to the Scale of the Background layer.

Next, we need to create a new Solid layer. Make it Comp Size and name it Background Matte. Place it directly above the original Background Layer.

Then, set the Track Matte for the Background layer to Alpha Matte.

Next, unlink the Scale value on the Background Matte layer.

Finally, apply a Fill effect to the Text Layer and to the original Background layer. This will allow us to change the color of each of these later on. You can set them to whatever color you’d like them to start as.
Building the Motion Graphics Template
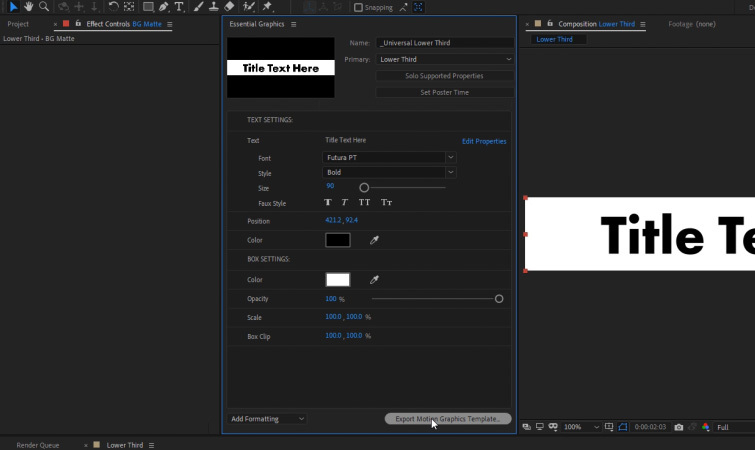
Now, we need to set the settings we’d like to adjust using the template. First, open up the Essential Graphics window. Navigate to Window>Essential Graphics. Then, select the Primary Composition, which will be our Lower Third composition. You can also name the template “Universal Lower Thirds.” Click Set Poster Time to create a thumbnail image for the template.
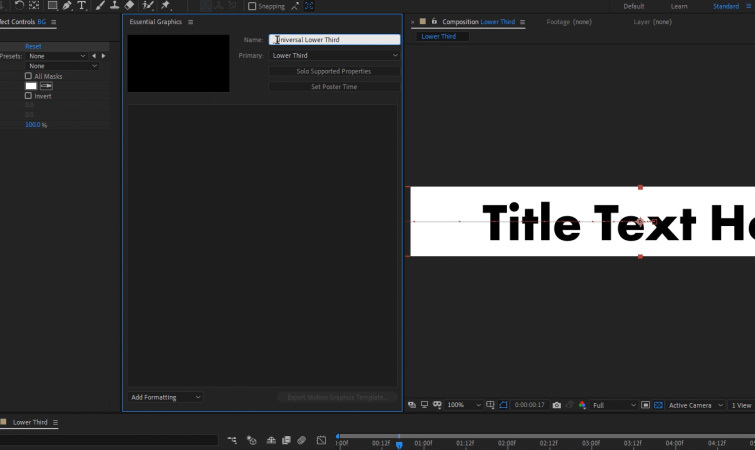
Next, add a Comment and title it “Text Settings:.” Under it, we’ll drag-and-drop any text-related settings we’d like to adjust in Premiere Pro.

Click Solo Supported Properties to reveal all of the properties that can be added to the Essential Graphics panel. These are all settings we have the option to adjust in Premiere Pro, if we add them to the template.

First, add the Source Text property. Simply drag-and-drop it into the Essential Graphics panel.
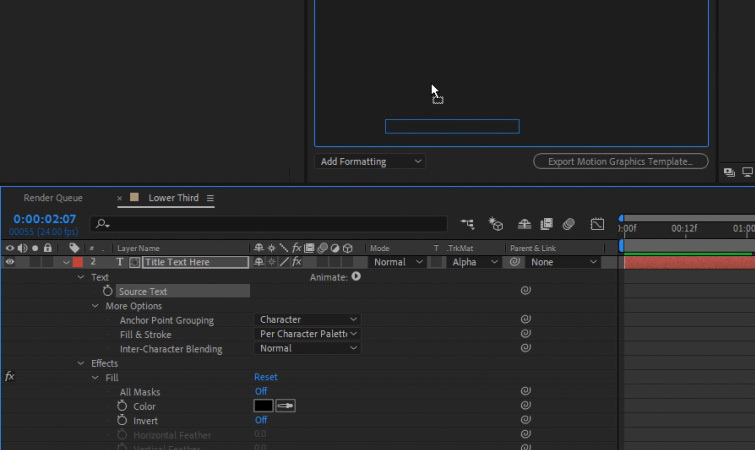
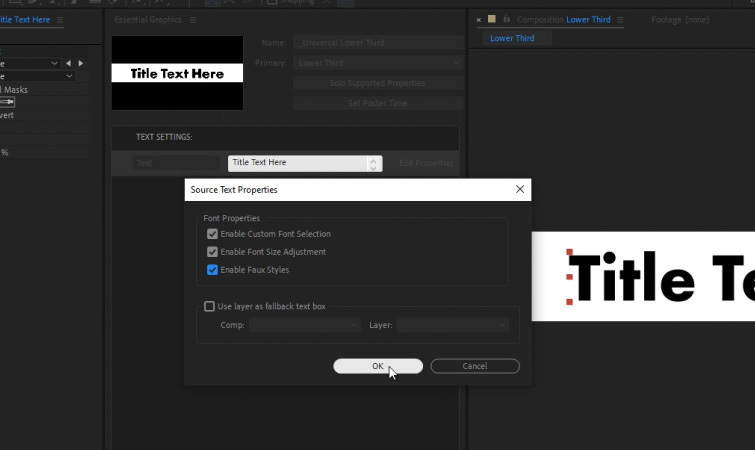
Once the Source Text has been added to the panel, click the blue Edit Properties button on the right side of it. Check on all of the Font Properties options.
Next, drag-and-drop in the text Position and the Fill effect that’s located on the Text layer.
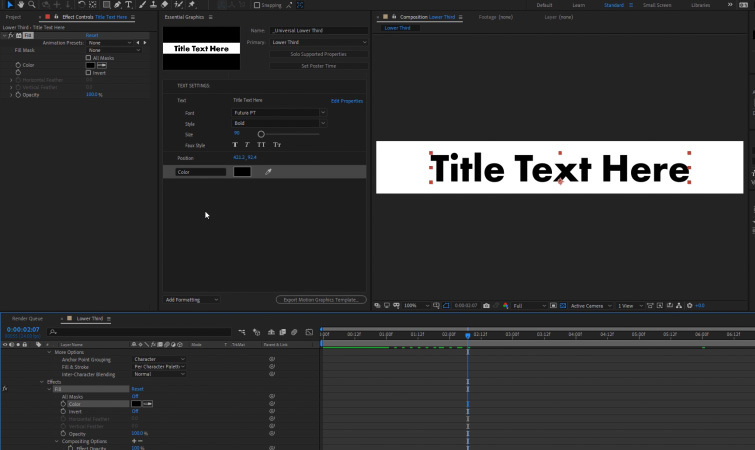
Now, add another comment titled “Box Settings:.” Then, add the Fill effect from the original Background layer.

Next, add the Opacity and the Scale from the original Background layer.
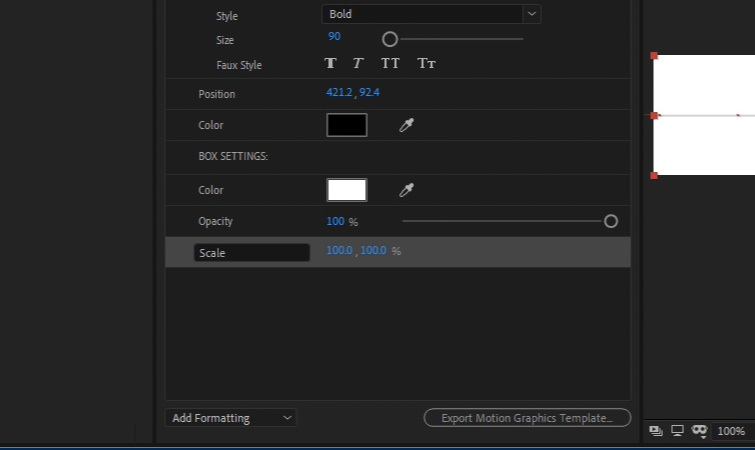
Finally, add the Scale setting from the Background Matte layer. Rename it “Box Clip.” If you adjust the Box Scale, I recommend setting the Box Clip to the same value. This will ensure that the animation looks smoother.

Exporting the Motion Graphics Template
We’re now ready to export our Universal Lower Thirds template. Simply click Export Motion Graphics Template. You’ll then need to select a save destination for your .mogurt file.
Loading the Template in Premiere Pro
To load our motion graphics template into Premiere Pro, first we need to open up the Essential Graphics window. Navigate to Window>Essential Graphics.
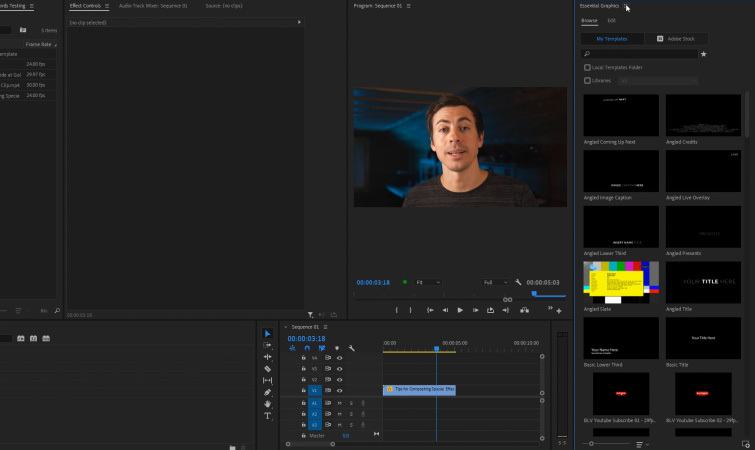
Next, click the three lines next to the Essential Graphics panel name. Then, select Manage Additional Folders. From there, click Add and select the folder where you saved the .mogurt file to. Click OK. Now, you should see your Universal Lower Thirds template available to choose in the Essential Graphics panel. The templates are listed in alphabetical order.

Using the Lower Thirds Template in Premiere Pro
To use the Universal Lower Thirds template, simply drag-and-drop it onto the sequence timeline, just as you would any other piece of footage.
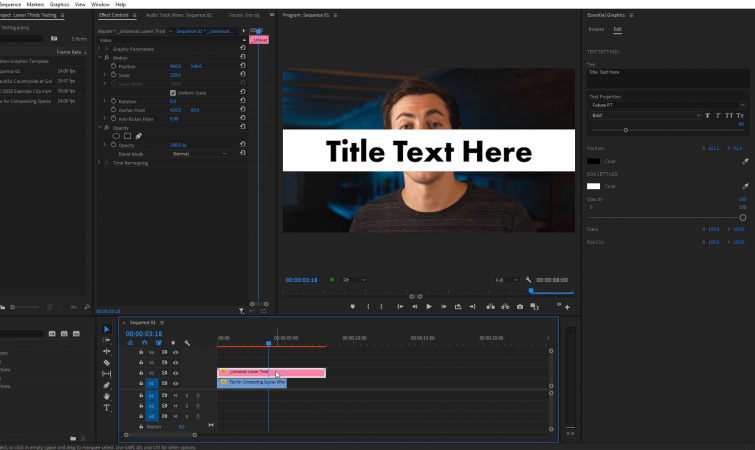
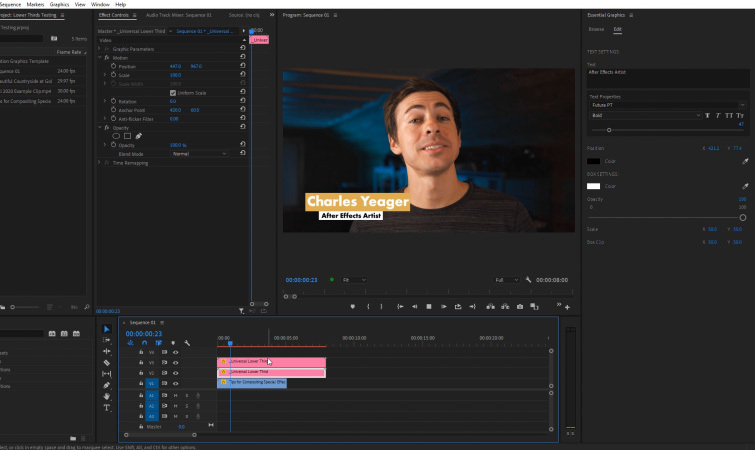
Once it’s applied, you may need to adjust the Scale and Position of the template using the Effect Controls panel in Premiere Pro.
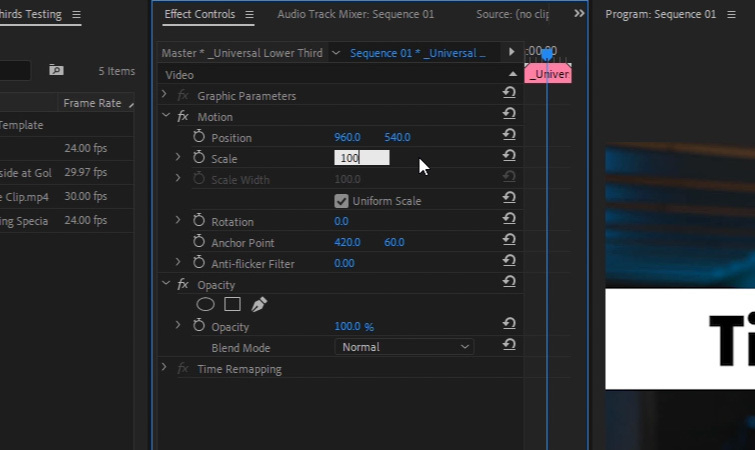
From here, you can customize all of the template settings available in the Essential Graphics panel. These will be the settings we selected in After Effects.
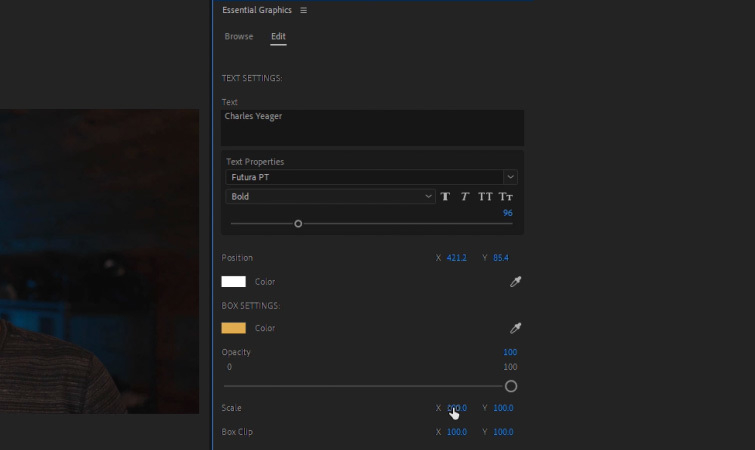
You can easily customize the font, box scale, colors, etc. You can even add multiple copies of the template for secondary lower thirds text.
Get Creative with the Template
I encourage you to get creative with the template. You can also use it for video titles, list animations, and much more built and rendered entirely in Premiere Pro.

Use multiple copies for text and others for the box animations. This allows you to create much more complex lower thirds looks. You can even try applying video effects to the template, such as drop shadows!
Interested in the royalty-free tracks we used to make this video? Give them another listen:
- “Influencers” by FASSounds
- “Lo Fi Beach Dawn” by Trending Music
- “Chilling in the West Indies” by Mattijs Muller
- “UX Paradise” by Tiny Music
- “Bushido Belief” by Tonemassif
Find even more on creating templates (and download FREE motion graphics assets) here:


