

5 Tips for Organizing Your Compositions in After Effects
In this video tutorial, we’ll cover five tips for keeping your After Effects compositions organized—bonus tips included!
Staying organized in After Effects can be difficult, especially when you’re working with a team or have to revisit a project multiple times. Fortunately, there are several features built into After Effects that can help keep you organized.
In this tutorial, we’re going to cover five tips for organizing your compositions in After Effects—and a few added bonus tips, as well!
1. Label Colors
The first way you can stay organized in After Effects is by taking advantage of Labels. These are what give each After Effects layer their color. And, you can change them by clicking on the label color box for any layer.
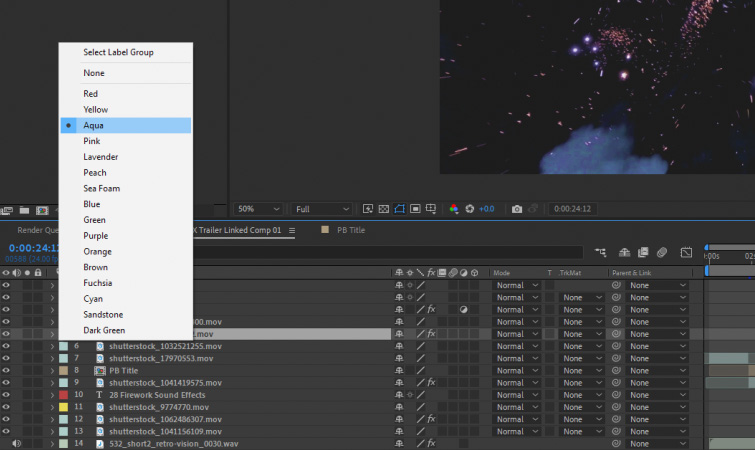
You also have the option to Select a Label Group, which allows you to select all layers with that same label color. This makes it easy to work with several layers of the same type, such as text layers.
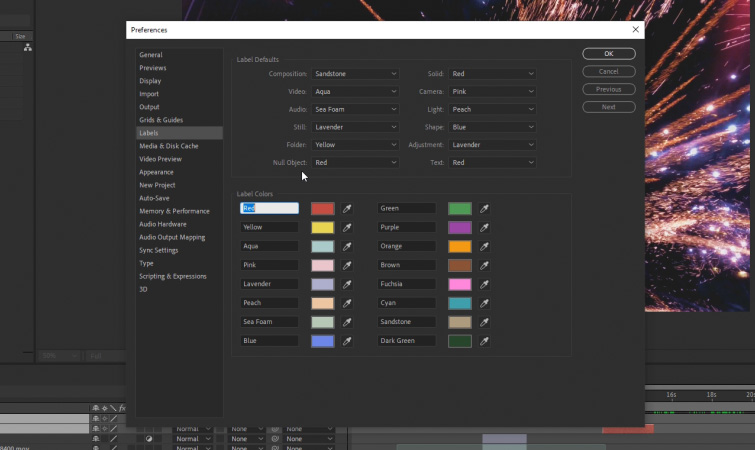
Another option you have with labels is the ability to set default colors for various media you’re working with in After Effects. To do this, navigate to Edit > Preferences > Labels. From there, you can set the label defaults and even rename and customize the look of the label colors.
2. Markers
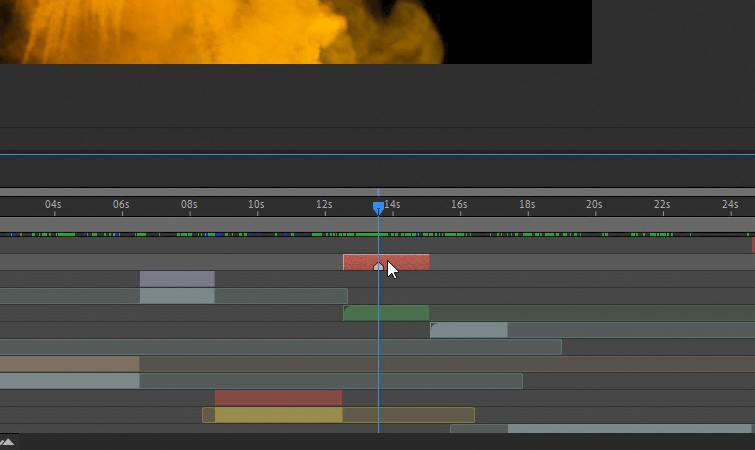
You have probably used Markers in After Effects a few times before, but a lot of users don’t realize how many different options markers can provide.
First, the shortcut for adding a marker is the asterisk key (*) on the numeric keypad. If you have a layer selected, this will add a marker on that layer. If no layer is selected, this will add a marker to the composition timeline.
You can also drag markers onto the composition timeline from the Marker Bin (located on the far-right of the timeline). To delete a marker, right-click on it and select Delete this Marker, or hold down Ctrl+click on the marker to remove it. (You’ll see the cursor turn into a pair of scissors.)
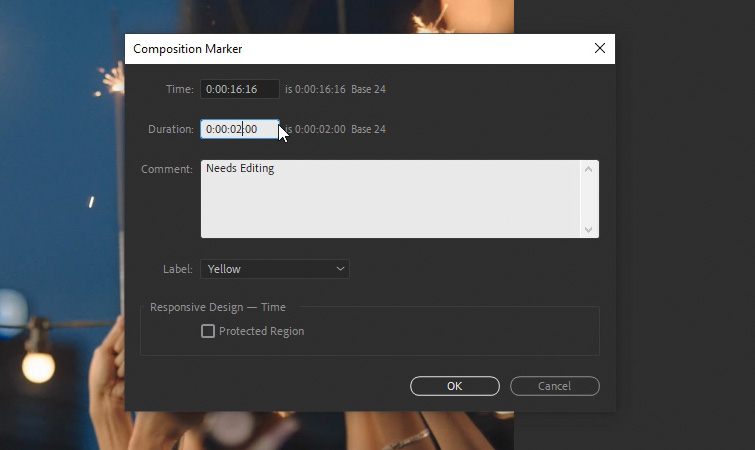
Finally, double-click on a marker to open up the Composition Marker settings. From here, you can add text labels to a marker, customize the color, length, and more.
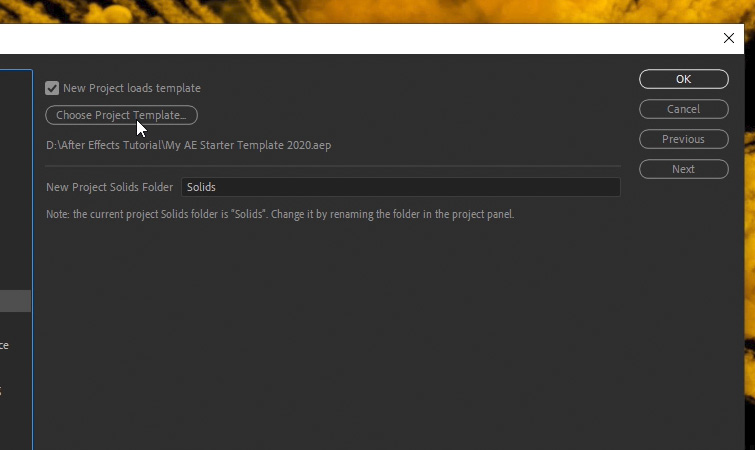
3. Using a Project Template
It’s always a good idea to organize your project’s assets by creating folders in the project panel. However, this can become a tedious process to do for every new project. Luckily, you can set a default Project Template that will automatically open whenever you create a new After Effects project.
This allows you to create an organized folder structure in your Project panel, and then that project will launch every time you create a new project, saving you the time of having to repeat that process.

To set up a project template, navigate to Edit > Preferences > New Project. From there, select an After Effects project file you’ve created to become your project template.
4. Apply Effects to Adjustment Layers
If your original footage is larger than your comp size, you can speed up your renders by applying effects to Adjustment layers. (Or, alternatively, Precomposing your footage to resize it to the size of your composition.)
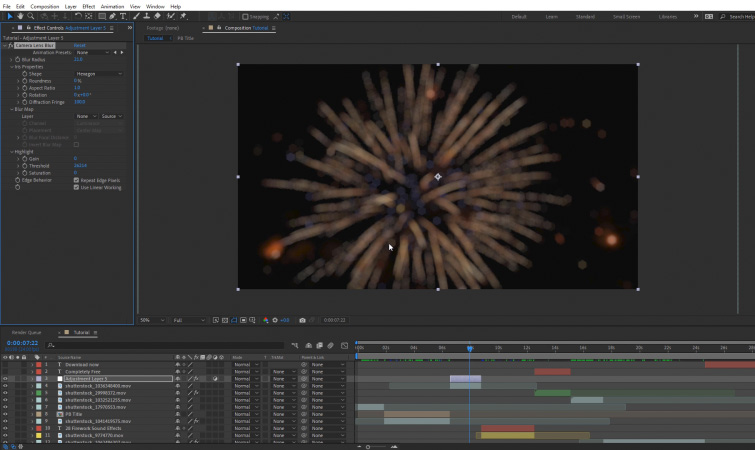
Here’s how/why this approach works: When you scale down footage to fit a smaller comp size, After Effects still applies effects to the entire media clip at the default size. So, effects applied to 4K footage in a 1080p comp will still render as if they are 4K.
Applying effects to an adjustment layer (which is the same size as the comp) is a nice way to work around this and not render more than you need to.
5. Prerender Effects You Reuse Frequently

Quick story: I used to work at an ad agency, and there were several effects we’d reuse for each client’s commercials—things like specific flare transitions, text animations, or generic social media icons that pop up on a commercial end tag.
Here’s one approach to this situation: Import a previous After Effects project into your current one, and copy the composition you need. Here’s the problem with this approach: You’re going to muddy-up your project by importing a lot of files you don’t need (and the render times are going to be longer).
So, instead, what I recommend is rendering those effects out with an alpha channel. Then, in the future, whenever you need to use them, you’ll just have to import one single file. Everything will also render much faster in After Effects because it only has to render one short clip versus each original asset (and related keyframes, plugins, etc.).
Bonus Tips
- Plugins: If you want to get even more organized in After Effects, there are a ton of third-party plugins out there to help you do just that. I recommend checking out AE Scripts. They have several plugins geared toward optimizing your workflow in comps and staying organized. Give these a look: Declutter, Workflower, KBar 2, Save Actions, and Free Compose.
- Add an underscore: Add an underscore at the beginning of your main composition name in After Effects. I always do this because it’ll put your composition at the top of the project panel, making it really easy to find the main composition when you need to go back and revisit a project.

Interested in the royalty-free tracks we used to make this video? Give them another listen:
- “Retro Vision” by Konstantin Garbuzyuk
- “Smooth Moves” by Reaktor Productions
- “Lo Fi Beach Dawn” by Trending Music
- “Lo Fi Abstract Chillhop” by Trending Music
- “Lo Fi Waves” by Origami Pigeon
Here are a few more After Effects goodies:


