The Role of Light Groups in Arnold for Maya

Learn how to manage particular aspects of lighting and have an advanced control over your renders in post production
Do you think your renders look nice, but you’d still want to push your limits and achieve things you never thought you could? Well… you are in the right place with this brand new tutorial!
As you probably know, achieving a great render result is not just a matter of setting up proper lighting and publish the image. You might be satisfied with your job, but you’d better know there are useful tools to go one step further.
Working with render passes, for instance, enables you to isolate parts of the scene and make changes when needed.
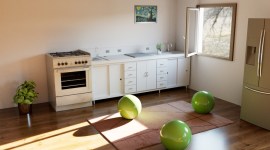
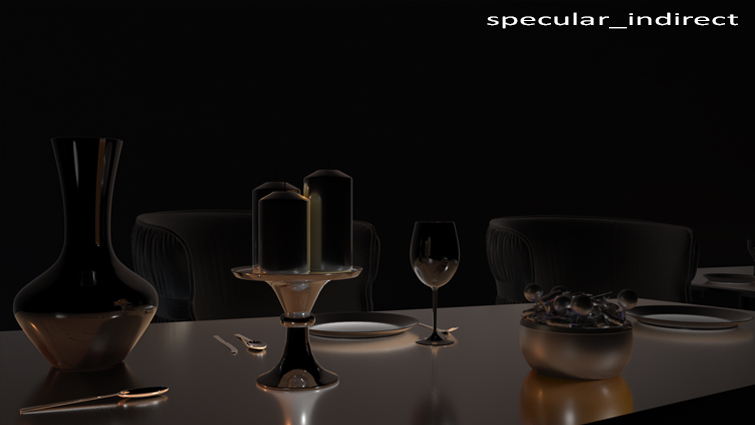
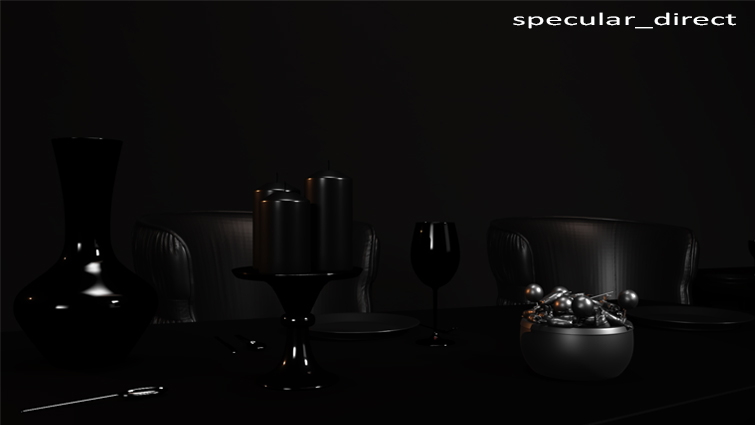
Consider the following work where a series of elements contribute to the final rendered image.
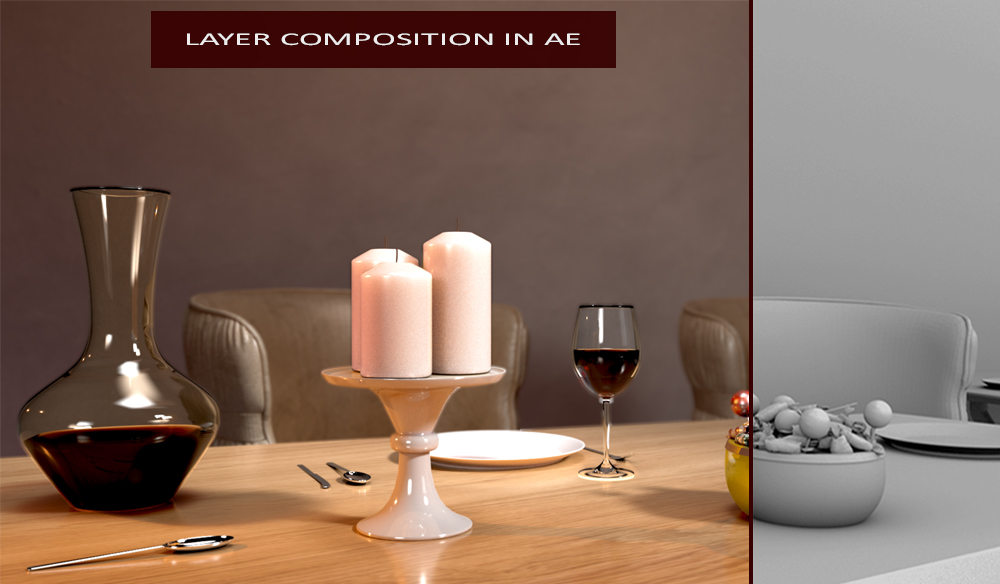
Whenever we need to tweak some specular reflections, we can do that by either the specular_direct or specular_indirect contribution.
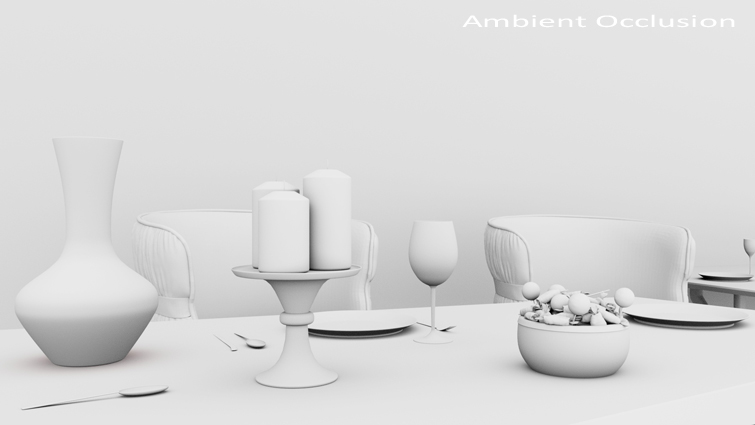
In the same way, we might want to add some ambient occlusion in compositing. The AO pass allows us to add soft shadows close to occluded areas—thus adding more realism.
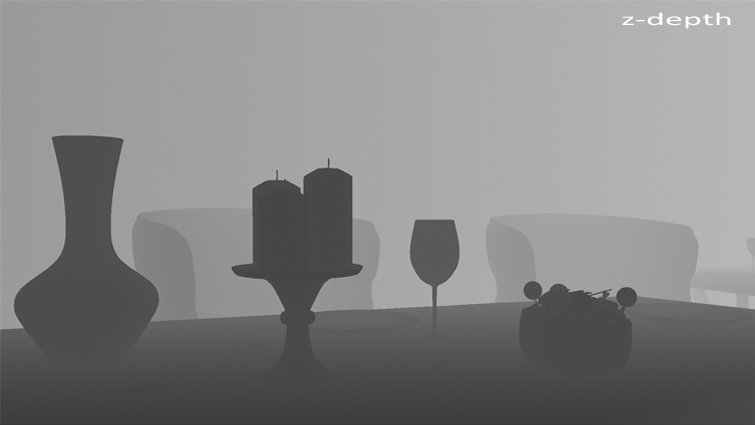
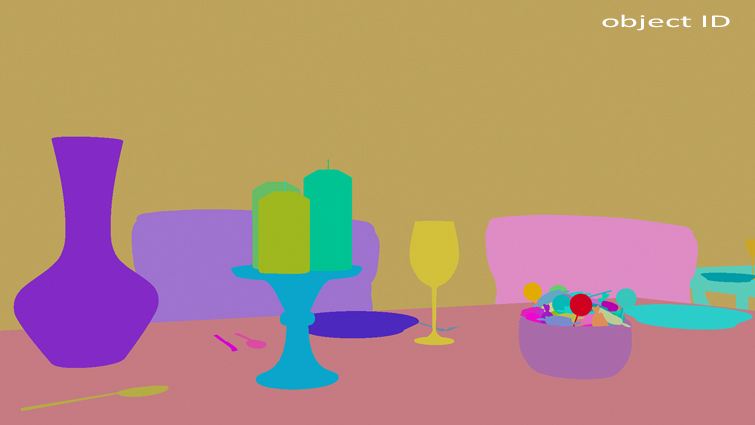
Again, there are other utility passes, such as z-depth and object ID which help us add depth of field and isolate particular objects in the scene, respectively.
By the object ID pass, a few local adjustments are easy to achieve. In particular, each object has a solid color and the selection inside a compositing software is a piece of cake.
In the following render the yellow jar was originally orange. The change in color was super quick, thanks to the object ID pass.

However, the render pass list is not exhaustive here. You will find more info in the article above (see image captions).
Light Groups
By using render passes, you already have control over different aspects of your render. Nonetheless, I’d like to introduce more advanced topics involving Light Groups.
If you work in 3D field, you’ll probably heard of light groups, but maybe never had the chance to experiment with them.
But what are light groups, essentially?
Instead of having separate layers just for diffuse / specular rays, subsurface scattering effects and so on, you create render passes which output lights within a specific group.
Simply put, a light group is a set of lights rendered separately.
Let’s say we want to either switch on and off a light or create a simple flashing effect in post production… The light groups are the right tool to use. Consequently, light groups are also useful to tweak the light intensity in compositing.
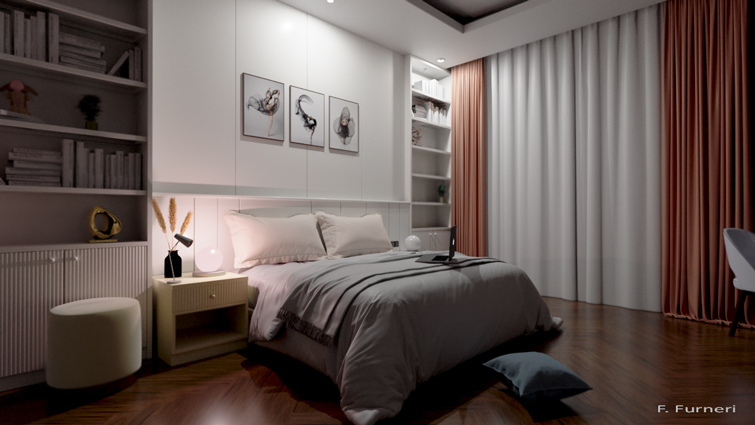
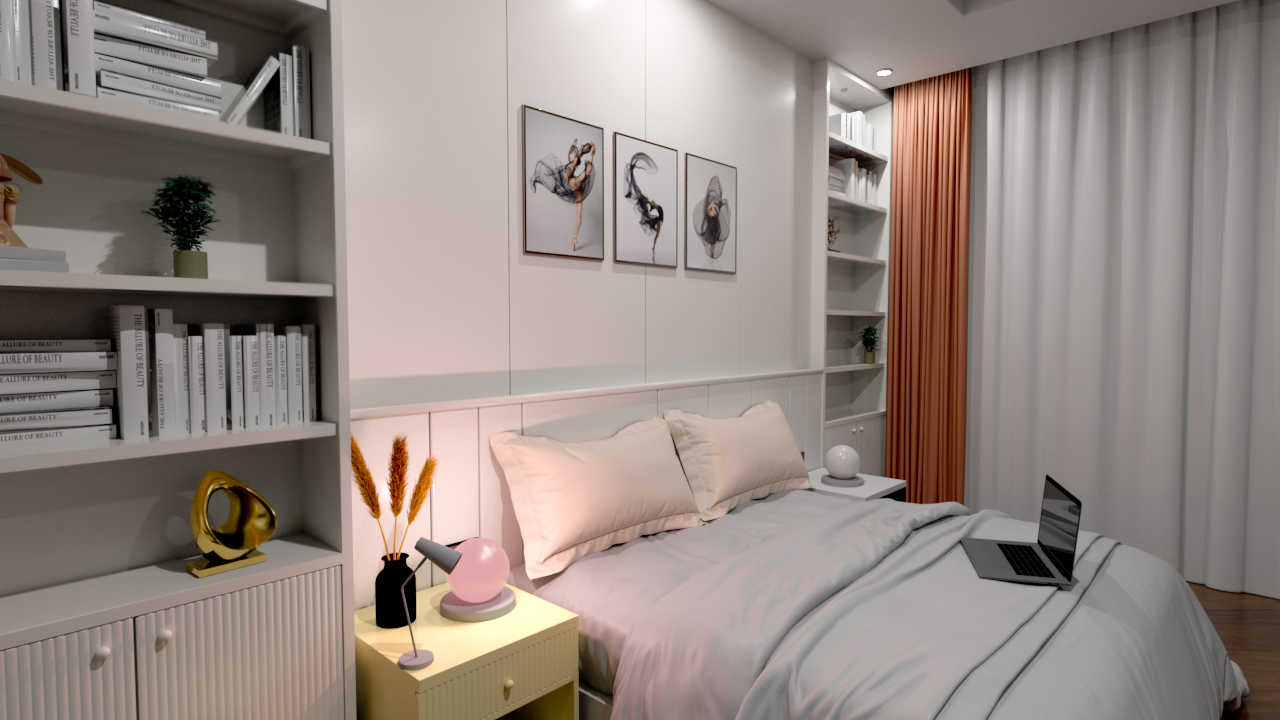
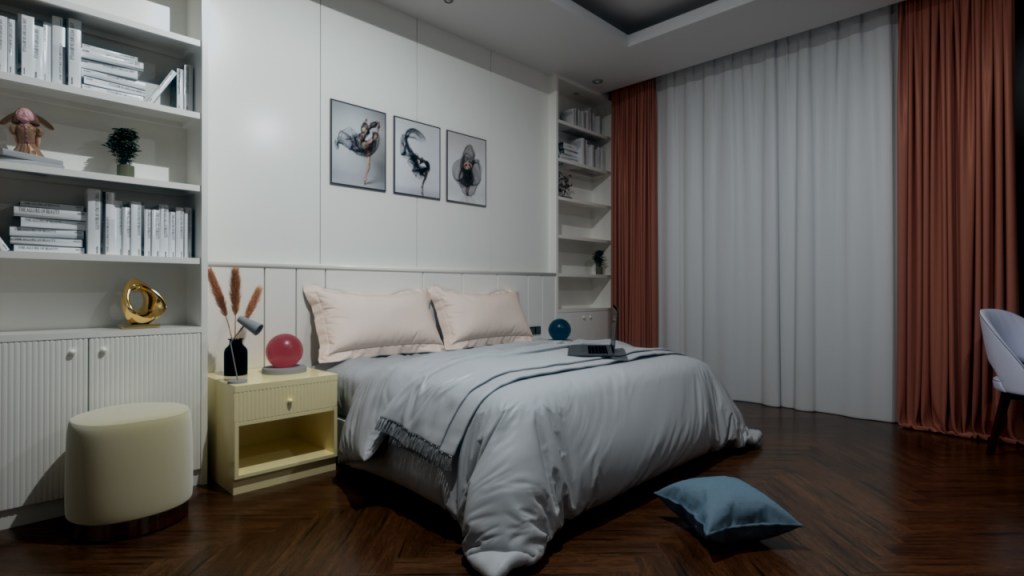
For the purpose, I prepared a scene with some external props from the Internet and lit it up.
This is the piece we’ll be working on in this episode.
Many professional 3D software implement light group functionalities. In this issue we’ll be using Arnold for Maya to explain how they work.
Organizing the Lights in the Scene
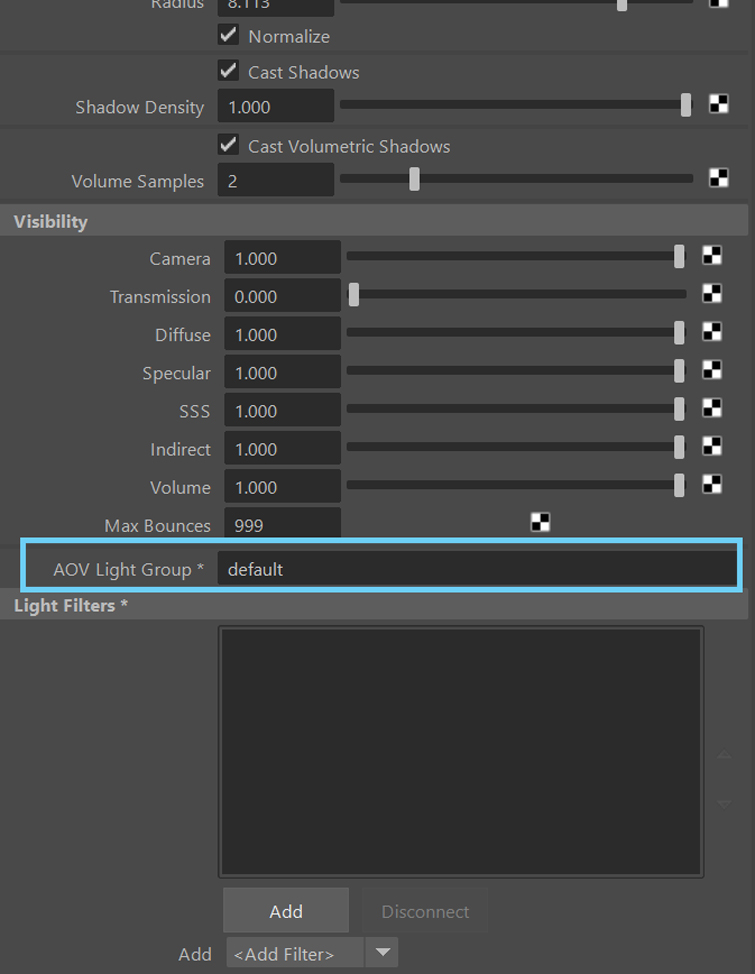
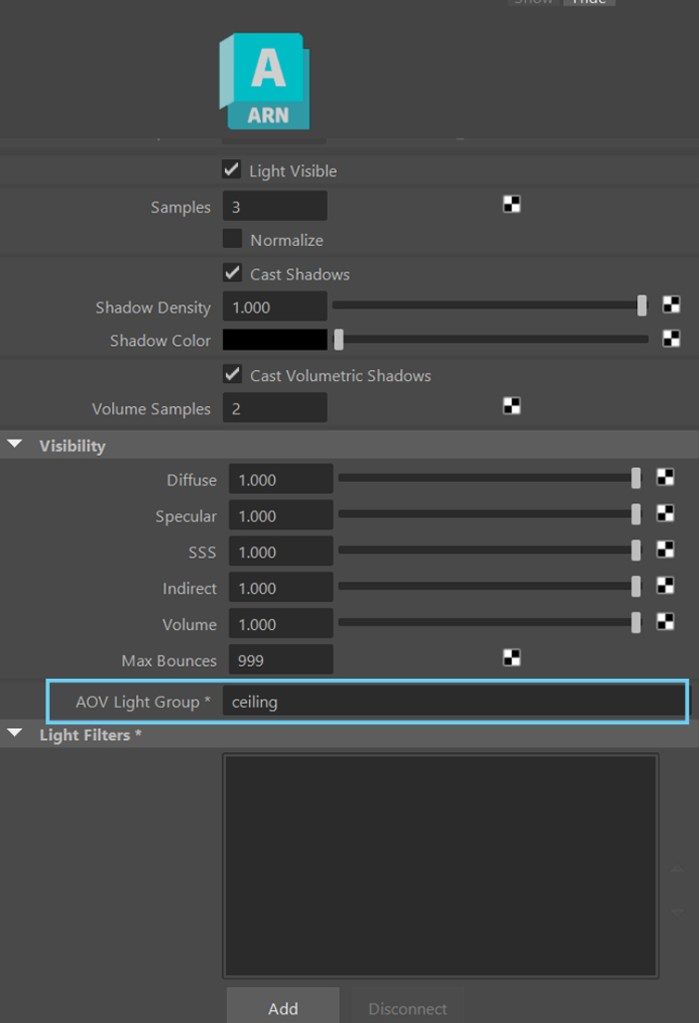
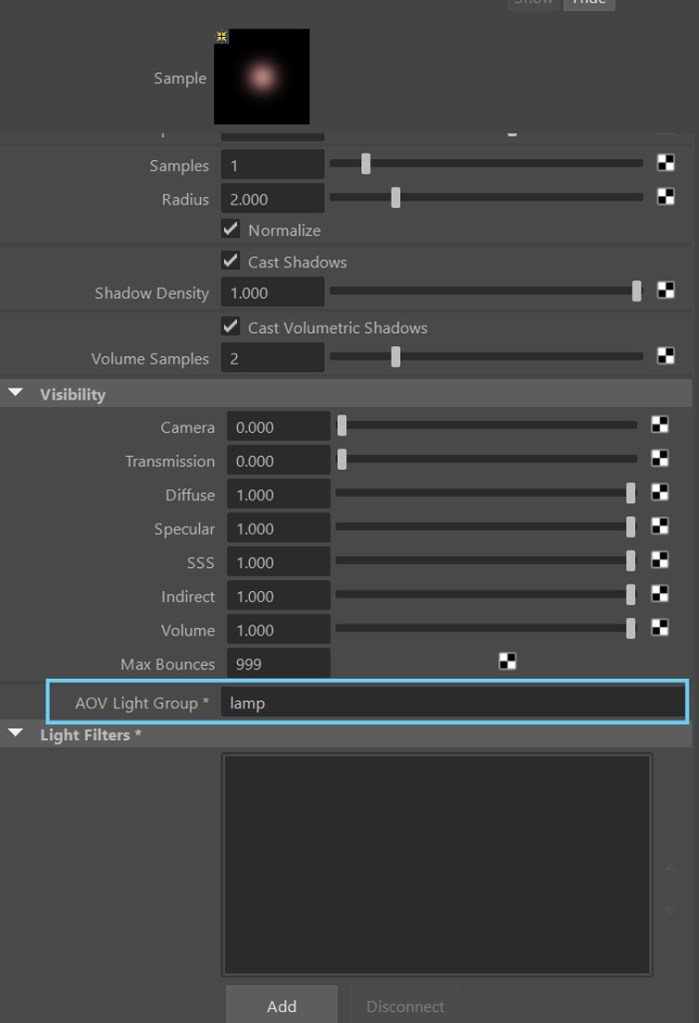
When creating a new light source in a scene, the Arnold Tab shows its properties such as exposure, color temperature and so on. Among them, there is one called AOV Light Group which stands for Arbitrary Output Variable Light Group.
For the record, an Arbitrary Output Variable is a technical term to describe a specific render pass for a multipass output. It means creating a group of one or more lights to assign to a specific render pass.
The term AOV is also used while creating passes for diffuse and specular direct / indirect rays, SSS, ambient occlusion and so on.
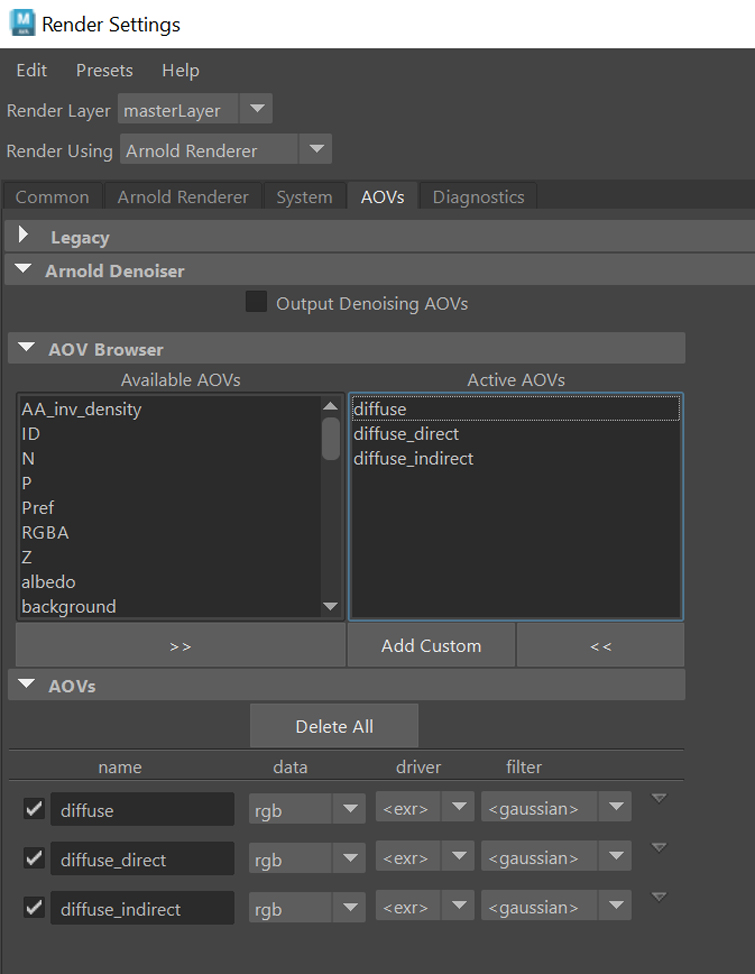
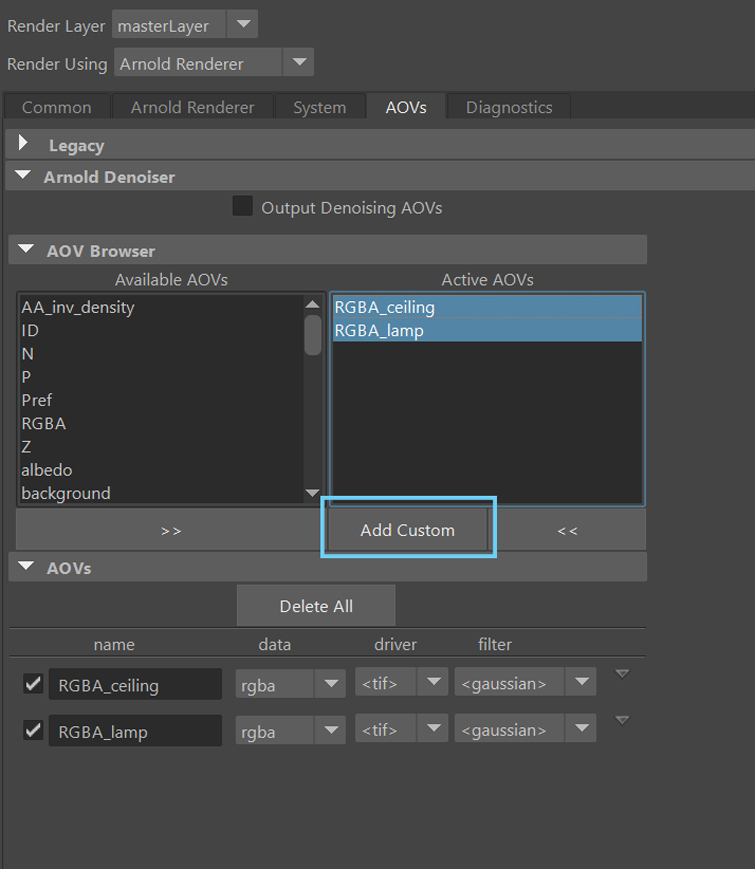
Arnold has an AOVs tab that we’ll be using later on. Every light has an AOV Light Group property which identifies the group the specific light belongs to.
In relation to the previous render, we made the environment brighter by adding the following lights.
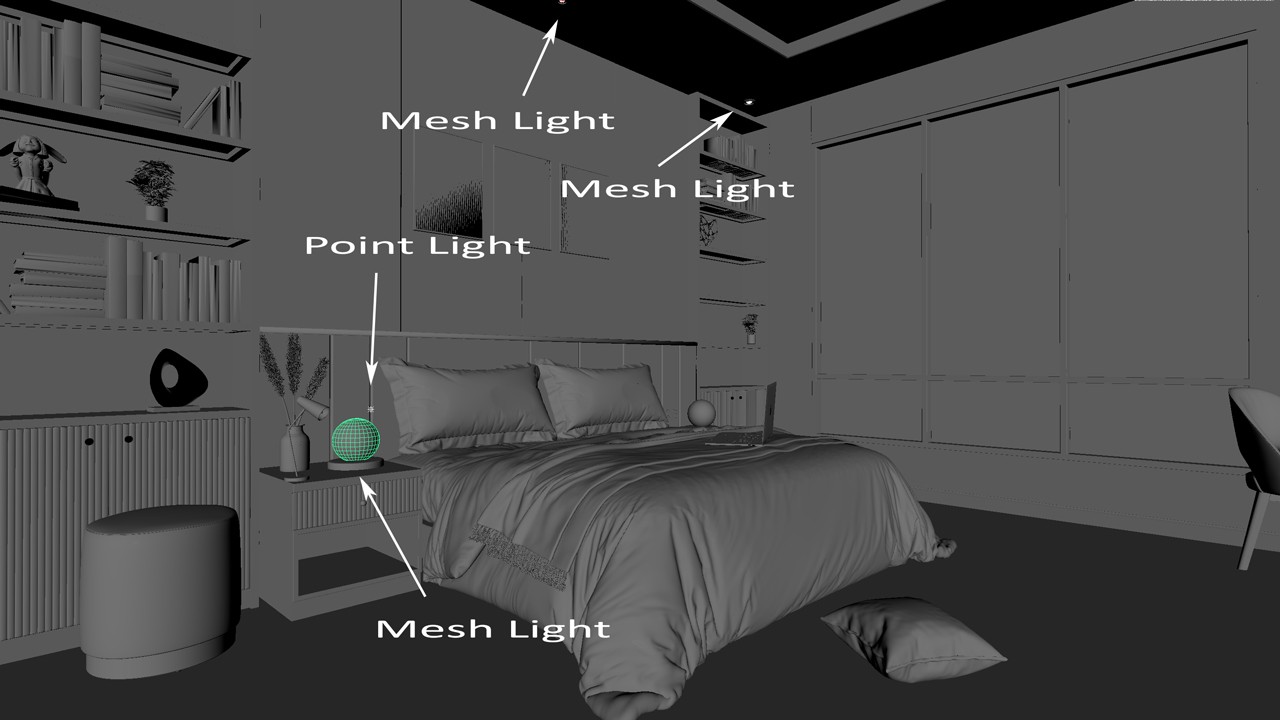
Here is the description of the light sources involved:
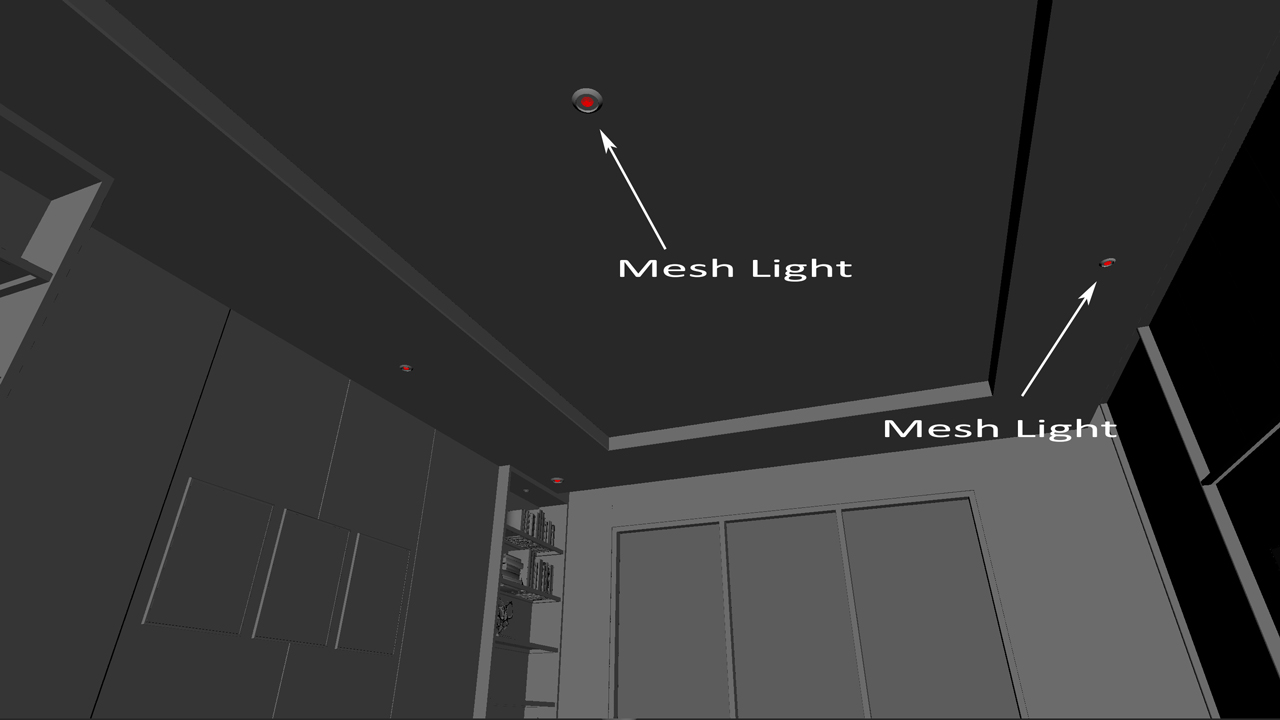
- Four mesh lights from the ceiling.
- one mesh light from table lamp.
- one point light to reinforce the presence of the pinky color from the table lamp.

Let’s create now some groups for the lights.
As first test we’ll create two groups—one containing the four lights from the ceiling, and one the lights from the table lamp.
A Simple Setup for Light Groups
Here are the steps in detail.
- Open the light list you have in your program. In this case you should see six lights that we properly named to recognize them in the scene.
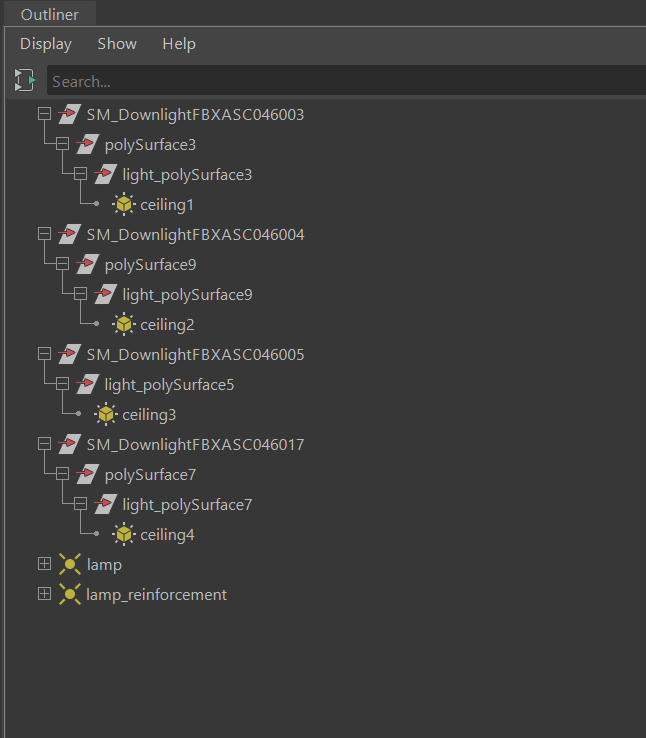
- Decide a name for the two light groups. By selecting every single light, you should fill the AOV Light Group property with an arbitrary name. In this case we chose “ceiling” and “lamp,” for the lights at the top and the ones associated with the lamp respectively.
- Open the AOVs tab to create two new render passes which we name RGBA_ceiling and RGBA_lamp. Here, the naming convention is extremely important. There is a prefix RGBA—meaning we want the whole output plus the alpha channel—followed by the name we chose for the light group.
In short, we are telling Arnold to output two render passes to manage separately. Also, with the “magical” word RGBA, we want to take into account all the rays—thus we want a Beauty render for every light group.
Blending the AOVs
After the previous settings it’s time to render the work. Notice that Arnold creates one Beauty render, plus a couple of images connected with the light groups.
You can bring those images into Photoshop, After Effects or any other compositing software and see what to edit.
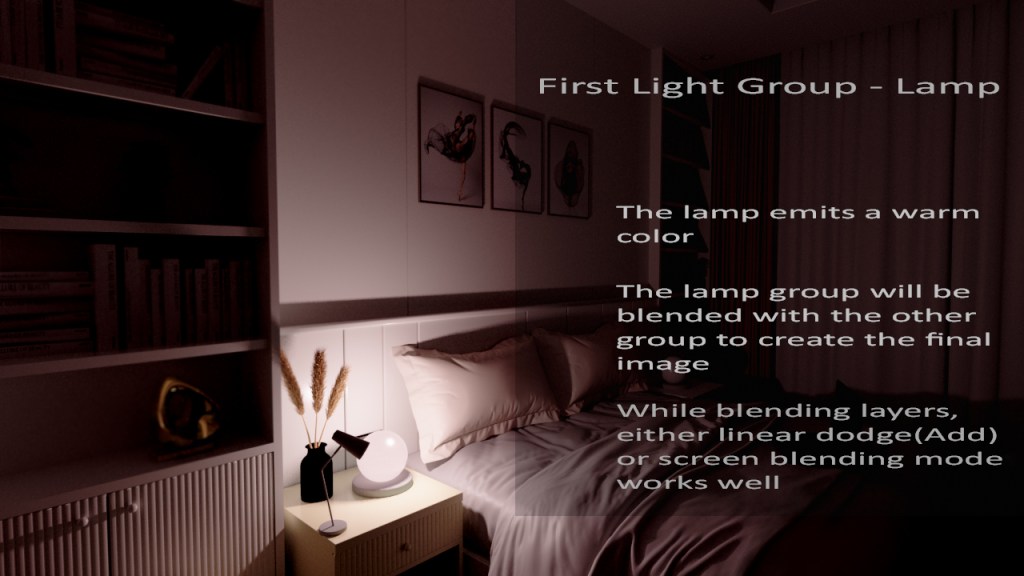
The previous image is just the result of the first light group called “lamp.” We will blend it with the following layer.
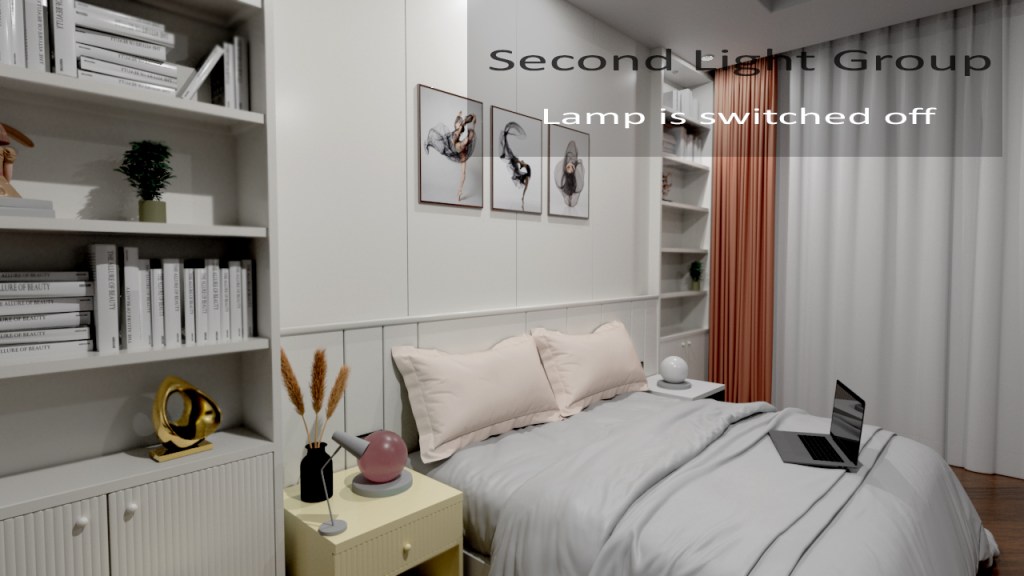
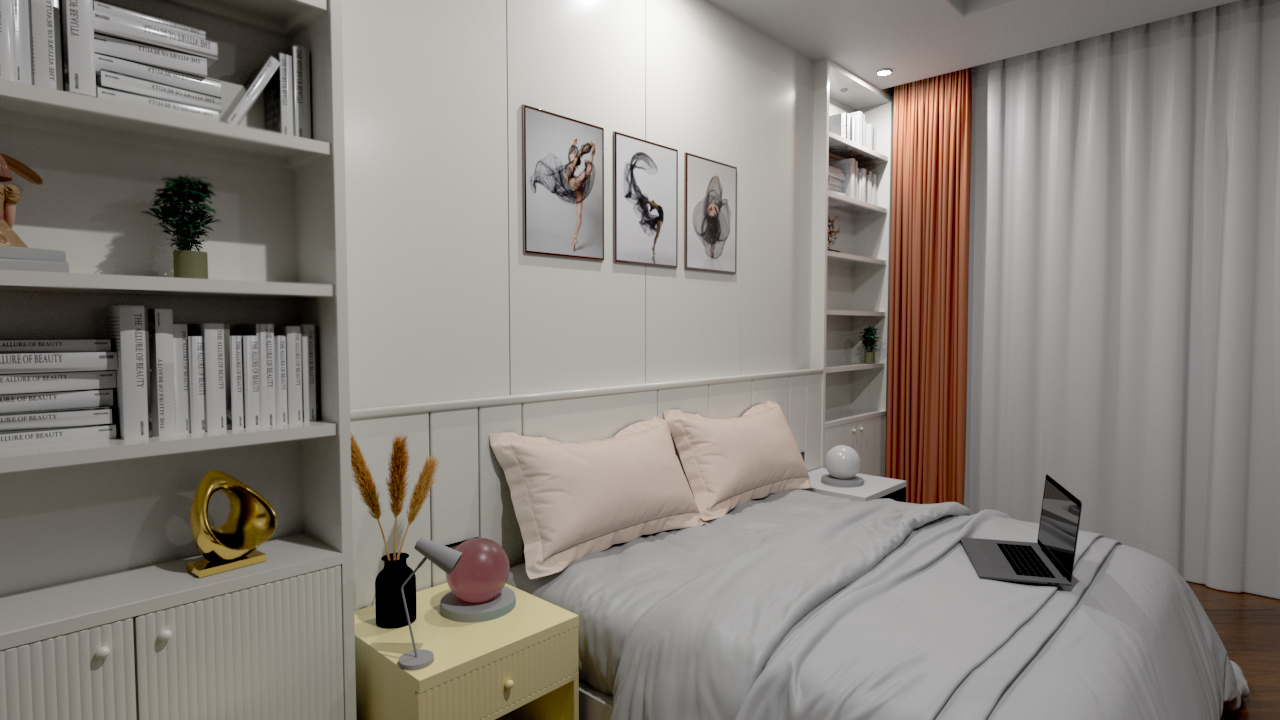
In this second image, instead, we can notice the presence of the “ceiling” light group, which is responsable for the main room lighting.
By integrating the “lamp” AOV on top of the “ceiling” AOV, we can obtain effects such as a simple switch, with the possibility to change the light and color intensity and so on.
For the purpose we’ll be using Photoshop and apply the linear dodge blending mode. It’s similar to the screen blending mode and simply adds one image on top of the other.
Use the arrows below to switch the lamp on and off.
The cool thing about our simple setting is that we captured everything within each layer—including shadows.
For instance, when we switch the lamp on, at the very bottom of the image, a shadow appears on the drawers. In the same way, the lamp produces a visible shadow on top of the pillows. That is cool, isn’t?
Let’s try now to experiment with other groups and add other two light sources in the scene.
Managing More Light Groups
Now that you learned how to deal with simple light groups, it’s time create another scenario with more light sources and a different way to organize the light groups.
Consider having additional lights:
- Another table lamp on the other side of the bed, with the same lighting setup—the emission is light blue this time.
- A light source coming from the laptop screen.
Furthermore, this time we’ll create more light groups as well.
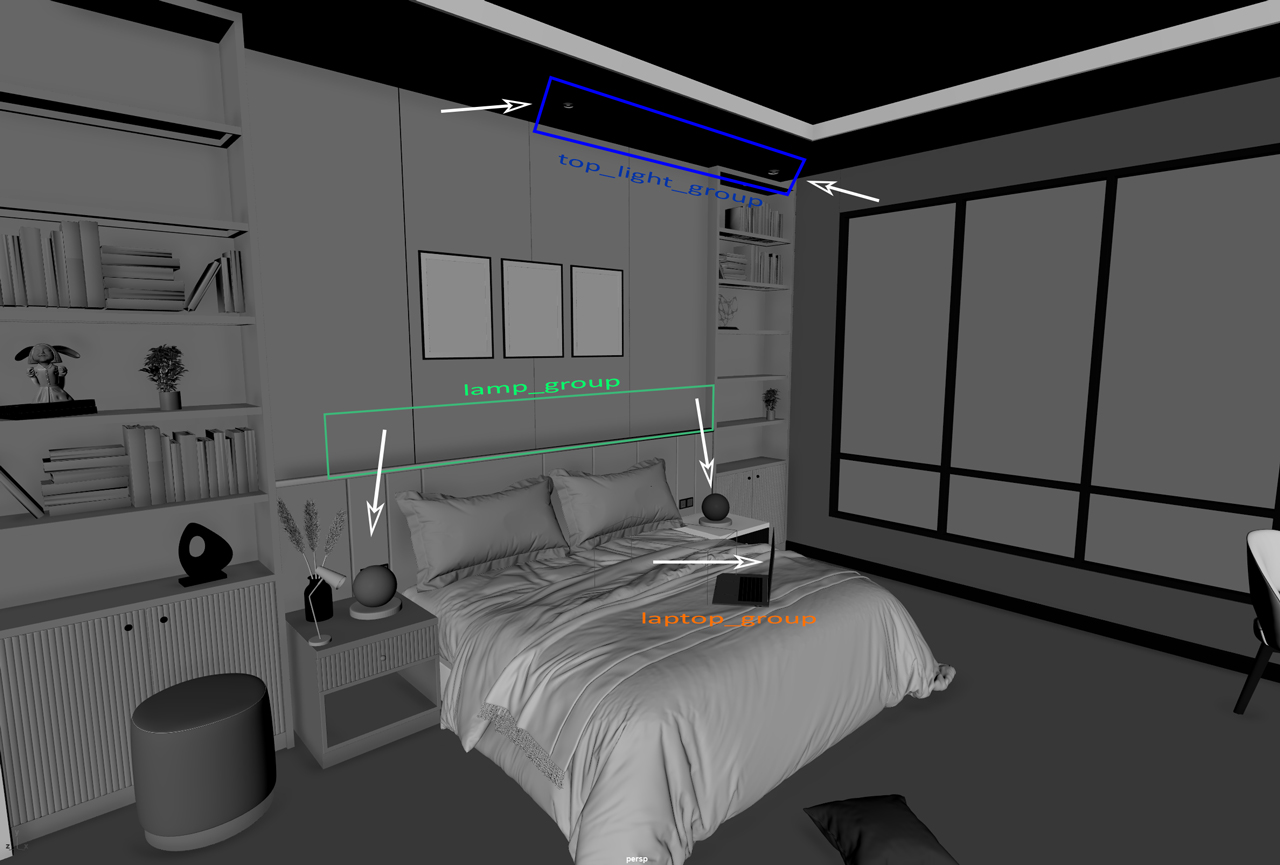
Let’s introduce three light groups:
- lamp_group which contains the two table lamps.
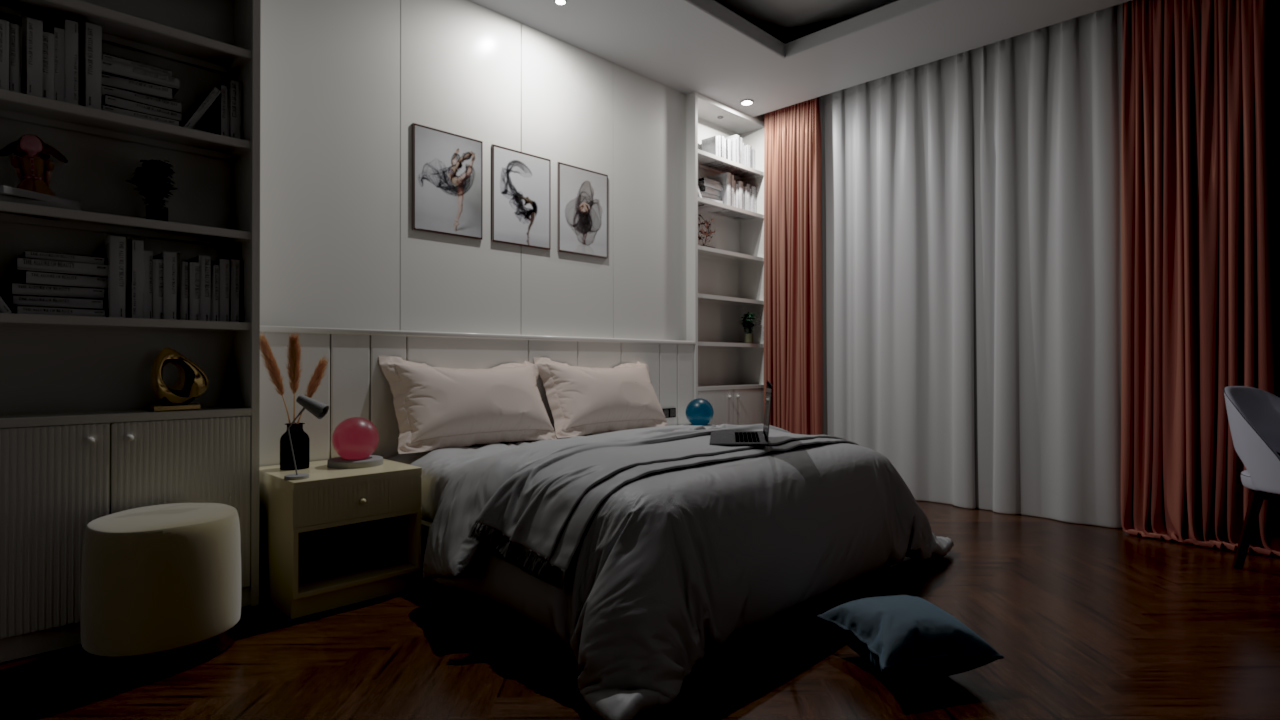
- top_light_group that only considers the two ceiling lights you see in the render below.
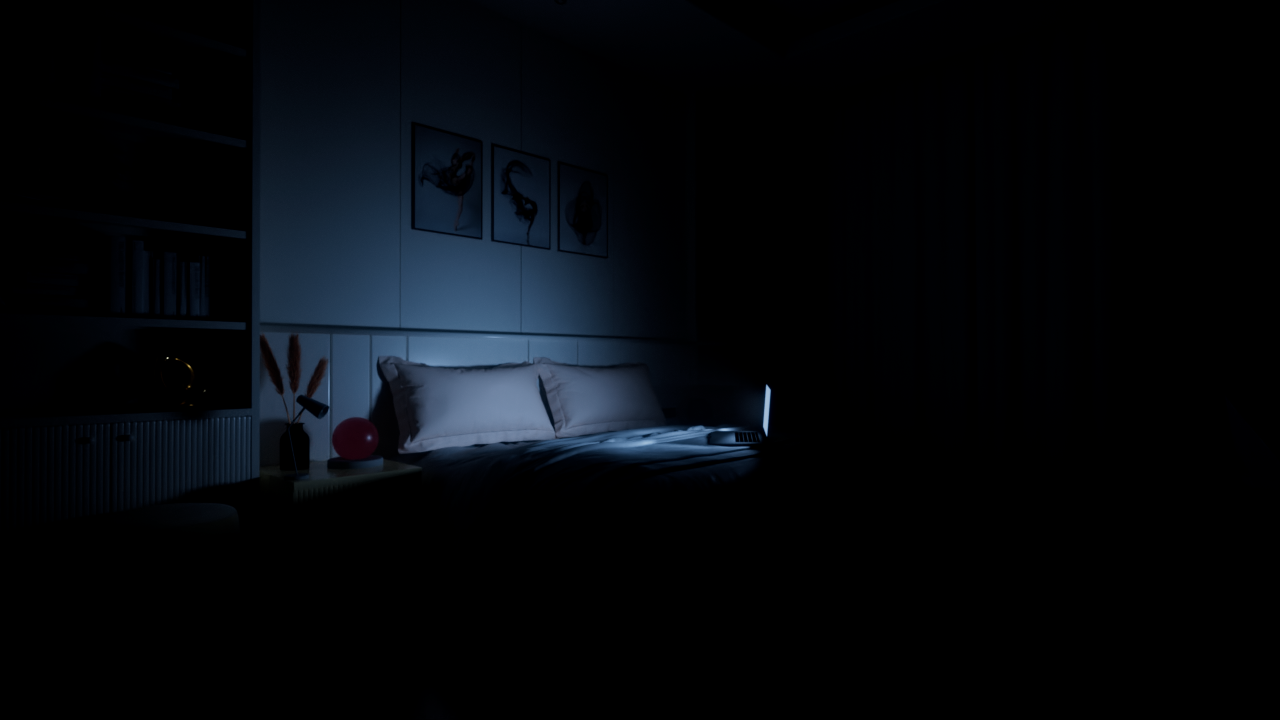
- laptop_group that is the soft light produced by the laptop screen on the bed.

You can observe that the focus is centered on the bed, creating more contrast in the rest of the room—this is due to the lack of the other ceiling lights, which are switched off.
After that, let’s render out the light groups separately.
In the first render we activated the top_light_group whose intensity is sufficient to illuminate the center of the scene. Apart from that, some indirect bounces are visible on the left side, showing part of the bookcase in the penumbra.
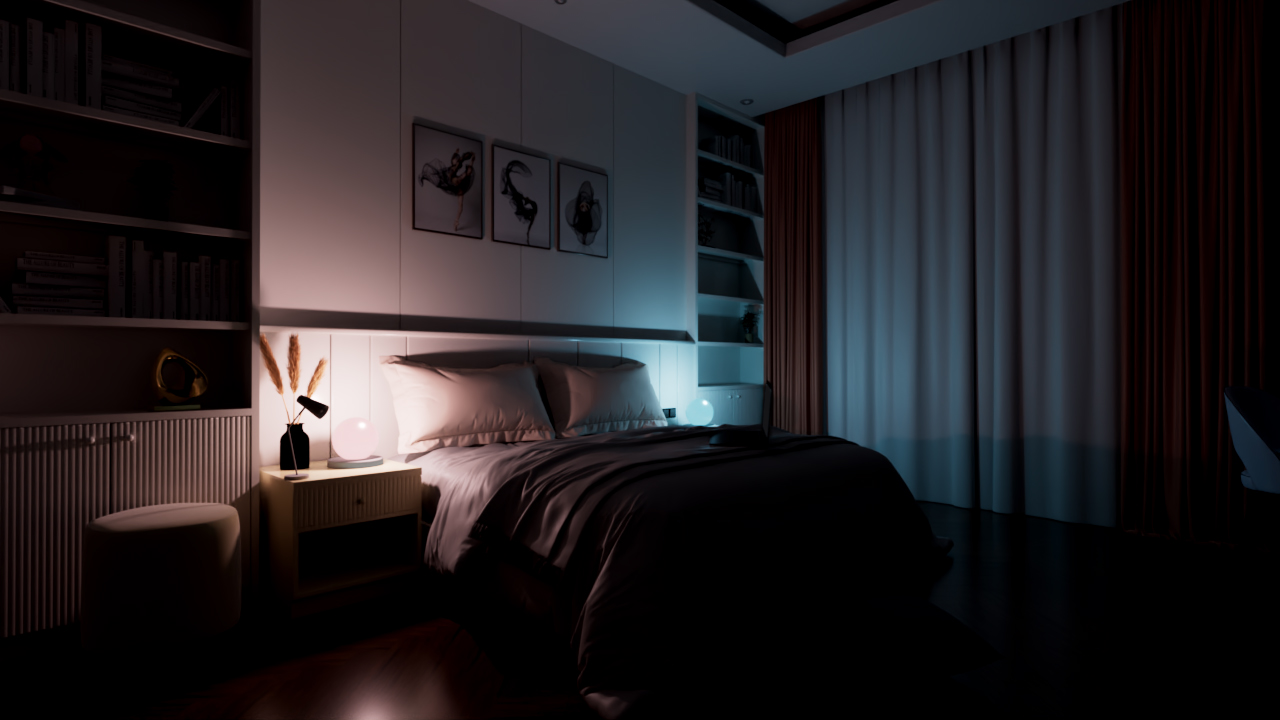
The lamp_group, in the second render, creates an interesting lighting effect that makes the room appear cosy and nice to observe.
Finally, the laptop_group is responsable for the cold light coming from the laptop screen. It’s the weakest light source, but with a solid contribution to the final render.
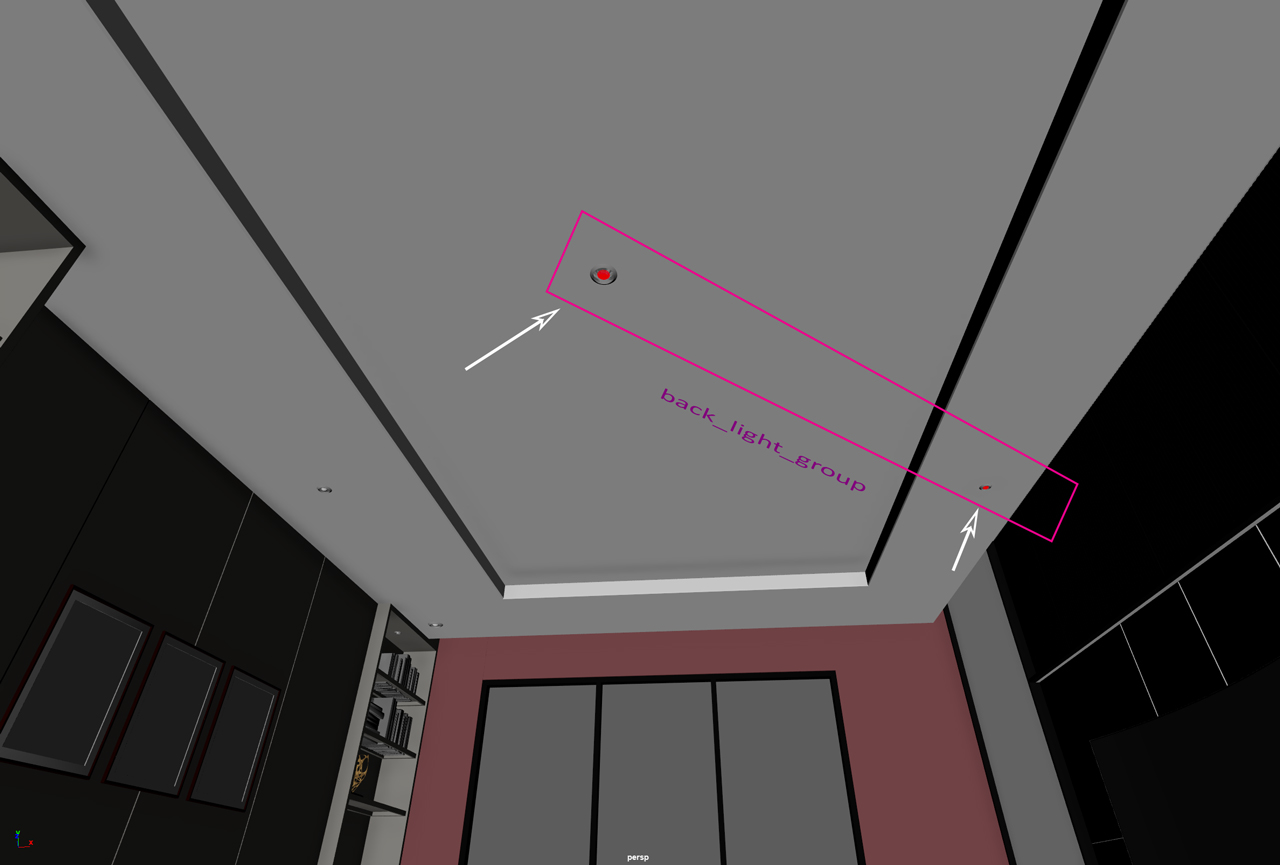
There is still one group left to soften the overall contrast. it contains the other two offscreen light sources on the ceiling. Let’s call it back_light_group.
A Final Look at the Room – Light and Light Groups
Here is how the room appears in relation to lights and light groups.
To sum up, we have:
nine light sources—including 4 mesh lights on the ceiling, 2 mesh lights for the lamp, 2 point lights to reinforce the table lamp spread and intensities and 1 area light on the laptop screen.
four light groups to be switched on / off and animated in compositing.
Animating Light Groups in After Effects
I’ll show you here a final example involving the animation of the previous light groups in After Effects.
There is nothing special here, but the purpose of the following video is to show you how you can easily obtain a dynamic shot from static frames. Just by the use of your light groups!
I imported the four static frames into After Effects and applied the Exposure Effect to all of them, in order to animate their light intensities. The blending mode, set to Screen, allows obtaining the right mix between the light groups.
The four static frames are all translated from left to right with the intention of simulating a sort of camera movement.
About the sequence, this is what happens:
- From a completely dark shot, the lamp_group activates
- Subsequently, the top_light_group and the back_light_group reveal the details throughout the room.
- The lamp_group has some flickering effects, as well as the back_light_group.
- At the same time, the light source from the laptop_group starts appearing and disappearing.
- At a certain point, the lamp_group goes out and while the remaining groups decrease their intensities to very low values—almost zero—the laptop_group flickers a bit and closes the shot.
The core of this tutorial is to understand how, from single frames and light groups, you can create many dynamic situations, that you can properly manage through compositing.
I hope you found this article useful for your future works and, if you liked my tutorial, I invite you to follow me at my Linkedin page.