How to Integrate 3D Elements into Video Footage – Part III

Explore how post-processing in After Effects can obtain a more believable integration between real video clips and CG models.
Welcome back to this third installment on how to use 3D models integrated into actual video sequences.
In the previous articles (part I; part II), we explained the process from scratch by considering a professional tool named PFTrack. Starting with camera tracking, PFTrack allows analysis of the video sequence and taking subsequent actions.
In the continuation of this series, we highlighted a few points and a checklist to follow before setting up a 3D scene based on the actual sequence.
After reading part 2, you will now be more accustomed to planning your scene with the following:
- HDRI for ambient light or directional light to emulate the presence of the sun.
- Hidden geometries used to cast or receive shadows.
- 3D planes are used to both model the terrain elevation and understand where to locate 3D objects in space.


Does color match solely depend on the renderer? The answer is no, of course! As you’ve probably realized, the renderer gives you a great result, but the icing on the cake is up to the compositing software.
There are several tools for adding post-processing effects and working in post-production. We’ll focus on After Effects, but if you feel more comfortable working with Nuke or any 3D software, go ahead!
And, by the way, this is the final sequence we’ll discuss in After Effects later. Watch it in 4K for a better definition!
Render Passes
When dealing with a 3D render, it’s common to work with render passes. But what are they, exactly?
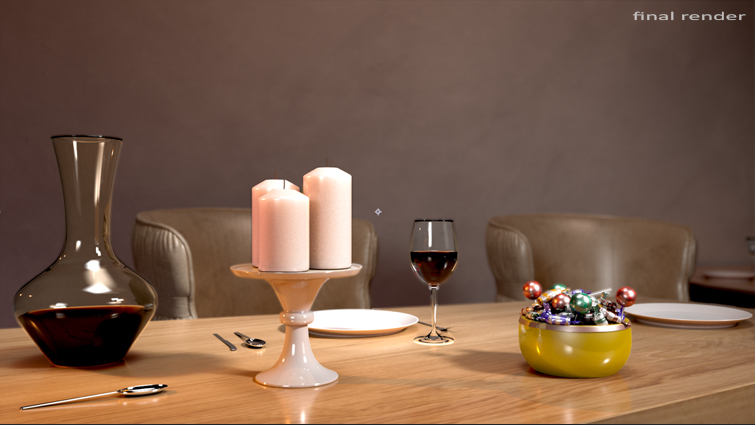
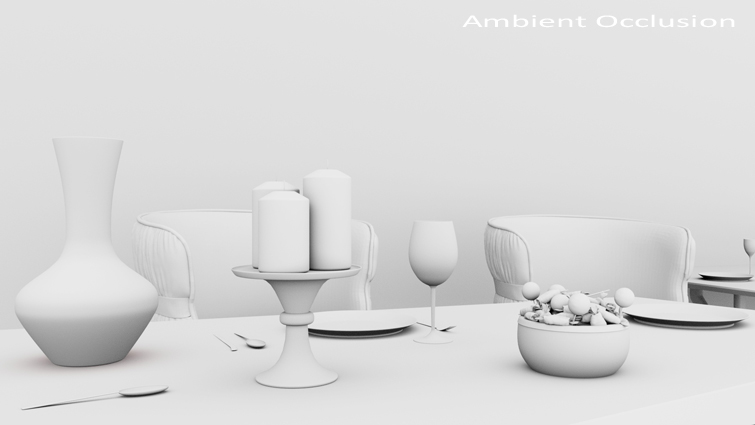
In a nutshell, a render pass holds specific aspects of the scene by rendering them as a separate element. That means we might have several renders: one just for the specular reflections, one for the shadows, one for the ambient occlusion, and so on.
Ultimately, we mix them up and export the final render— also known as the “Beauty Pass.” The beauty pass combines the different compositional layers—specular and diffuse reflections, ambient occlusion, shadows, etc.
There are undoubtedly many benefits of working with render passes. They help you isolate and correct single parts of the scene without affecting the entire render.
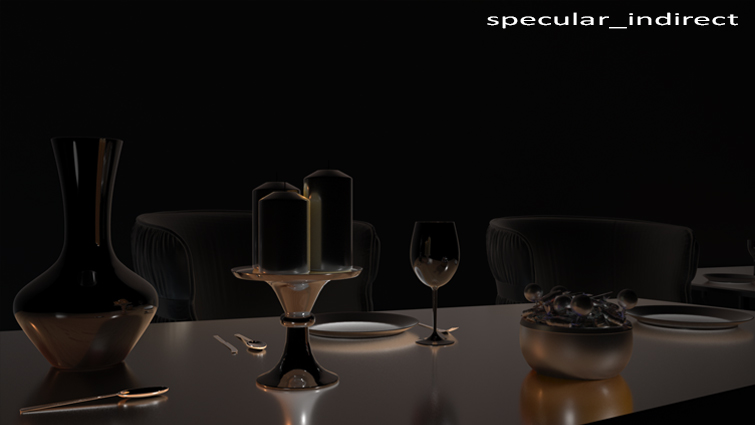
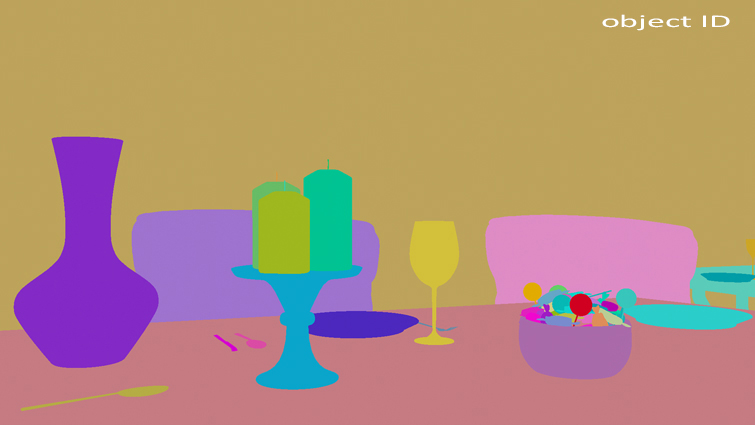
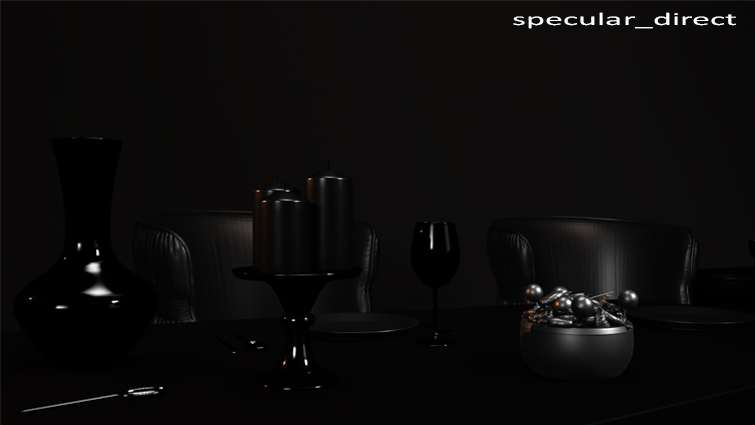

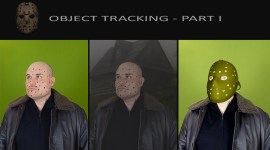
The previous images—from a project I discuss in a tutorial—show a few render passes:
An ambient occlusion pass adds soft shadows in occluded areas, while an object ID pass allows you to isolate specific scene objects in compositing and work on them separately. And again, a specular pass considers the reflections, giving more control over their contribution to the final render.
As you can imagine, there are many elements we can isolate.
Considering the size of our hero car from the camera, we don’t necessarily need many passes.
We’ll see how just a few passes are acceptable for our purpose.
What Render Passes do we need?
Before choosing the number of passes to render, think of your final composition to understand what you need. Generally, it’s an excellent habit to render different passes. This allows you to tweak your final image as you like.
I saved different passes for the static renders of the car. However, for the related animations, there was no need to export many keys for a simple reason: Considering the size of our hero car from the camera, many surface details are barely visible.
I used the beauty pass with two additional passes for aerial renders.
- The beauty pass renders the car animation with direct/indirect specular reflections and direct/indirect diffuse reflections.
- The shadow pass only catches shadows visible in the final video
- The ambient occlusion pass (AO) takes into account the contact shadows. This is useful for creating more integration with the environment. For instance, the attenuation of light when the car lies on the road is achieved by an AO pass.
In this case, the specular reflections belong to the beauty pass and are not saved in a different render pass.
Breakdown in Post-Production
Let’s analyze the previous video to see the effect of render passes.
- In the beginning, we have the render out of Maya. The colors don’t match so well. The light blue of the car has too much saturation as well.
- We do a bit of a color match and work on the curves to increase the contrast.
- We add the ambient occlusion pass to make the vehicle lie on the road. We produce contact shadows.
- Finally, we put the shadow pass, which includes the shade created by the sun, onto the road, and we add just a bit of motion blur!
It’s interesting to list the effects used in post-production.
A word of advice. Refine the render in your 3D application as much as possible to have an excellent starting point during compositing. This implies fewer headaches while color matching and color correcting in post-production.
Working on robust lighting setups with accurate HDRIs, shadows, and additional lighting sources is extremely important and saves time afterward. Don’t underestimate it!
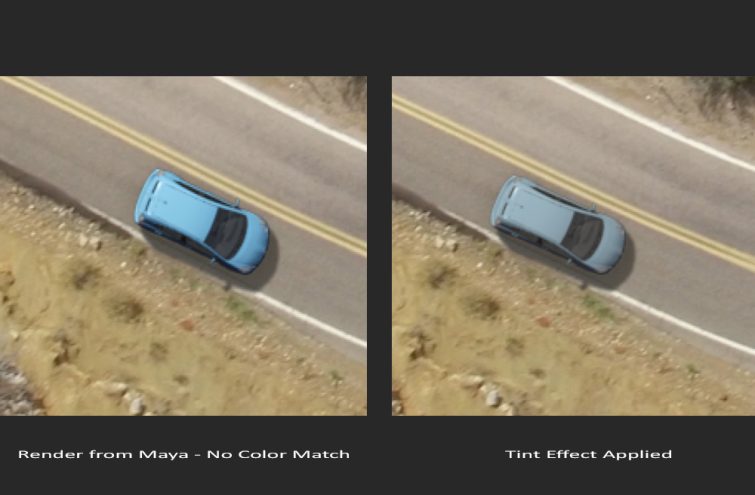
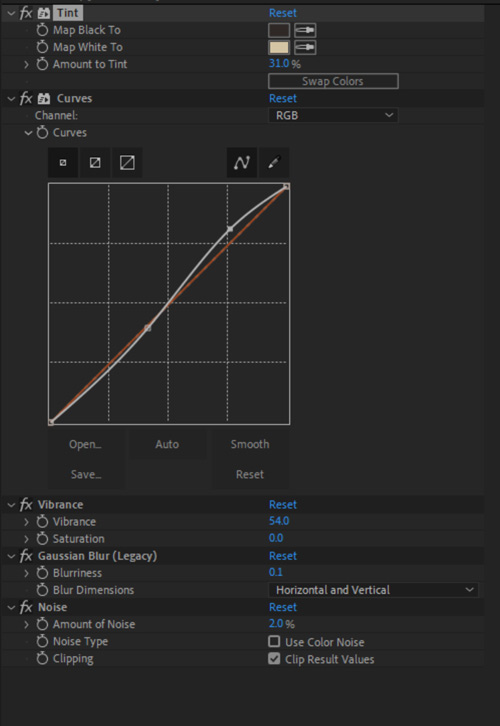
The Tint feature is just for color matching the shot. We set up the white and black points from the video clip and established the tint amount.
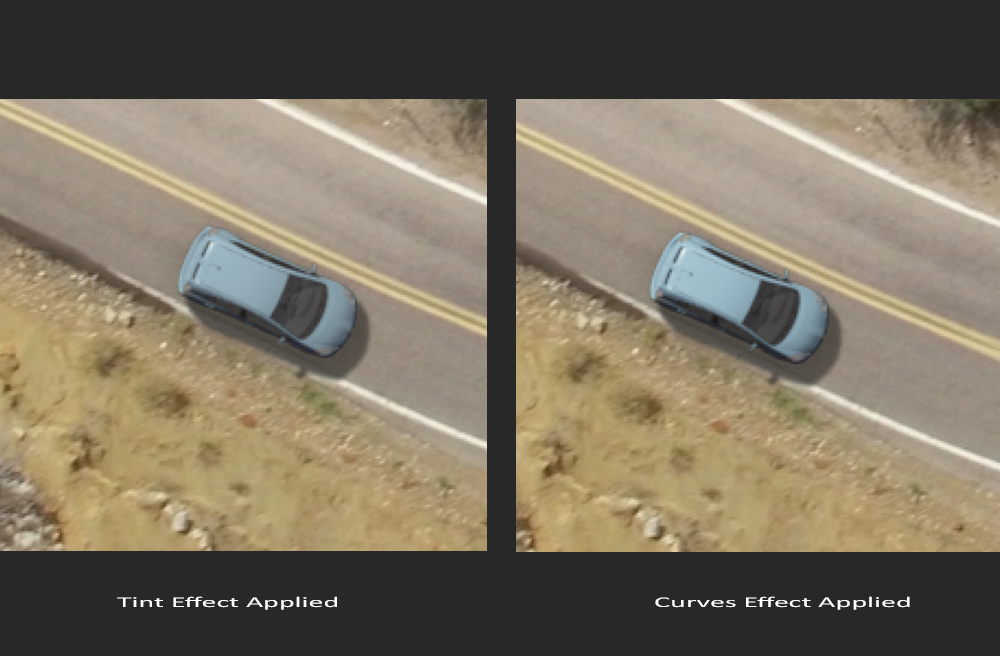
The Curves effect is used to restore a bit of the contrast we lost after applying the tint. It’s a tiny but essential detail.
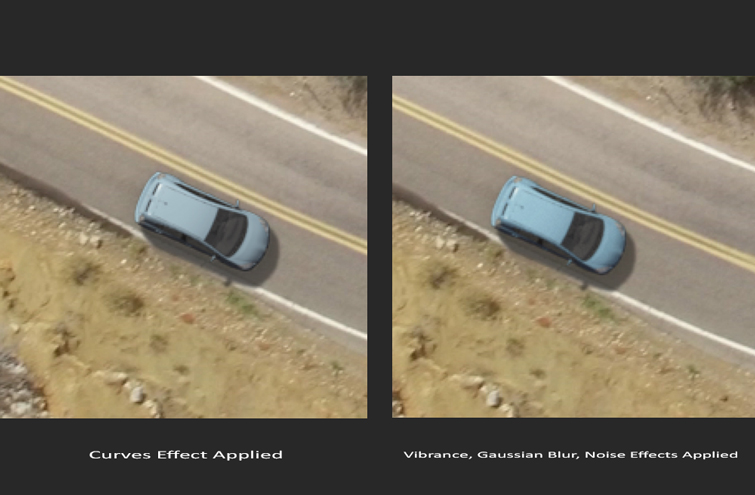
The Vibrance effect makes the car’s light blue a bit more vivid. In this case, the effect is subtle too.
Furthermore, we apply some Blur and Noise effects to integrate the 3D model in the video better.
A More In-Depth Look at Post-Processing in AE
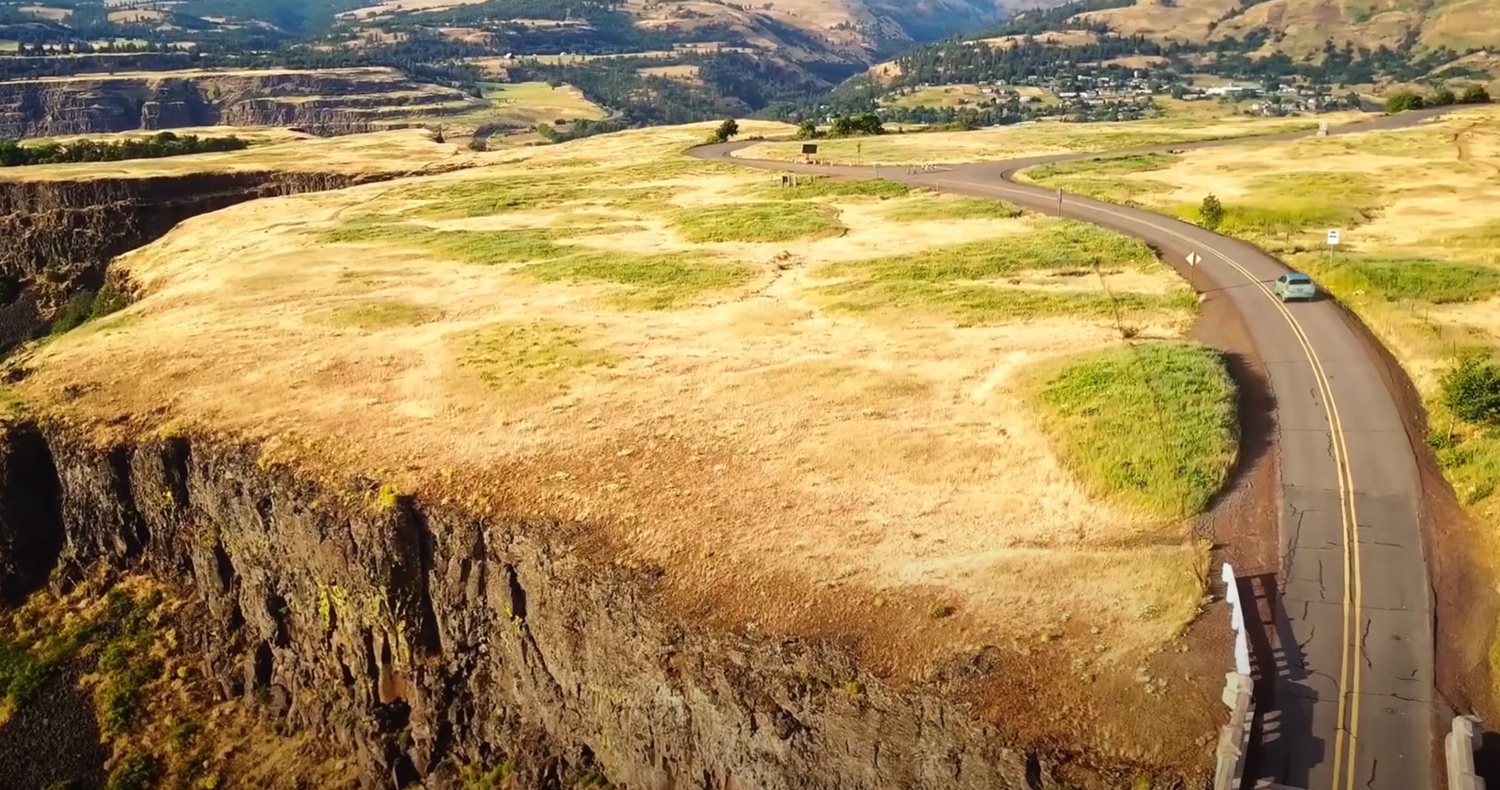
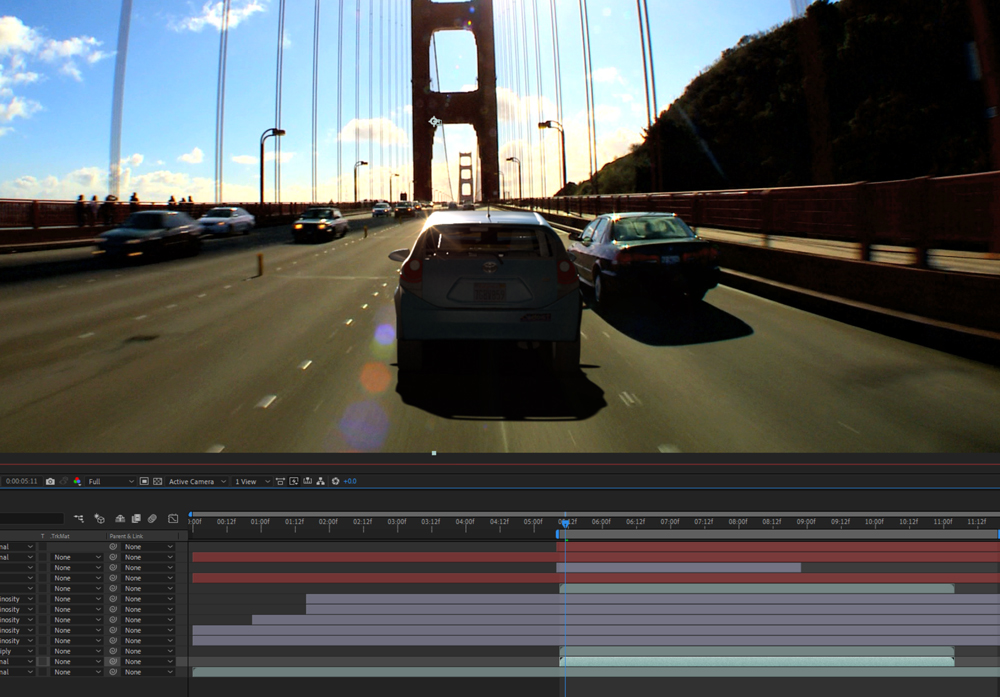
In this part, we’ll show a final example with a different camera perspective. We are on a bridge this time, and our hero car will be positioned just in front of us. The image has high contrast with sharp shadows and a backlit scene. That’s the footage introduced at the beginning of the episode.
Imagine that you’ve already exported the camera tracking and worked in After Effects. This is the final sequence exported in 4K:
Since the original footage has an evident optical distortion—barrel effect visible at the bridge piers—a good rule of thumb is to remove it before you track the camera. That is convenient to avoid having issues while solving your camera.
As mentioned in part 1, PFTrack offers you a tool under the Distortion tab. Use it while tracking but reload the original shot in the final render.
To sum up, these were the main challenges:
- Building a backlight effect on the 3D car, which had to emulate the real environment lighting.
- Creating the right balance of lights and shadows without having a totally underexposed render.
- Adding a lens flare effect, produced by the shiny car body, which resembles the one on the real car.
- Creating fake reflections, when needed, to increase the realism.
- Adding imperfections, grain, and blur effects to emulate the film used in the original footage.
Cameras are not perfect! Capture the imperfections where you can, and remember that your result must reflect the quality of the real camera at the shooting stage. Too much perfection doesn’t look convincing.
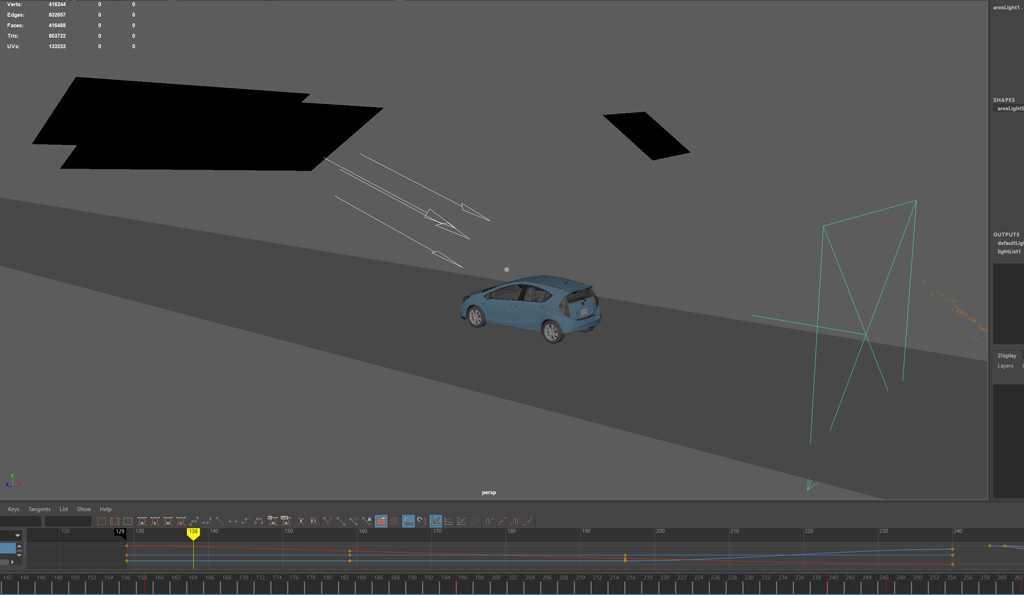
Building Up a Backlight Effect
Consider the real car on the right to study how light impacts it.
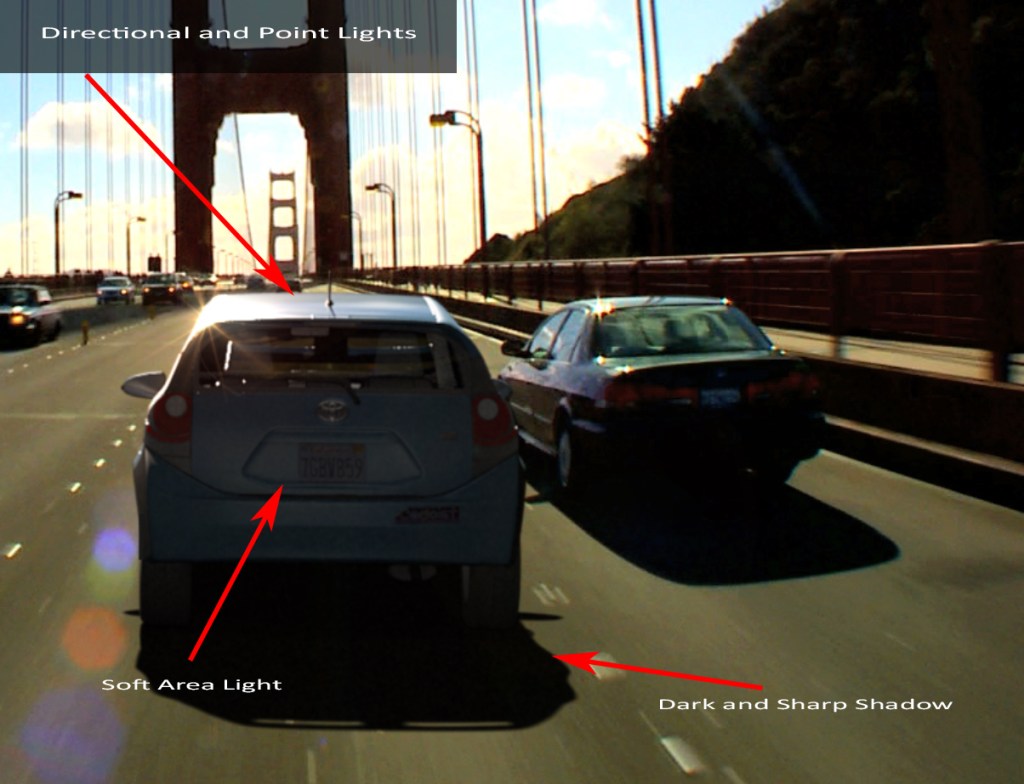
A directional light produces a sharp shadow at the back of the vehicle. Furthermore, the sun hits the car’s roof by leaving the back in shadow but barely visible.
In the 3D software, the lighting setup is relatively easy but needs to match the footage as closely as possible.
- A directional light is being positioned in front of the 3D model.
- A dull and soft area light covers the rear side of the car by adding a bit of ambient light.
- An additional point light, close to the roof, to enhance the specular reflections and the shiny nature of it.
I preferred not to use HDRIs for diffuse reflections because I wanted more control over the high contrast in the scene.
Color Match in AE
The color match can be performed in different ways. I prefer to work on specific RGB channels and tweak them separately.
After applying Levels in AE, we can adjust the red, green, and blue values and re-establish the right colors precisely.
Let’s see it in action!
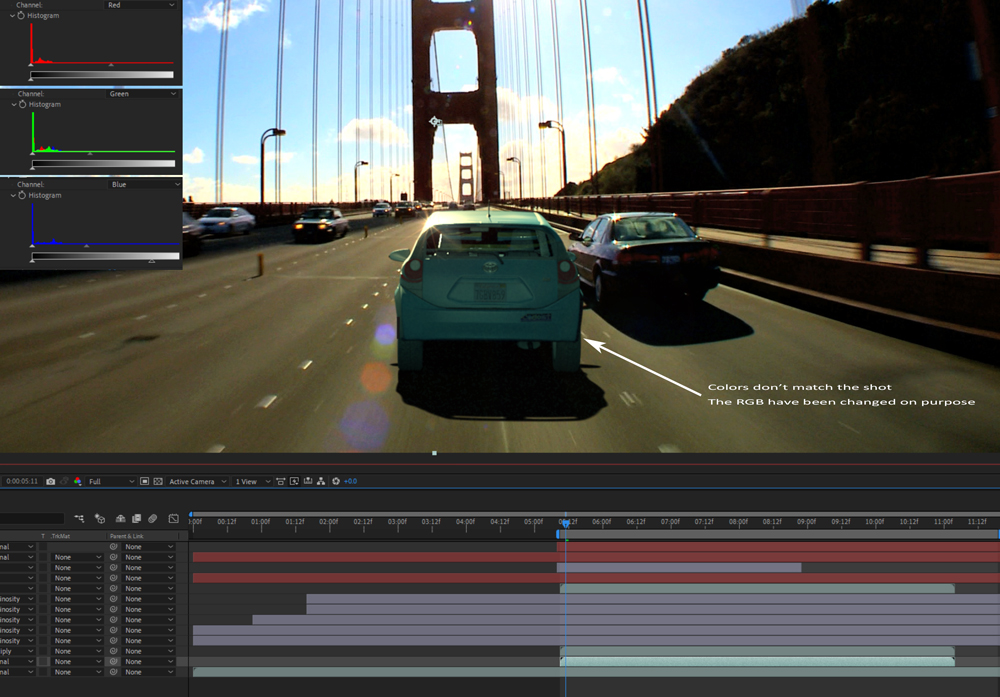
How to tweak the RGB components?
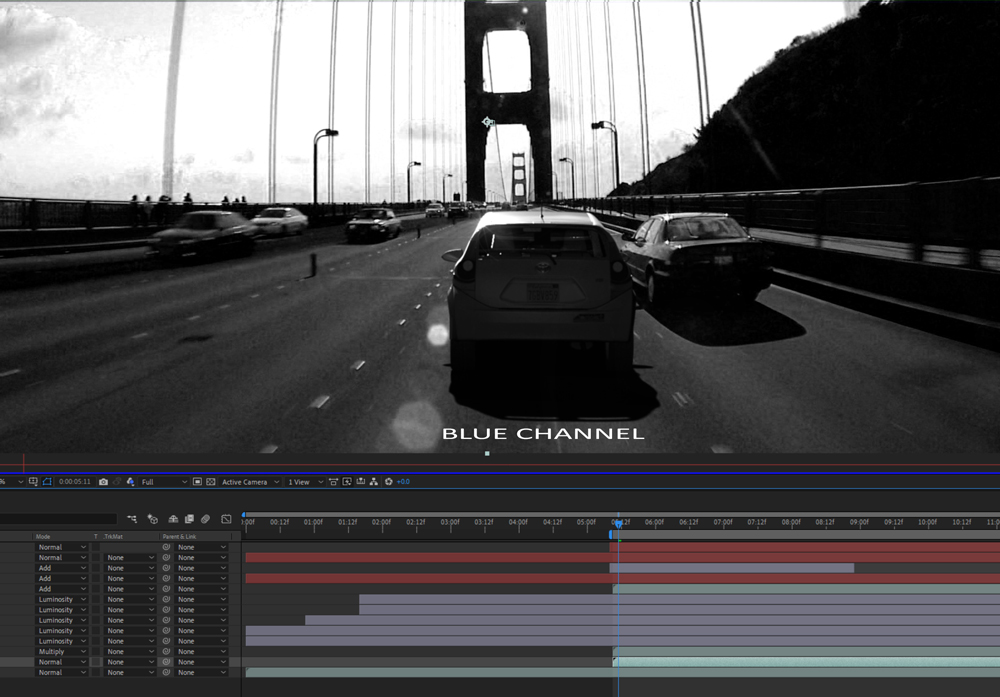
In the previous example, we mainly changed the G and B channels to exaggerate the effect. By examining the G and B channels separately in the shot, this is what we have:
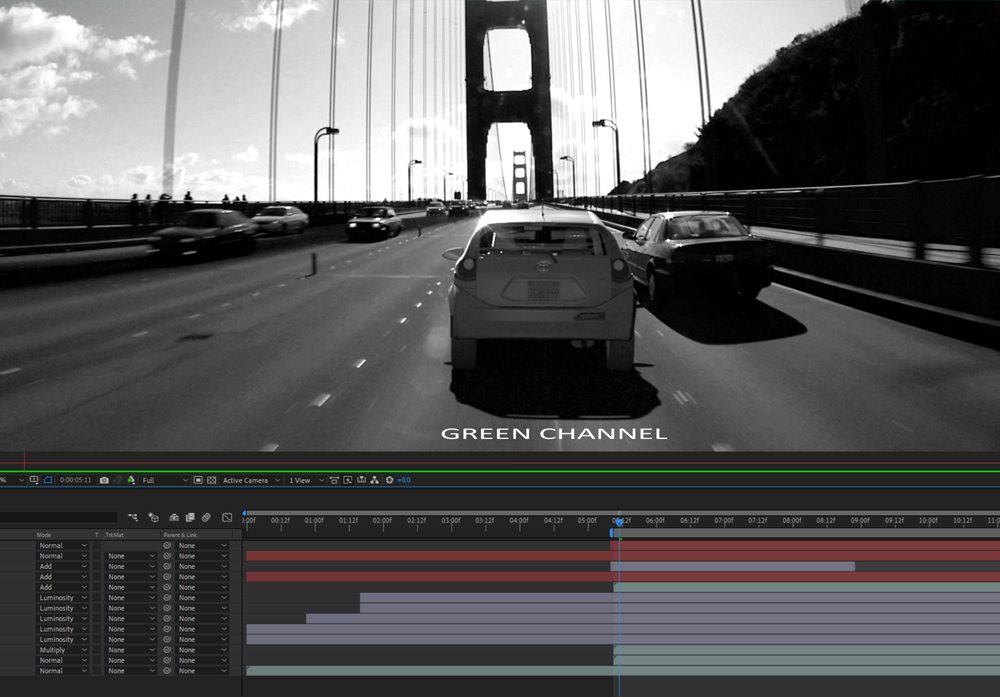
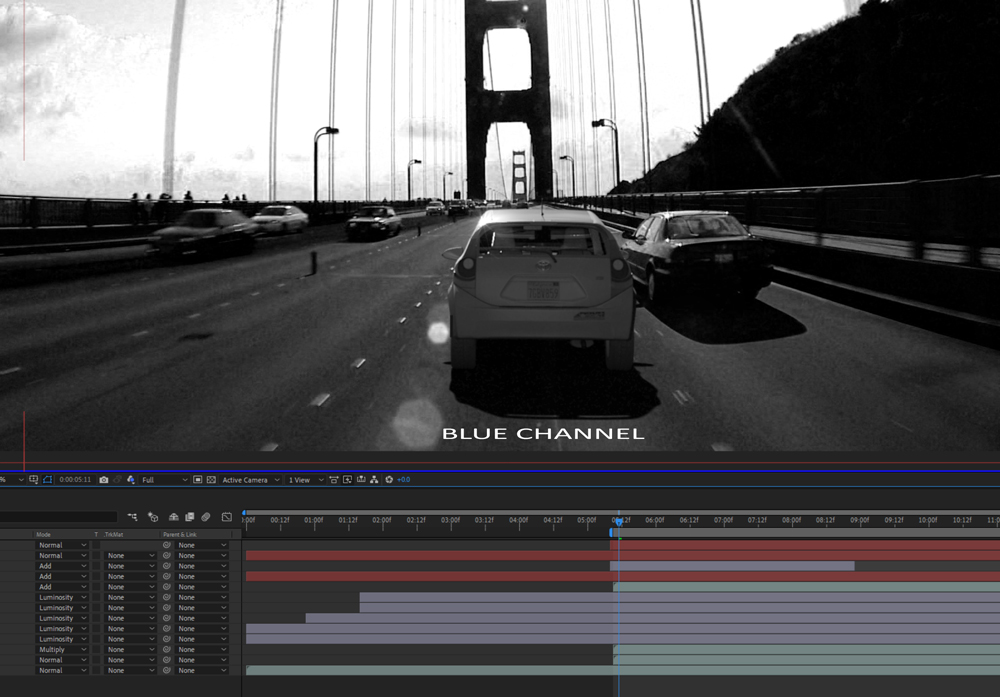
If you observe the car, it appears bright in the shot—this is more evident in the blue channel. That means that you are exaggerating with that component. The Levels effect, with its sliders, can fix that. Tweak the R, G, and B until you see that everything is well-balanced.
Similarly, find the part of the shot with potential red, green, or blue values and try to reach the same amount for your 3D object.
In fact, after tweaking them, the car and the shot amalgamate nicely!

See how the car now matches in the shot. Here it is after and before the color match.
As mentioned earlier, the Tint Effect also works in several situations. It’s a cheaper effect but much easier and faster to apply. Just remember not to boost the tint amount so much, otherwise, the subject is more likely to be affected by a color cast.
Working on custom Reflections
Unlike the other shots, reflections here are considered a separate render pass. In particular, we deal with two different types of reflection:
- The specular highlights from the lighting setup we built.
- The fake reflections from the environment.
As long as you can access the shooting area and use light probes to capture 360-degree environment reflections, that’s perfect! However, most of the time, it’s impossible to shoot at the actual location, so you need to fake the reflections.
But how?
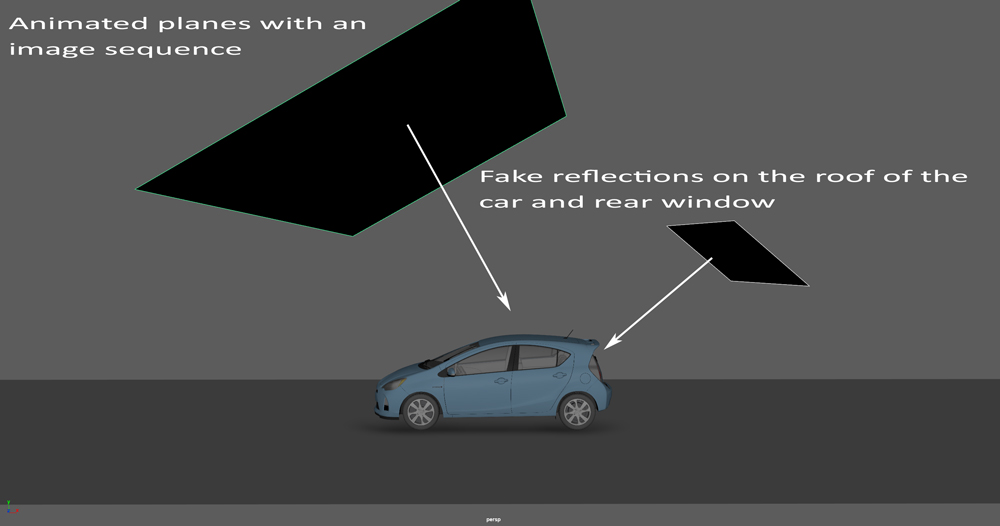
Consider that most reflections are visible on the rear window and the car’s roof. So I decided to target specific planes towards those areas.
Each plane reproduces an animated pre-elaborated clip to cover the car’s surface. The delicate plane movement, summed to the video clip playback, helps increase the sense of dynamism of the whole shot.
A curious fact: if you observe the reflections on the rear window, you’ll notice a pre-elaborated version of the initial video clip, without the car.
At a certain point, you observe the road, the sky, and the bridge, with the idea to extend the same environment behind the car. Pretty cool!
Finally, remember to save the reflections pass for After Effects. For instance, if the reflections appear dull, you can always boost their intensity.
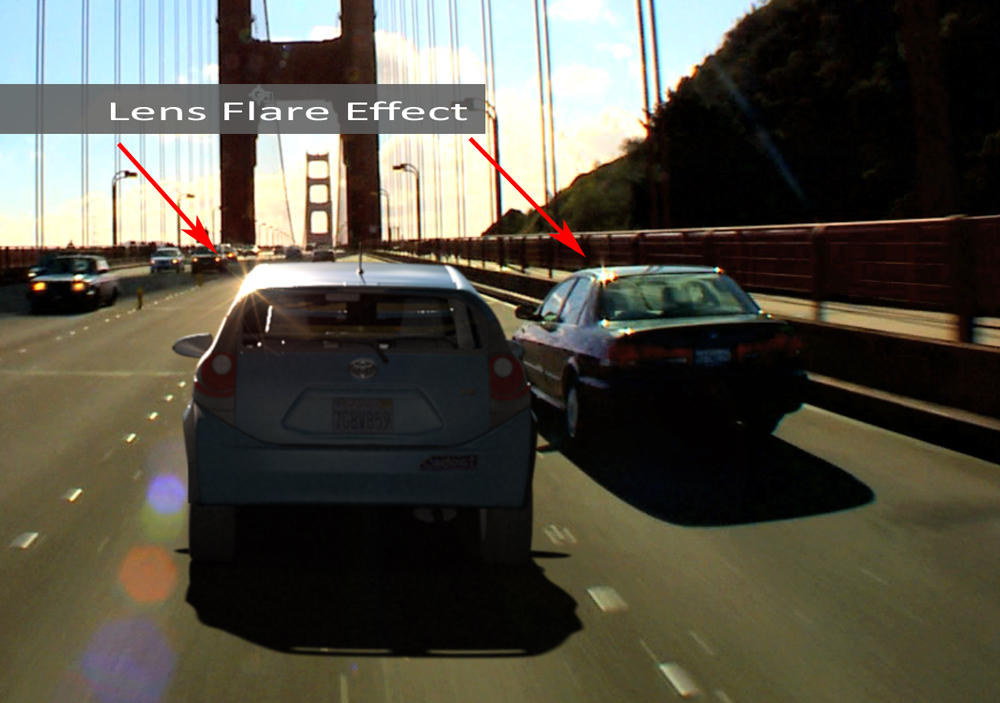
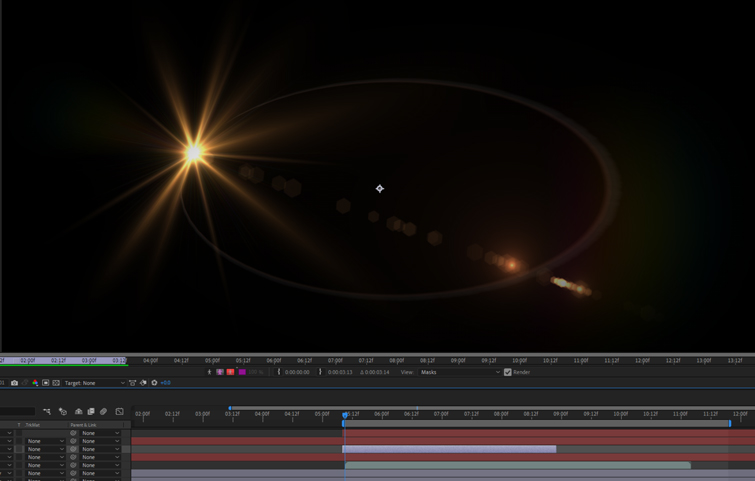
Lens Flare Effect
We add this kind of effect in post-production. If you observe the real vehicle, there is a strong reflection—on the roof of the car—that creates a pattern on the camera lens.
A lens flare effect produces a glare that might improve your 3D integration sometimes.
Nonetheless, consider using the lens flare effect sparingly. Despite being applied for aesthetic purposes too, don’t go overboard.
Shutterstock has a huge library of lens flare effects you can consider. Once added as a separate layer in AE, you can use the Add Blending mode to composite it with the rest of the layers.
Final Touches
Apart from the color match that we explained earlier, this is the list of the effects used to improve the final result:
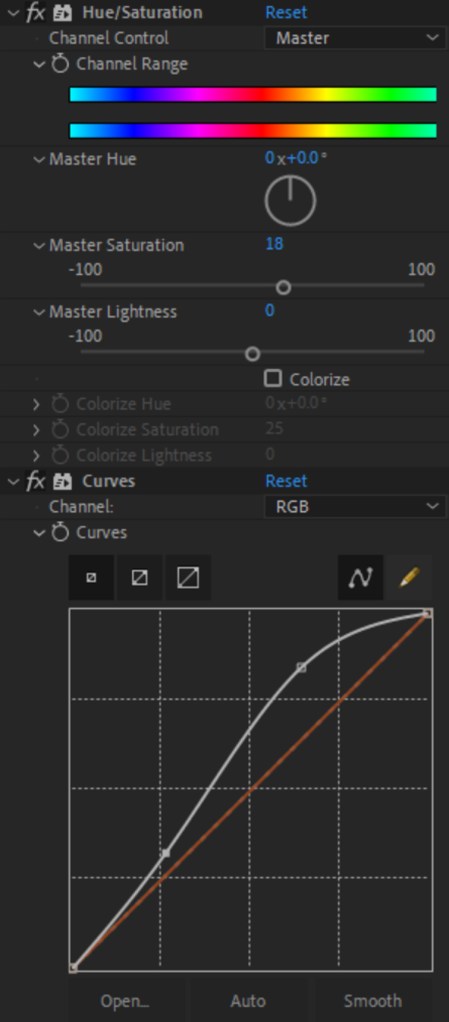
- Hue/Saturation: This effect helps us increase the saturation a bit. As happened in the previous example, the effect is soft and less noticeable.
- Curves: By observing the curve profile, we mainly increase the brightness in the bright areas—the roof of the car for instance.
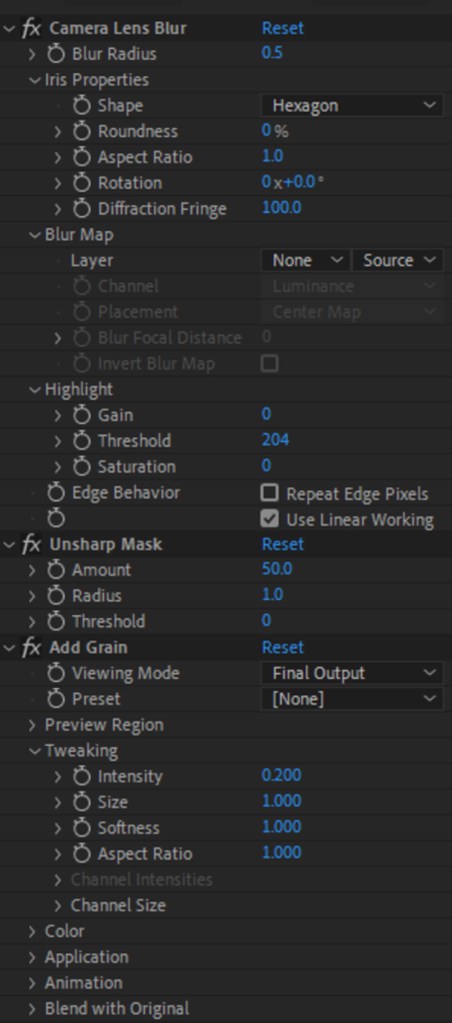
- Camera LensBlur: Adds some blurriness to the car.
- Unsharp Mask: Increases the contrast close to the edges.
- Add Grain: Most of the time, real cameras introduce a grainy look to the image. This effect simulates that look.
Finally, here is the video showing a few post-processing effects used in AE:
I hope you like this installment and I invite you to follow me on my Linkedin page.
For more on 3D, check out these articles below: