Your New Best Friend: 5 Tools to Mount Your Camera Vertically

Let’s take a look at five products (and methods) you can utilize to mount your cameras for vertical footage.
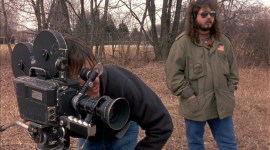
If you’re at all involved with full-time or freelance content creation, then it’s likely someone is asking you (with ever-increasing frequency) to produce vertical video. That means you’ve probably been asking yourself a couple of related questions:
However, this approach will prevent you from getting a full sensor readout, and you’ll miss out on the increase in perceived clarity.
Plus, actually taking steps to film vertically means you can then crop into the shot for a closeup, which (again) would be inherently sharper than cropping into already cropped 16:9 content.
So, with all that in mind, back to the first question: What’s the best way to mount a camera for vertical footage?
Here are five of our favorite answers in the form of products that will make shooting vertically a breeze.
1. Tripod with 90-Degree Tilt
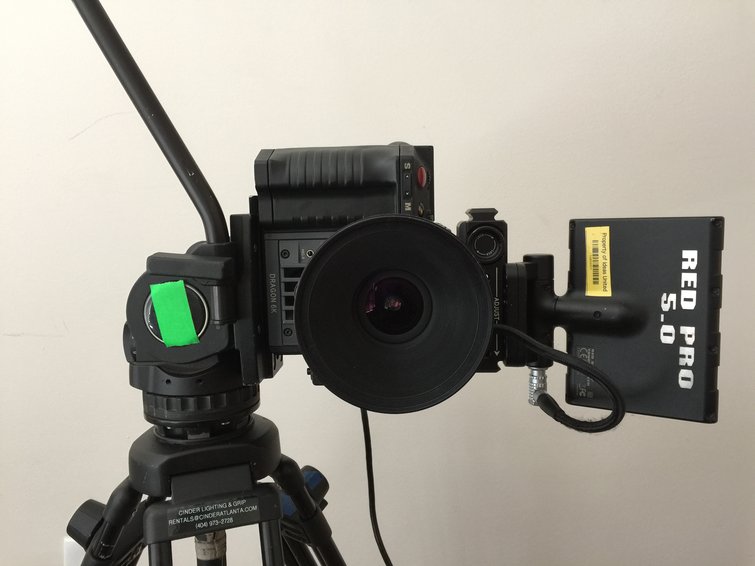
If you need a quick vertical-video solution that’s probably already in your kit, you’ll be pleased to know that most tripods are capable of a full 90-degree tilt. With this tilt, you can toss your camera on its side and then side-mount the camera on your tripod plate. This quick solution allows your camera to capture the most amount of pixel information possible.
If you take this approach, remember to adjust the mounting plate so that the camera is set 90-degrees out from the standard forward position. Otherwise, when you tilt the head down, the lens will be pointing toward the floor.
A tripod should be a must-own item for any videographer or photographer. Investing money into a good and durable tripod will last your entire career, if treated well.
If you need some recommendations on what tripods to buy, we’ve got you covered:
2. Vertical L-Bracket
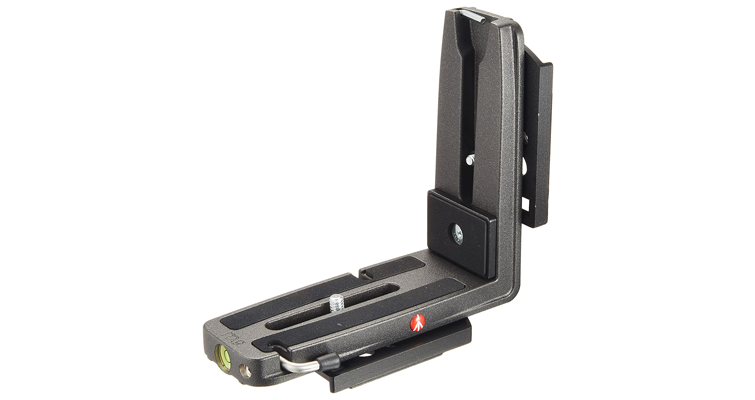
If you’re consistently capturing vertical shots in addition to landscape images, swapping the position of the camera on the tripod plate can become tedious. Therefore, I recommend looking at an L-bracket.
An L-bracket allows you to rotate your camera from landscape to portrait perspective without having to roll your tripod head 90-degrees. You can slide the L-bracket out from the tripod head and then back in at the other angle for an instant change to a vertical setup.
Multiple companies will offer vertical L-brackets, from Manfrotto to Smallrig. Some are camera specific to fit seamlessly with your system, while some are universal.
Prices can start as little as $30 and go up to the $150-$200 mark. The higher-priced L-bracket models generally have more accessory connection points, rubber strips for your camera’s protection, and upgraded metal and construction materials.
The design of the bracket can play a big part when it comes to swapping out batteries. You want to make sure you get one that will allow you to have easy access to your battery door. Most L-brackets are Arca Swiss-compatible but do check your tripod mount before ordering; otherwise, it won’t fit.
3. SmallRig Cage
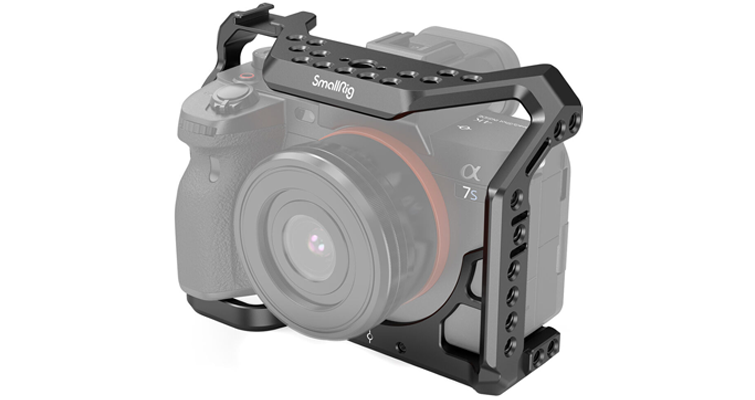
SmallRig has a plethora of options for building out a cage set up for most cameras on the market right now. Keeping it basic, using a cage with two mountable side handles makes it so easy to shoot handheld vertical video.
You can also add a Quick Release Arca-Type Base and Plate onto the cage to make it mountable onto a tripod.
Many filmmaking YouTubers share how to make custom setups using the SmallRig cage system. They share custom setups with SmallRig accessories that provide the optimal shooting experience for many different applications.
The big bonus? It’s affordable to get all the pieces you need for your ideal setup. These cages are made from a lightweight aluminum construction—it doesn’t add too much weight to your setup.
The extra items you might mount, including external monitors, hard drives, or battery packs, might add a few pounds to your gear. However, ultimately you get to decide and customize your setup for what you need.
Shimmon JM shares how they configured their system in this super helpful video.
4. Wooden Camera Vertical Plate
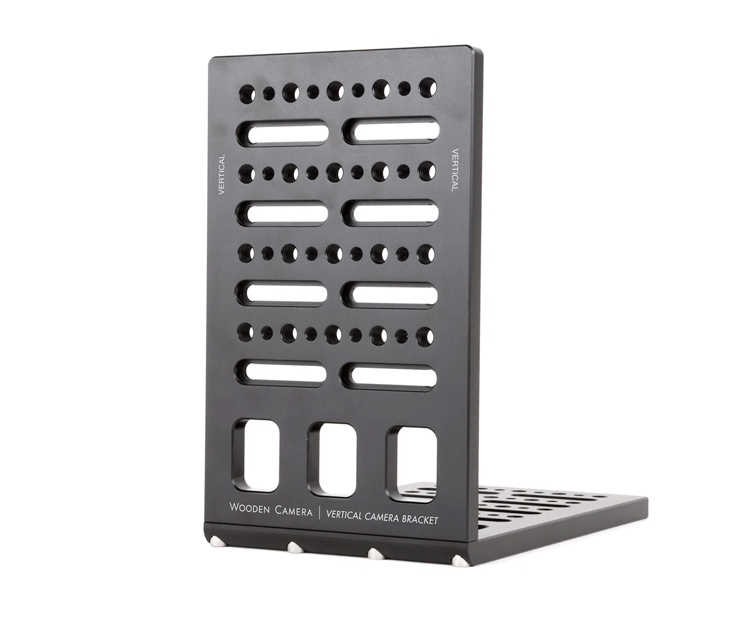
Working with something larger than a mirrorless or DSLR camera? You might need to look at a vertical plate instead of an L-bracket. The Wooden Camera vertical plate is made of durable, CNC machined aluminum. The bracket can hold some of the heaviest cameras currently on the market.
Additionally, this system allows you to mount accessories in many of its 1/4 20 and 3/8 16 mounting points. They also offer a mini version offering the same package as the bigger brother, but 45% lighter than the full-size version to accommodate smaller camera setups.
It’s a pricey option at $295 for the standard size and $195 for the mini, but if you’re serious about shooting vertical content, then these vertical plates will be a nice asset to your production and are probably the safest option for your camera.
5. Gimbals

There’s no doubt that gimbals have exploded in popularity and affordability over the past few years. There are gimbals for mobile phones and larger video cameras between the various brands and product offerings within the gimbal market, and you’re sure to find something that will work well for both your budget and setup. These self-stabilization devices are perfect for mounting cameras for vertical shooting.
Some, if not all, of the premium gimbals on the market will come with some sort of vertical quick-release mount (such as the Zhiyun Crane-2S), but fear not if it doesn’t.
You can use something like a SmallRig cage (mentioned above) or any form of bracket mount to attach it to the gimbal. Once attached, make sure you re-calibrate your gimbal so you don’t get the dreaded “death roll.”
We’ve done a full article on the lowdown and run-through of all the gimbals within all budgets that we recommend. Check it out:
For more filmmaking tips and advice, take a further look:
- The Best Camera for a New Content Creator
- Canon Announces EOS R7 and EOS R10 – Compact APS-C Cameras
- 5 Preparation Tips for Directing Your Next Commercial
- The Pros and Cons of 4 Popular Camera Rental Options
- Why Virtual Production Could Work for You
Feature image via Gorodenkoff.