DaVinci Resolve 15 Video Crash Course — Working with Audio on The Edit Page
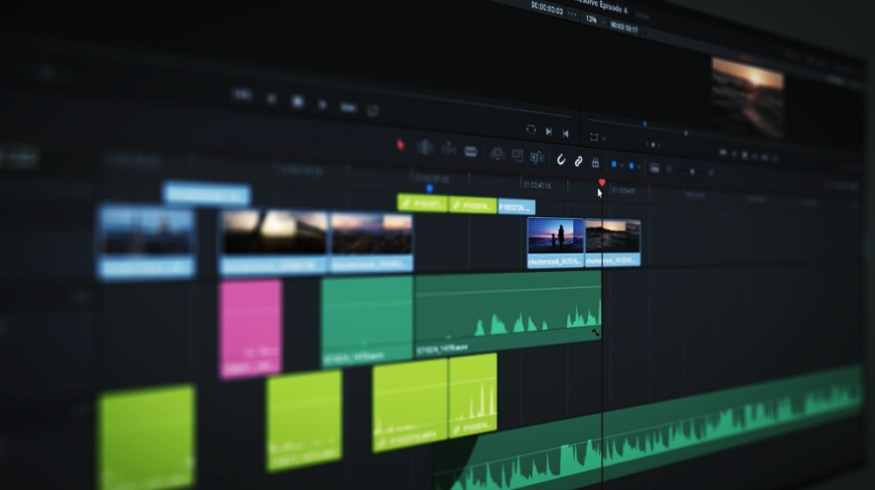
In part 4 of our six-part video series The DaVinci Resolve 15 Crash Course, we take a look at what you can do with your audio on the edit page.
Welcome to part four of the PremiumBeat Resolve Editing crash course. In this episode, we look at audio features on the edit page.
Audio is often regarded as more important than visuals. An audio slip-up is easy to hear, whereas a visual slip-up can go unnoticed. After all, how often do we notice a crew member in the corner of the frame until someone points it out to us on YouTube.
For a year or so, we’ve had the addition of the Fairlight audio page with a page dedicated to professional audio mixing. Not to be deceptive, but this isn’t going to be our primary focal point of the episode, and the same goes for the fusion and color pages. We’ll touch upon some features in our final chapter.
Audio Feature Recap
So, there are a few audio features on the edit page that we haven’t covered. We’ll look at those but first, in episodes 1-3, we touched upon a few audio-related elements. Let’s quickly recap:
- If you want the audio element from a video clip currently in the source viewer, you just hover over the lower third of the video. Then, click and drag the audio waveform icon onto an audio track.
- On the timeline clips themselves, you can create a fade-in or -out by dragging the white handles inward. Then you can increase or decrease the audio level by moving this bar up or down. Or, if you open the inspector, you can adjust the volume with more control.
- If you find that your audio clips aren’t showing audio waveforms, don’t worry. You may have turned off the waveform display. To turn that back on, you just hit the timeline view options and make sure the audio waveform icon is highlighted white.
Mute and Dim
That’s pretty much all of the audio aspects that we’ve previously covered. Now, let’s take a look at what audio features we have here on the edit page. Underneath the video track area, is, of course, our audio timeline. If you right click on a track menu, you can change the audio track type from mono to stereo to 5.1 and so on. We can also mute and solo the track. I know this is a crash course covering just the basics, but I won’t tell you which buttons do what. I’ll leave that mystery up to you.

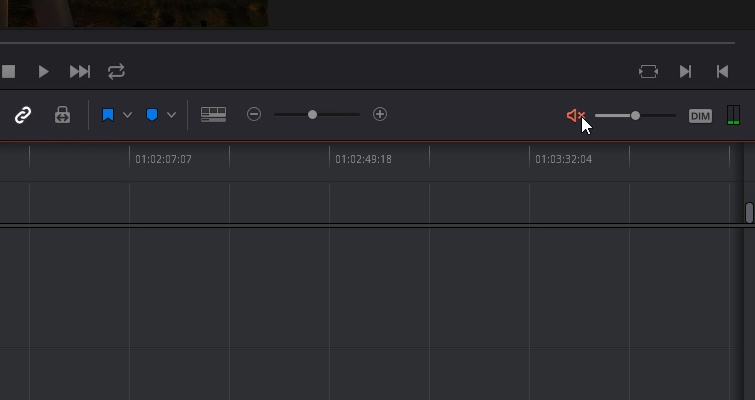
However, if you ever want just to mute the entire timeline you can click the mute icon here. Likewise, you can simply lower the volume.
The difference between muting or lowering the volume using this tool is that it only affects Resolve as a software operation. It’s a means of silencing the edit while you work or playback your material without having to mute Resolve from the OS volume bar. It doesn’t affect the audio levels on the timeline. So, if you render a video with the mute icon active, you still have audio on the given video.
Next to the mute volume button, we have a dim button. This is useful when playing back your edit to someone. By hitting dim, the audio will slightly reduce in volume, allowing you to proceed with the edit at a more audible level. When clicked again, the audio will return to the normal levels. Again, this is non-destructive, and if you render your edit with this active, the audio will render at the levels set by the track mixer, not dimmed.
Track Mixer
Now let’s have a look at how the track mixer functions on the edit page. As I mentioned in the initial tour of the edit page, you open the mixer by hitting the audio mixer button.
If you initially only see a set of audio meters, click the ellipses and select mixer. If you’ve used an older version of Resolve, you may remember that we also used to have a clip mixer here. But, that feature has been removed.
Here you’ll have an array of track mixers, and they’ll correspond to how many tracks you have on the timeline. However, there will be an extra mixer called main. You can use it to increase or decrease the levels of the overall mix.
There’s no wizardry about using the levels. Merely push the fader knob up or down to increase or decrease them. On the Premiumbeat blog, we have a handy guide on what levels you should have your audio set to, so be sure to check that out if you get lost. Meanwhile, you’ll see that the audio levels are color coded to give you a visual indication of where your levels sit. Green is low, yellow is high, and red is very high, with probable clipping.
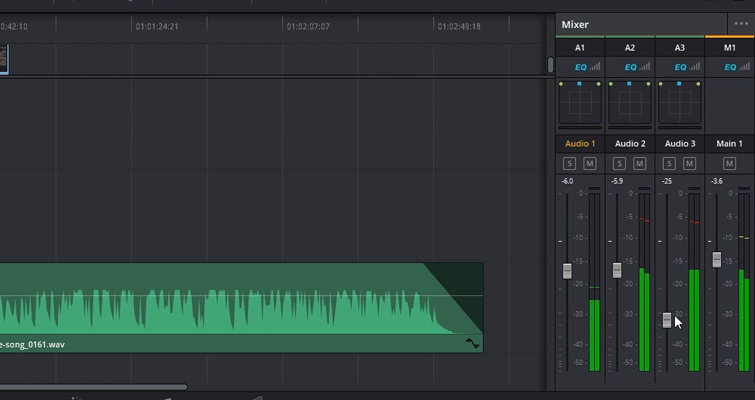
Clipping is essentially when your audio is too loud to be properly audible. The audio waveform on the clips will give you a visual indication of when part of a clip is too high by changing the peaks to a lighter shade of the clip’s color.
Pan Mixer
Above the level mixer, we also have a basic pan mixer. Here you can pan the audio so it appears to be coming from a different direction.
There are two ways you can use this tool. First, you click inside the box and then drag the blue square in the direction you want. So, if I want my audio to appear as if it were coming from the rear left, I drag the blue square to the bottom left of the square. Of course, to hear this exact pan, you need a monitor setup or headphones that can adequately hear the positioning of the audio. Otherwise, it sounds like it’s just coming from the left.
If you double click the pan square, you are greeted with a pop-out pan display. This will offer further settings to fine-tune the effect. You can pan a specific clip by clicking on the audio clip, opening the inspector, activating the pan keyframe, and then animating as you see fit.
EQ Function
Finally, we have an EQ function on the mixer panel. However, this specific button was rendered useless in the latest update and to use it we need to head to the Fairlight audio page. But, we do have a basic EQ and pitch tools in the inspector.
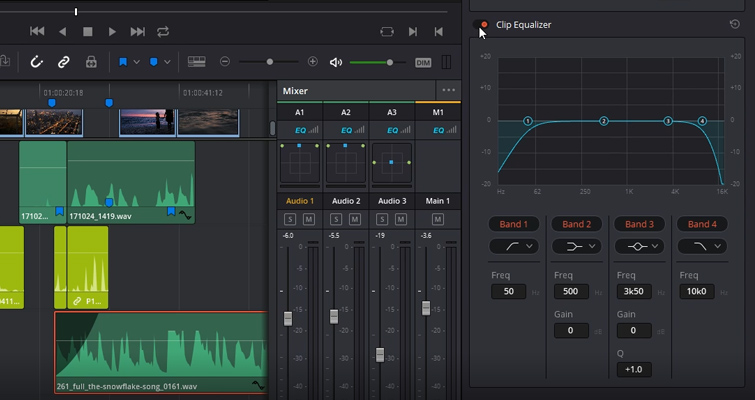
On the edit page, the effects and transitions for audio are on the effects panel. Now realistically, there are only a few ways to transition audio, such as a crossfade. To bring one onto the audio clip, drag and drop the transition onto an audio clip. As the name states, the only area you can position a transition is at the start or end of an audio clip. You can also press control T to have the default transition apply to the selected edit point. This shortcut works for the default video transition too. To make a transition the default, right-click and choose save as default.
The audio effects work similarly. Find the needed effect in the effect’s library, then drag it onto the audio clip. You will be greeted with a pop-out user interface unique to the effect. For example, when we use reverb, we have a visualization of the reverbs effect on the frequencies of the audio signal.
If you close the audio effects user interface but later want to adjust the parameters of the effect, you select the clip, open the inspector, and you’ll find the effects adjustable properties at the bottom. If you want to open the interface again, just hit this button.
This pretty much covers the audio elements of the edit page. It’s pretty simple, right?
Interested in the tracks we used to make this video?
- “Relaxing in Vermont” by Chill Study
- “Brooklyn Drive” by Chill Study
Looking for more on DaVinci Resolve? Check out these tutorials.


