The Exposure Fundamentals Behind Great Filmmaking
From aperture to shutter speed to frame rate — in this tutorial, we’ll look at the basic building blocks of great filmmaking.
To guide you through the fundamentals of getting a good exposure, I’m going to draw from the diagram of the exposure triangle originally created for photographers. It illustrates aperture, ISO, and shutter speed, and thanks to our friends at Shutterstock, we’ve got a free bag tag featuring the triangle for easy reference on your next shoot. (Download it below).
At the very top of the triangle, we have aperture and how your iris can affect your depth of field. So let’s begin by breaking these two things down and how they relate to one another.
Aperture

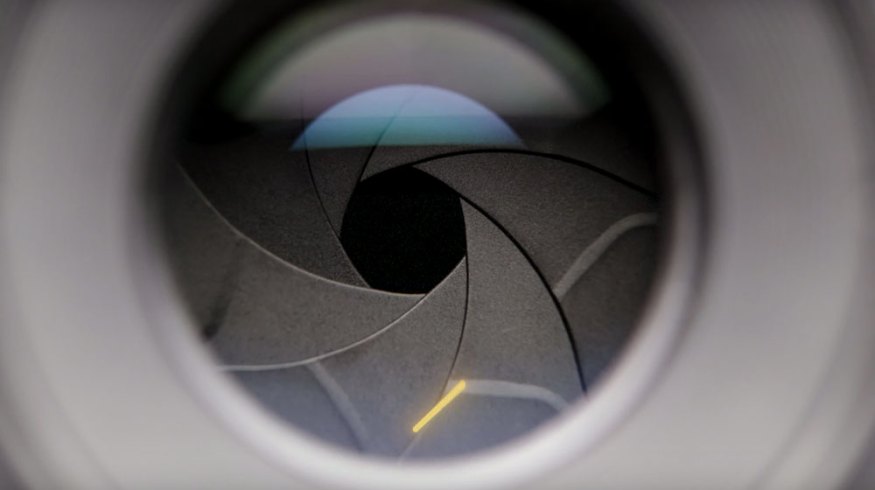
Aperture is the opening of a lens diaphragm — how much light passes through and reaches your camera’s sensor. Much like how the pupils in our eyes adjust in size according to the brightness of our surroundings, the aperture of a lens opens and closes to allow more or less light through, changing the exposure of our images.
The measurements for aperture are focal stops (or f-stops), which actually scale in a way you might find illogical — the lower the f-stop, the more open your aperture will be, thus letting in more light. This is because f-stops are actually fractions, which makes it much easier to remember if we treat them as such. An f-2 is actually one over two — or one half — which is a larger number than f-4, which is one over four — or one fourth.

Depth of Field

Depth of field is the distance around your focal point that is also in focus — basically how far in front of and behind your subject your image maintains focus. If your subject is in focus, with the rest of your image blurred out, this is called shallow focus — or having shallow depth of field.
You achieve this look by using a lower f-stop. This is a highly cinematic look, great for shooting solo subjects because it draws attention to them. You can also display lights in the background of a shot, with shallow depth of field, and the lights will take on a nice bokeh look, which is quite beautiful.

User Eric Xavier asked me in another tutorial how to keep from having a flat-looking image on my mastering manual focus tutorial, and, well, using a backlight and shallow depth of field are two of the best ways to pull your subject away from the background, thus avoiding a flat image.

If you use a higher f-stop, you can maintain detail and focus throughout the entirety of your shot. This is known as having a large — or deep — depth of field. This is perfect for landscapes, extremely long shots, or basically whenever you want to ensure that every detail of your frame is in focus. Adjusting your aperture to achieve a certain depth of field for your project may leave you with an unwanted exposure, so let’s discuss adjusting your ISO to help level out your exposure.
ISO
In essence, altering your ISO means changing how sensitive your camera is to light. The lower the ISO, the less sensitive it’ll be to light. The higher the number, the more sensitive it’ll be. When raising your ISO, you’re increasing the electrical signal that’s being applied to your footage. So, a higher ISO will yield a brighter image because it has been amplified with a stronger charge. But, if you raise the ISO too high, this can yield a poor image by adding “noise” or “grain” to your footage.
Cameras are getting better every year at handling the noise caused by higher ISOs. But, when you find yourself in a low-light setting — where you must increase your ISO — be sure to keep an eye on the “noise,” especially in the blacks of your footage. Your camera is going to have a native ISO, which is the baseline setting that allows you to achieve the most detail out of your footage. Be sure to know the native ISO of whatever camera you may be using. Many new cameras will have two listed — dual ISOs have become a rising staple in our industry.
Shutter Speed and Frame Rate

Shutter speed is the refresh rate of your camera — or how long each frame gets exposed to light. With a higher shutter speed, we’re going to get crisper images, which are great for action films or fight scenes since they capture so much detail. Lower shutter speeds are going to have some blur in the motion, which will actually feel more natural to your audience.
For shutter speed, the rule of thumb is following the 180-degree rule, which is to mimic motion in a natural way to double the shutter speed of our frame rate. For example, if we’re in 24p, then use a shutter speed of 48 (or 50, if your camera doesn’t have a setting for 48); use a shutter of 60 if you’re in 30p, etc. That’s not to say you can’t step outside of this rule for different aesthetics, but it’s definitely something to consider. The higher shutter speeds are a great way to add kinetic energy to your footage, so experiment with different shutter speeds to match your story.

Frame rate is how many frames your camera is capturing per second. The industry standard for filmmakers is 23.98 frames per second — or 24p. This is the classic cinema look to which we’ve all become accustomed over the years. Other common frame rates to know are 25 or 30 frames per second — 30p is most commonly associated with shooting news or sports. If you wanted to drop below 24p, it’d be more of a creative decision, which I’ve seen used to represent someone recounting a memory or simulating the feeling of intoxication — also used in a few not-so-great ’90s grunge rock music videos. Now, if we increase the frame rate to, say, 48fps, this unlocks the ability to use slow motion, giving us the option — in a 24p editorial timeline — to double the length of our clip for slow motion.
So, we’ve covered everything in the exposure triangle — and even discussed a bit extra. Now you’re set with the basic building blocks to becoming a great filmmaker. Experiment with all of them and be sure to check back in with us here at PremiumBeat for more advanced tips.
Interested in the tracks we used to make this video?
- “The Urge to Win” by Vincent Tone
- “Awaken Together” by Evan MacDonald
- “Little World” by Fugu Vibes
Looking for more filmmaking tips and tricks? Check these out.