How to Create Volumetric Beams of Light Using Haze
Add some god rays to your video project by creating volumetric lighting using a haze machine and some carefully directed light sources.
The first time I worked with haze, it was as exciting for me as when I found my first “favorite lens.” While it isn’t something everyone has worked with, it is one of my go-to filmmaking tools. However, I was timid in trying one particular haze skill — creating beams of light.
Here’s how it turned out.
Volumetric lighting — or “god rays” — are not as difficult to create as the name implies. Adding beams to your film on a small, manageable scale is entirely possible.
When I began pulling together this project, I subconsciously started forming a somewhat essentialist theory. You can scale that concept up and down based on the size of your set, your story, or other factors you deem necessary. Everything else is just an accent to boost the actual beam(s). So, to create beams of light, you only need two things:
- A narrow-beam light source
- Haze
This means that an LED panel, with multiple teeny bulbs (re: light sources), wouldn’t quite work. Not only would you see the multiple individual starting points from the light, it would then become too muddy and wide, as the light continued out to the subject.

An LED panel produces a multi-light illumination of fog, thus making the scene less realistic.
Fog also isn’t quite going to do the job. Fog is “heavier” than haze, it’s more noticeable, and it doesn’t blend and disperse as evenly. It would look beautiful in many instances — for example, if you want to see more motion in your beams. However, I had a vision of a still, dreamy shaft of light.
In the beginning, I toyed with different combinations of this idea, starting with a spot (not flood) flashlight/lantern and a can of haze. I got a pretty beam, great for a medium shot or closer. Yet, the vision in my head was a little bigger than a wee lamp. These are god rays, after all.
Arrisun HMI Light + Haze Machine
So, the actual beam section of this set is made by only these two things. So far, I have only ever used Hurricane Haze machines and cheap fog machines, so I wasn’t too particular about my actual haze machine.

The ARRI Arrisun 12 produces the brightest light you can plug into a wall.
I was quite particular about one light. I used an ARRI Arrisun 12 – Par (1200W) as my light source, which (according to B&H) is the brightest light you can plug into a wall. Now, an HMI Light uses an arc lamp, which uses an arc of electricity, as opposed to an incandescent bulb. Incandescent literally means “emitting light as a result of being heated,” so you can see how that would be less ideal, even if they’re less expensive. Incandescents are beautiful, orange-ish lights, and HMI lights are more efficient and happen to be daylight temperature. A modest set could benefit from an incandescent light.
I went a little overboard and chose the HMI and a chunky Hurricane Haze machine.
Beam Sizes
I had envisioned a giant shaft of light. The owners of the house wanted to put blinds on the window, which would break the beam into pieces. It ended up looking better with the blinds for this set (in my opinion), so I left the blinds down instead of raising them.

Cutting beams of light into patterns.
For our small version, the spot flashlight + haze-in-a-can concept, you could achieve this same idea with a DIY cookie using cardboard! A cookie, or cucoloris, can create the look of blinds, or you can create whatever shape suits your vision. (Cucoloris is spelled about four different ways. Like American English “gray” and the British English “grey.”)
For more on cookies, check out these two articles on cutting light and creating shadow and light modifiers.
Accents
Once you choose your light and haze setup, the rest of your set may need attention to really set the mood — such as with my set’s entry room. To balance out the monster that is the HMI light, I chose a standard ARRI 4-Light Kit to bring a glowy balance to the other windows.

Contrasting colors emanating from the windows.
These accents could also be any practicals you want to include. The fun thing about our beams of light is that it doesn’t match the color temperature of the other lights. So, as you move through the space with a lower level of haze (or none), you get the slightest contrast of soft blue from the HMI to baby-chick-yellow from the surrounding windows. Don’t stress too much about your practicals matching your beams. If it looks good to you, give it a shot!
Haze Levels
Level One

The first shot of haze is subtle, concentrating close on the front door.
The first shot has a soft puff of haze concentrated at the front door. It’s gentle and soft, while the rest of the room is nice and sharp.
Level Two

The second shot of haze gently covers the entire space.
Level Two received a generous flow of haze through the whole space, making it noticeable but not overwhelming.
Level Three

Almost at full blast, the haze consumes the area, creating a smoky effect.
Let ‘er rip! We turned the haze on until we were concerned we might not be able to see anything. At this point, you get some dreamy, cool, special-effects types of scenarios. The haze began to look smoky toward the end.

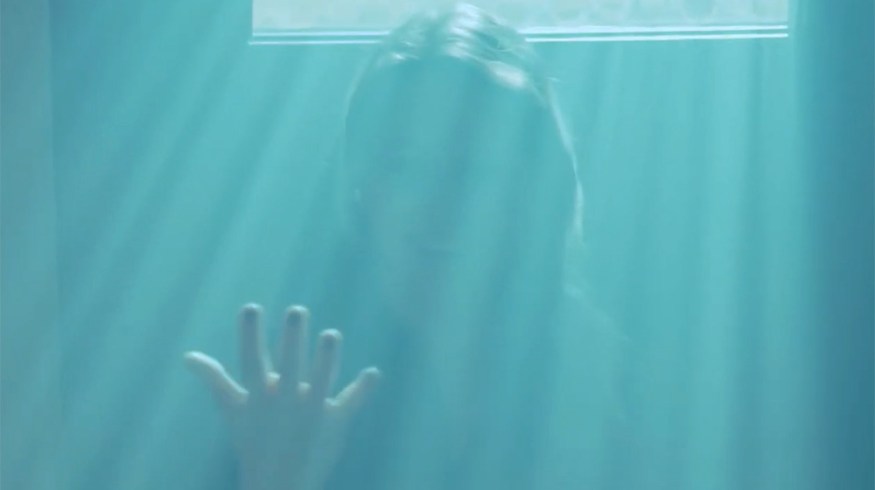
The detail begins to disappear into a single shaft of light.
The detail started to disappear with the beams of light, so it became a single shaft of light. We also got a nice disappearing trick into that shaft of light.

Tips
1. Removing fire alarms.
Haze absolutely will set off any fire alarms. And, if you hit level two or heavy level three of haze, fanning the fire alarm won’t save you from the piercing scream. If there are sprinklers on the set, this is even more critical. Take the time to learn how to properly remove whatever type of fire alarms are on your set (Google is your friend), and add a ladder to your equipment list. Then, place both in a safe place.
Removing and turning off the fire alarms can be a pain, and it also comes with a hazard producers (and you) need to be aware of. Since there are no alarms to warn you of any actual fires, this should be noted in the call sheet and announced, so everyone can communicate.
2. Find the electrical layout of the set.
If you aren’t a trained gaffer, you might not be aware of how wonky the circuits in old houses can be. You don’t want to blow a circuit, which can happen — specifically in a house — if you don’t keep up with how many watts you’re pulling from each circuit — and which plugs are on which circuit (not that I know from personal experience or anything . . .). Finding out the electrical layout of a house can be difficult. The house we shot in had a wacky layout, where the garage was on the same circuit as one single plug in the kitchen/living area. Keep communication open with your location manager (or, in our case, the owner of the house).
Bonus: You can call the rental house you got your gear from! Most rent houses are more than happy to walk you through basics to get you going if you run into any trouble. Be kind and patient, and they will no doubt impart their wisdom!
3. Airing-out the set.
Open a door or window at two opposite sides of the set — preferably so wind flows through. If you turn on the A/C fan to help, be aware of where the vents are in the house, to avoid redirecting the haze into rooms with fire alarms.
Final Product

Now, was my theory right? It only takes a narrow-beam light and some haze to make a beam of light? I’d say pretty much, yes! At its core, these two things are the foundation to practice for this technique. While the blinds, cookies, extra lights, etc., can really amplify the look, I learned the most with my beautiful, little god ray.
Interested in the tracks we used to make this video?
- “Summer Always” by RimskyMusic
- “Under the Same Sky” by RimskyMusic
Looking for more on lighting? Check out these articles.