
Learn How to Fix a Variable ND Filter Vignette in DaVinci Resolve

A variable ND filter is handy for run-and-gun filmmakers, but it’s not perfect. Here’s how you can correct some of the issues that may arise.
Variable ND filters can seem like the perfect tool for the run-and-gun filmmaker. They eliminate clunky square filters and the holder system they require. Likewise, variable NDs will also free up the kit bag by reducing the number of individual ND filters you need to carry, as one variable ND filter may cover the same range of stops as three screw-in filters.
However, this is not to say that variable ND filters are the pinnacle of perfect engineering — they do have problems. Because a variable ND filter is two polarizing filters stacked on top of each other, you can run into unwanted reflections, as in the still below:

Because you’re shooting through two layers of glass, your image can also become softened (which is more predominant in the budget-friendly brands) and occurs in color casts, and the primary negative is if you push beyond the “max” stop limit, you can get uneven exposure, vignetting, or an X bar that will appear in the center of the image.
Once the cross appears in the center of your image, the image is dead in the water. However, the damage caused by a variable ND vignette doesn’t put you out of the game. Correcting a vignette caused by using an APS-C lens on a full-frame body isn’t possible because the lens not covering the sensor creates the dark edges that vignette the frame. That information isn’t underexposed — it doesn’t exist. Whereas, a vignette caused by a variable ND filter is simply underexposed.
With that covered, let’s look at how we can apply a soft fix. And that’s what this is — a soft fix. It’s quite like having soft focus and applying a sharpening layer (as talked about here); we’re never really going to get the footage to appear as it would without maxing the variable ND, but we can bring it pretty close.
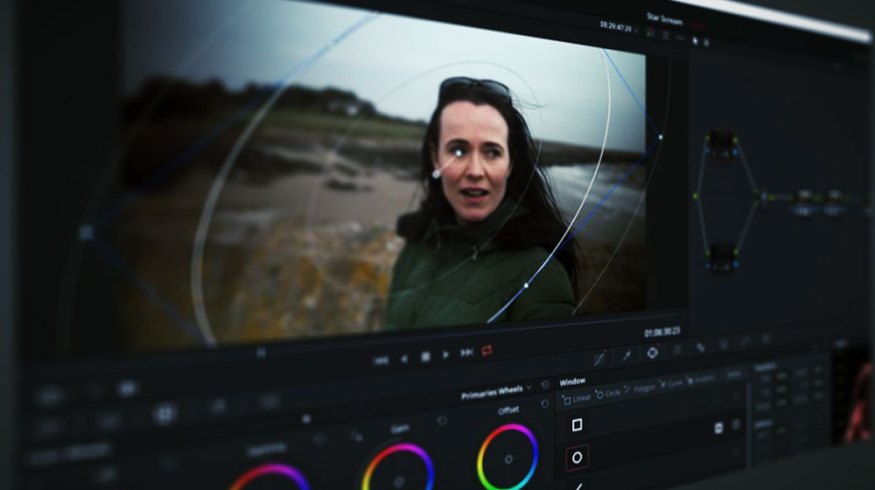
Open the color page and go to the footage that needs correcting.
This is my image. It’s been corrected and graded, and as you can see, it has a nasty vignette around the edges of the frame.

However, as I said, it’s just the edges that are underexposed. There’s not a physical obstruction to the sensor or lens. At first, you may think about quickly adding the vignette OFX to a node and reversing the damage with a white vignette. But when variable ND filters are rotated past the max symbol, the vignette it creates will be dependent on a number of things (such as your focal length), and as such, it may not appear as a symmetrical circle — like a lens that’s too small for the sensor.

In my image, the vignette appears more like a skewed egg than a circle.
Therefore, we need to do this manually, after we’ve completed the grade — but applied to a new node set before the first node. With this, we’ll be able to accurately see what needs adjusting, while fixing the issue at the end of the grading process. I’m going to select the first node and add a serial node before the current one. On this blank node, I’m going to add a circular power window and make sure the window is inverted (so we’re just affecting the outside of the window).

Of course, I’ve already said that the vignette isn’t symmetrical. Therefore, using the power window adjustment tools, we need to correct the shape of the window, and most importantly, increase the softness. If you don’t increase the softness, the exposure adjustment will be very apparent.

From here on out, it’s not rocket science. Based on the density of vignetting, you’re going to have to increase all tonal regions: the shadows, the midtones, and also (importantly) the highlights, as it’s likely that any natural highlights in the scene would have been completely nullified.
With the laws of light, we also know that the less light that falls onto a subject, the more desaturated it becomes. Therefore, you will need to slightly increase the saturation of the node.
While this is a great start, we have two problems. Let’s look at problem one. While this node has done an excellent job of correcting the vignette, we still have a slight amount of darkness at the very edge of the frame, and this comes down to the softness of the first power window. We could decrease the softness, but that would make the correction very obvious.

Regardless, this is a super-quick fix. Click on the vignette node and select “add a parallel node.” Right-click on the first node, and select “copy,” then paste the attributes to the node underneath. At first, it may appear overwhelming, but don’t adjust any of the properties. All we want to do is expand the size of the power window, so the strength of the window reaches the edges of the frame.

Perfect.
The second problem, however, is an increase in noise around the edges of the frame. You have to remember that we’ve mainly tried to increase the exposure of an underexposed part of the image, and it’s reacting just as it would if you were to do this on a severely underexposed image shot at night — there’s going to be noise because the sensor wasn’t correctly receiving light.
Therefore, we’re going to add another node at the end of the tree, then open the motion effects panel and adjust the temporal noise reduction. I’m going to base my noise to be referenced from the proceeding four frames, and I’m only going to increase the reduction by 15.0, as the effect can be quite intense, removing most of the clarity from the image.

You can see a visible difference in the amount of noise, and I’ve also lowered the saturation (just a touch) to hide it a bit more.
This is the before:
And this is the after:

Honestly? It’s not entirely perfect, but it’s better. We can’t continue to push the edges too much because you’ll then be trying to counter the noise and artifacts that arise from the correction. But overall, the vignetting is a lot less visible and likely won’t be noticeable by your audience — not that they notice the flaws we stress over anyway.
- Looking for more articles on DaVinci Resolve? Check these out.
- How to Work with Different Frame Rates With The Same File in Resolve
- Review: DaVinci Resolve 16’s Cut Page — Is It Any Good?
- DaVinci Resolve’s New Object Removal Tool — Is It Any Good?
- A Rundown Of The Edit Page Changes in DaVinci Resolve 1
- How to Upload to YouTube Directly from DaVinci Resolve 16


