
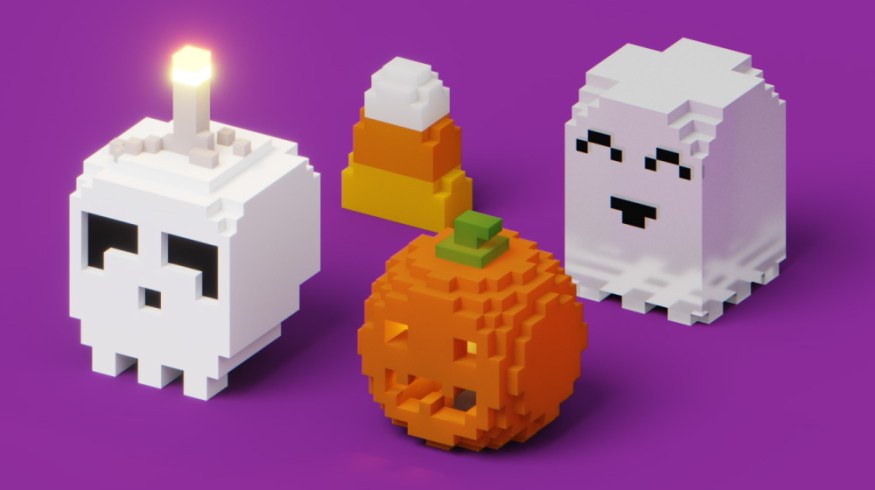
Create Halloween Voxel Art with MagicaVoxel: FREE Models Included
Learn advanced voxel art material tips and tricks you can use for your MagicaVoxel creations—FREE MagicaVoxel Halloween models included!
In this article tutorial, I’ll cover some more advanced material settings and tips you can utilize in MagicaVoxel. We’ll dive into emitting materials, glass materials, and even blended materials for creating sub-surface scattering.
All of these pair perfectly for creating Halloween-inspired voxel art! Be sure to download the FREE pack of MagicaVoxel Halloween models, now!
DOWNLOAD THE FREE MAGICAVOXEL HALLOWEEN MODELS HERE
By downloading, you agree not to resell or redistribute these free assets.
Brand New to MagicaVoxel?
As mentioned, we’re going learn some in-depth MagicaVoxel material settings. However, if you’re brand new to MagicaVoxel, I recommend checking out our first tutorial: Create 3D Voxel Art with MagicaVoxel. This will help get you started with the basics of creating voxel art.
Glass Materials
First, let’s learn about Glass materials, which are perfect for creating a ghost. You can create your own ghost model, or you can reference the dimensions for the original one in the image below.
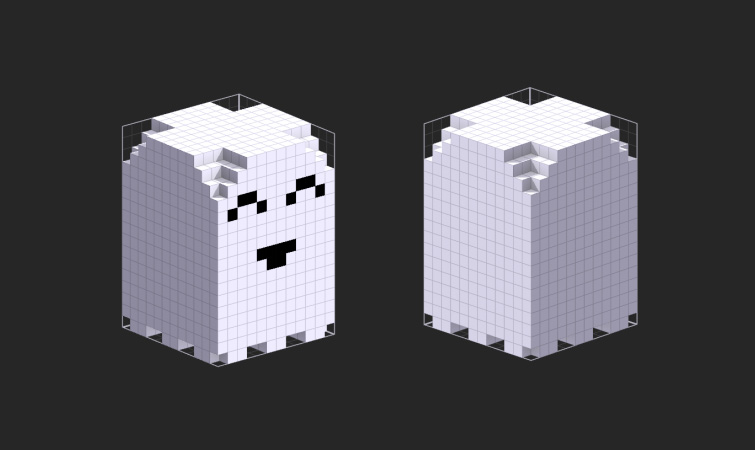
First, select the main color you used for the ghost in the Palette panel. Then, make sure the Render view is selected. You should now see the Material settings available in the Matter panel, located on the right-side of the UI.

Next, under the Material options, select Glass. (Diffuse is set by default.) By selecting Glass, you’ve changed the material for the color you currently have selected. In this case, the material has switched from Diffuse to Glass.
Now, we can adjust the Surface settings, which will appear when Glass is selected. For a frosted glass look, set the Roughness to 44. Then set the IOR (Refractive Index) to 2.31 and set the Transparency to 48.
Your ghost should now have the look of frosted glass! Experiment with the surface settings for different glass looks.

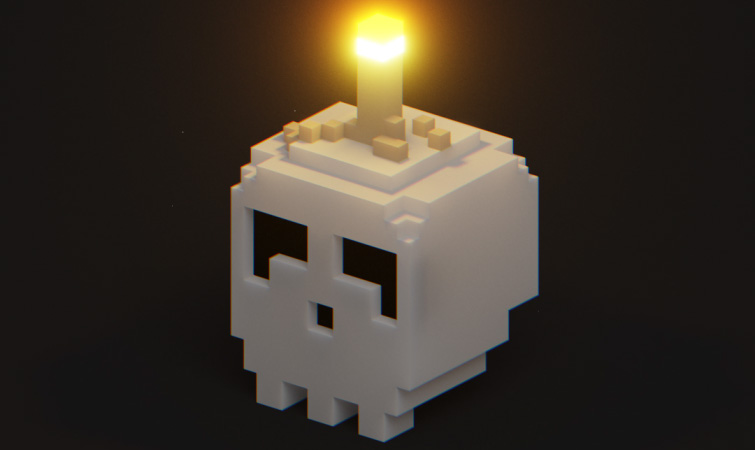
Emitting Materials
Next, we can create some stunning glow effects using Emit materials. For this model design, I went with a skull with a candle on top of it. We can use the colors of the candle flame as our emitting material.
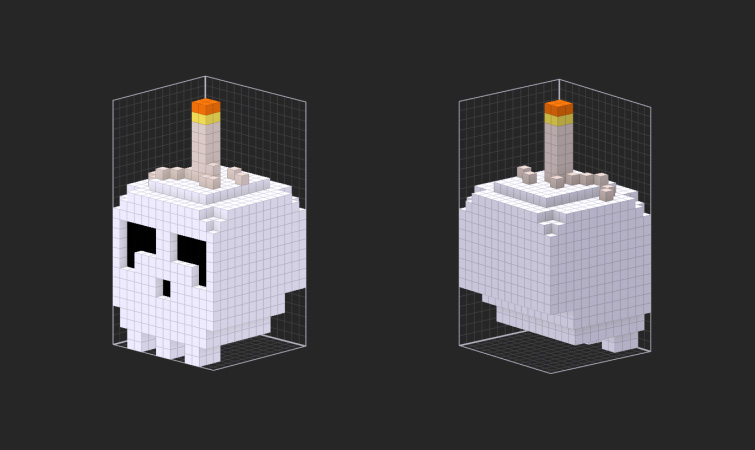
First, select the color you’d like to emit in the Palette panel. (In our case, it’s the yellow color of the candle flame.) Then, select the Render view.
You should now see the Material settings available in the Matter panel on the right-side of the screen. Under the Material options, select Emit. Now, we can adjust the Emission settings, which will appear when Emit is selected as the material type. Set the Emission to 53. Then set the Power to level 3. Leave Low Dynamic Range (LDR) set to 0.
You should now see the material emitting light. However, the glow of the emitting material will look much nicer if we enable bloom effects for the camera.
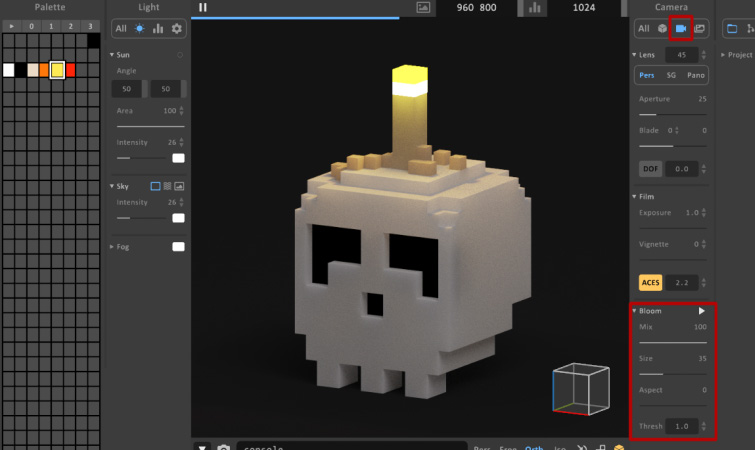
To do this, select the Camera icon on the top row of the Matter panel. This will open up the Camera settings. At the bottom of the Camera settings, you’ll see Bloom. Click the Play Button icon next to it. This will enable rendering of light bloom effects.
Set the Mix to 100 and the Size to 35. You should now see some gorgeous light bloom effects from your emitting materials.
Subsurface Scattering Materials
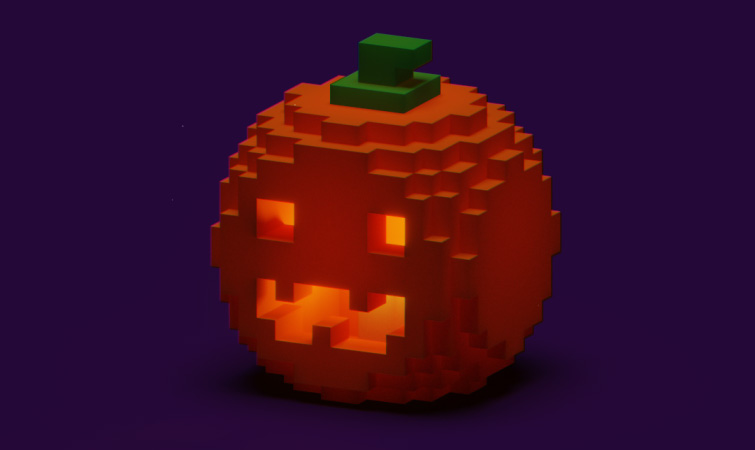
Finally, we can create some subsurface scattering using Blended materials. In this case, we’ll make our pumpkin have a subsurface scattering material.
Subsurface scattering happens when light penetrates a material and gets scattered around inside of it. A common example of this in real life can be seen when you hold a flashlight up to your hand.
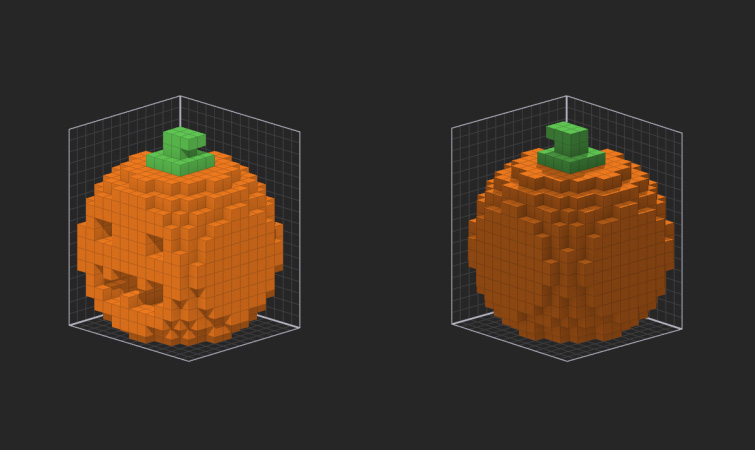
In our example, we’re using a hollowed out Jack O’Lantern with an emitting material placed inside. We’ll use the orange pumpkin color as our subsurface material, because the emitting light inside of it will create a cool effect.
First, select the color of the pumpkin in the Palette panel. Then select the Render view. You should now see the Material settings available in the Matter panel on the right-side of the screen. Under the Material options, select Blend.

We can now see the Media settings appear at the bottom of the Matter panel. Select the “S” icon, which will enable Subsurface Scattering. Then set the Density to 100.
Now, we need to adjust a few of the Surface settings. Set the Roughness to 100 and the Transparency to 27. Set the IOR to 0. The walls of the pumpkin should now have a subtle subsurface scattering effect.
Halloween Voxel Models
Be sure to download the FREE Halloween voxel models used in this tutorial. You can then breakdown and explore how the models were built and take a closer look at the material and render settings for each scene.
And, if you want learn even more about different voxel art applications, check out our Voxel Art Video Tutorial: What it Is and How to Create It.
Like creating things from scratch? We’ve got more for you to explore:


