How to Choose and Use a Capture Card for Your Gaming Needs
Whether you want to stream current games or create a YouTube gaming channel, having a capture card is essential to making that dream a reality.
Why You Need a Capture Card
Streaming on Twitch or YouTube has become a lucrative career for gamers with big dreams and even bigger personalities. So, exactly how lucrative is it? Between sponsorships, ad revenue, member subscriptions, and other forms of revenue, the top ten Twitch streamers each make over $1 million a year, if not more, according to an independent study from Mediakix.
But, before you start shouting “What’s up, guys” into a microphone, you’re going to need some equipment. A high-end PC is a must, in addition to a microphone, webcam, and (most importantly) a capture card. A capture card is a device that allows you to record and stream games from your video game consoles — an integral component for any streamer worth their salt.
Which Card to Pick

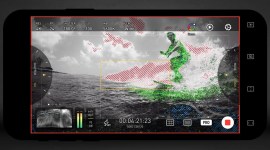
Image via Elgato.
Your budget will determine what kind of capture card you can buy, but there are several options for neophytes and experts alike.
For around $150, you can buy a great card like Elgato’s HD60 S, which comes with everything you need to start streaming at 1080p and 60 frames per second (FPS). This capture card is mobile, and you don’t need to install it on your PC’s motherboard — the HD60 PRO and 4K60 PRO require this installation. You can even use this card with your laptop, so long as it’s relatively powerful. That means you can keep your consoles where you want them and bring your laptop around whenever you want to record. I had to move my consoles closer to my PC and it was a hassle.

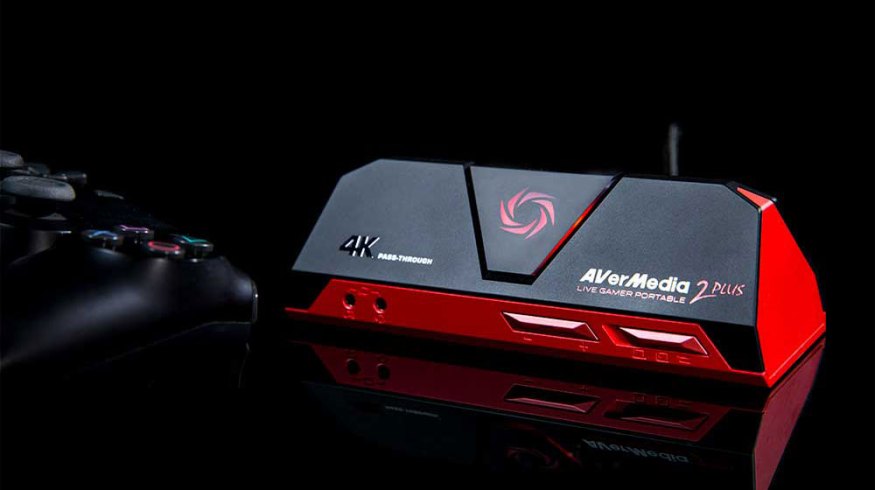
Image via AVerMedia.
If you want to remove the PC from the process altogether, the AVerMedia Live Gamer Portable 2 Plus can capture footage onto itself, thanks to a MicroSD card slot that accepts cards up to 128GB. Apart from its unique PC-free mode, it can also record and stream footage the normal way, which makes this a much more versatile card. Although, it is more expensive.
When it comes to sheer value, the HD60 S gives you the most bang for your buck, and it is extremely easy to set up. The HD60 S is a perfect capture card for beginners. But, if you want to step up your game, Elgato’s pricier cards require some installation. These more expensive models have added features like higher streaming resolution and bitrate. However, for beginners, it may not be worth the extra money.
How to Set Up
If you get a capture card like the HD60 S, all you have to do is run an HDMI cable from your console to the card’s input port, then run another HDMI cable from the card’s output port to your monitor or TV. Finally, plug in the USB cable to your computer and your capture card. That’s it. The other cards, however, have a couple more steps. It’s nothing hard, but you’ll have to open up your PC.

Image via Elgato.
To install the capture card, you’ll need access to the motherboard, so it’s best to shut off the computer and cut the power. If you’re installing a card like the HD60 PRO, hunt down a spare PCIe x1 port and insert your card. The 4K60 PRO uses a PCIe x4 slot, so slots may vary by card. Make sure it’s in there snug, and screw the card onto the case. If it turns out you have no available slots, it may be best to go with a card like the HD60 S. Upgrading your motherboard is another option — albeit an expensive one.
Once you’ve installed your card, it’s time to download some software, fiddle with settings, and get one step closer to streaming or recording.
Software
Capture card manufacturers sometimes have their own proprietary software, but I found Elgato’s Game Capture HD software to be clunky and unintuitive. I can’t speak to other manufacturers’ software, but most professional streamers opt for software like OBS Studio or XSplit. The former is completely free to download and use.
After a frustrating hour with Elgato’s software, I downloaded OBS Studio and recorded footage from my Nintendo Switch in a matter of minutes. It’s all really simple to configure, but here’s a quick guide if you want to record from your console:
- Open OBS Studio.
- On the bottom left-hand side, where it says “Sources,” click on the “+” button.
- Select “Video Capture Device.”
- Name the device and click “OK.”
- In the “Properties” window, select your capture card from the drop-down menu named “Device.”
- If using an Elgato product, click on “Configure Video” and select your console, if it hasn’t already been detected. You can also adjust audio levels and video resolution. Click “Done.”
- Back in the “Properties” window, click “OK.” You can always click on the gear icon in the “Source” box to change any settings.
- On the bottom right-hand side of OBS Studio, click on “Start Recording.”
To change where your recorded footage gets stored, click on the “Settings” button under the recording button. Select “Output” and make your changes, if needed. You can also tweak your streaming settings in this window.
Speaking of streaming, the process is basically the same as when you’re recording, except that you’ll need to select the “Start Streaming” button. Before you do that, however, you’ll need to link your streaming account with OBS Studio. Twitch, Mixer, YouTube, and Facebook Live are all compatible. To link your account, go to the “Settings” menu again, select “Stream,” and choose your preferred streaming service. This will prompt you to log into your account.
OBS Studio is simple to use but hard to master. This is just a basic guide, and, if you’re serious about streaming, you need to be comfortable with the software you use. Mastering hotkeys will help your stream run more smoothly, and investing in eye-catching overlays will attract users’ attention. Now, all you have to do is be yourself and play games on camera. Just don’t expect the money to come in right away.
Becoming a Streamer
Unlike the video games that we all know and love, there are no cheat codes to becoming a top streamer. That comes with patience, hard work, and creating quality content that attracts and entertains users. Having good equipment won’t propel you into superstardom per se, but it’ll make the ascent that much smoother.
For tips on how to build a PC for video editing, check out The Comprehensive Guide To Building Your Own Editing PC. Our blog has all you need to know about editing video, camera gear, and much more.
Need music for your stream? Check out our near-endless collection of royalty-free music, which can make for an awesome intro song. And, to stand out from the pack, read Power Up Your Gaming Videos and Twitch Streams with Royalty-Free Music. It has a great curated playlist that’ll make your stream even better.
Cover image via AVerMedia.
Looking for more on tips and gear for streaming? Check these out.