4 Clever Tips for Organizing Your After Effects Project
Get organized and stay that way with a few fantastic workflow organization hacks that can help you blast through any project.
Unorganized projects are the absolute worst to work in. No matter if you’re the creator or receiving them from a colleague. Chaos can make a simple process seem longer and overly frustrating, for absolutely no reason. A lot of these tips are clever ways that I actually (mostly) hate to do. But, as I naturally adopted them into my workflow, I started to notice a dramatic shift in the amount of time I was saving. Let’s jump into it.
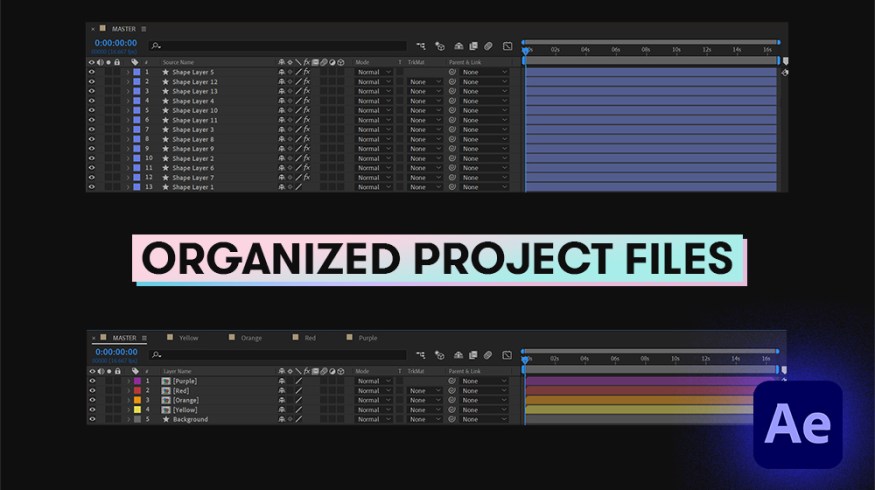
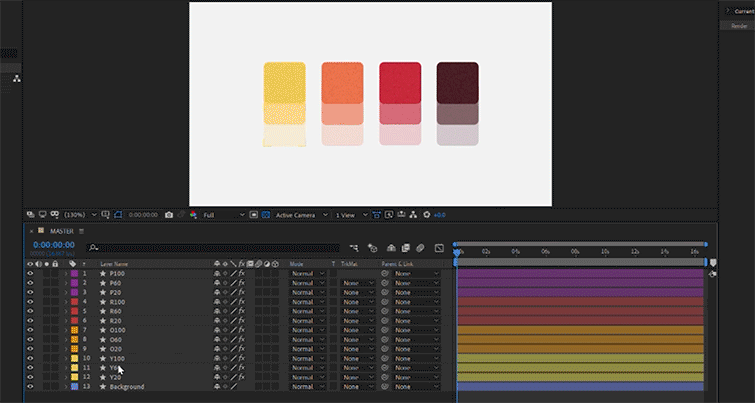
1. Label and Color Your Layers
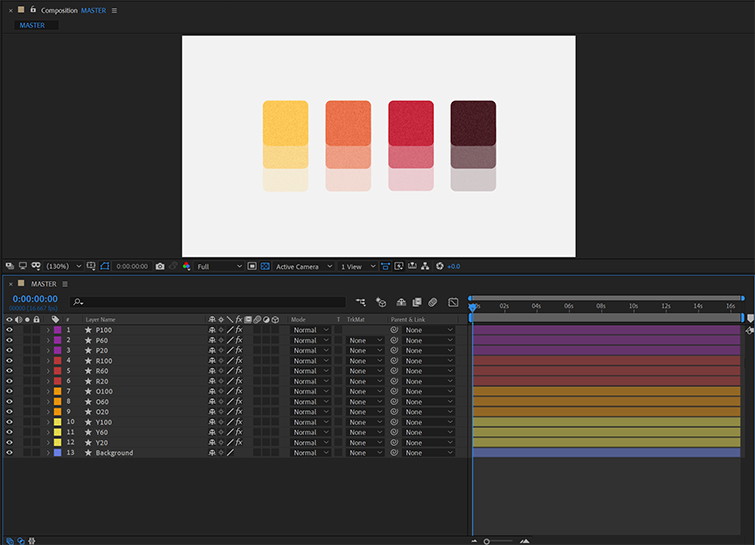
Group your layers by name and color. Doing this will make it significantly easier to navigate your project. When your timeline is full of layers that are all the same color, or have names like “Shape layer 64” and “Rectangle 22,” it makes it a lot harder to focus. Even when I try to sneak over this step, it never fails to catch up to me. I’ll be excited to jump straight into animating, but then slowly start to realize that I’m constantly searching for layers or assets. Consequently, I’m dealing with an even more unorganized project file than what I originally started with. I end up having to go back and organize my project either way. Just make sure you do it at the start. It helps with not getting lost in the first place.
2. Work Through a Pipeline of Pre-comps
Once you have all your layers organized, you can start to break them off to their own sections. This tip is one I especially love to use for UI animation. I briefly mention it in my article “Tips for Animating UI in After Effects.” A pre-comp pipeline isn’t an exclusive workflow for UI animation though. It applies to every project you work on.
What you first want to do is find all the layers that belong to a section of your set-up scene and highlight them. You can pre-compose a set of layers by going up to the tab labeled Layers and clicking on it. Go all the way to the bottom of the menu that pops up and select Pre-compose. You can also use the shortcut Shift+Control+C or Cmd+Shift+C on a Mac. A Pre-compose menu will pop up. Select Move all attributes into new composition and click Okay.
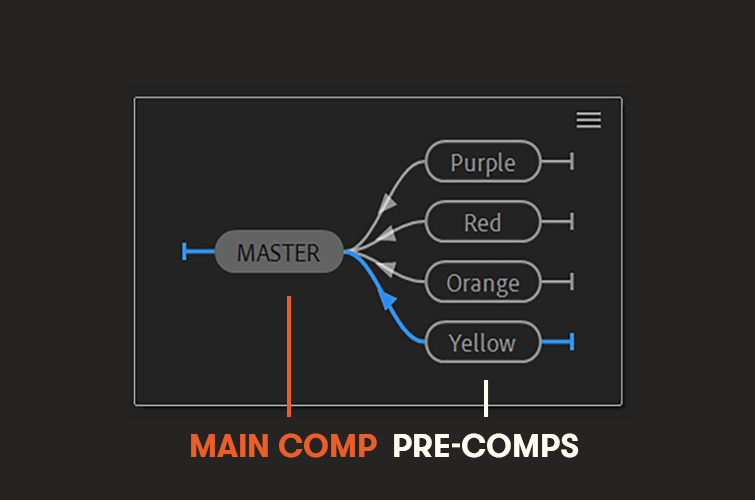
Now those layers will be placed inside of a new composition that’s inside of the original one. Go back to the first comp you had open. There, you’ll see the layers that were previously selected represented as a single comp. This is a smart way to organize layers and to work across a web of compositions. As you scrub through the main composition, the timeline indicator will update in all the pre-comps since they’re the same duration. Use the timeline indicator to find a common point in time throughout all your compositions. It’ll help you sync all the different animations.
3. Project Panel Organization

Now you need to organize your project panel to fit the workflow. Create two folders in your project panel. Label one MAIN COMP, and the other WORKING COMPS. Place the comps that divide up your main scene and drag them into the folder WORKING COMPS. Then, drag your main comp that contains all your working compositions and place that inside of the MAIN COMP folder.
4. Smart Parenting

Another thing you can do to help keep keyframe count down and limit the number of layers you need to animate, is by smart parenting. If you already know what some of the animation is going to look like, you can start to link elements in your project. You can even do this process as you work through the animation. If you have multiple events that make up an item in your composition, you can link their properties together—like linking the opacity, position, scale, etc.
For example, if you want to move one layer around and have other elements follow, it wouldn’t be best to keyframe each layer. You can just pick whip any layer or property to another and it’ll mimic exactly what it does. This is a nice way to save time and not become overwhelmed in your project.
Keeping your project clean and optimized is the best thing you can do to help your creativity. Organizing isn’t always easy or something you want to do, but eventually, not being organized will catch up to you. It’s important to practice because once you consistently work it into your workflow, it’ll become natural.
Need more animation tips, tricks, and advice? Check out these articles: