
Create a Stylish Walkthrough Portal Transition in After Effects
Learn how to create a walkthrough portal transition in After Effects using footage mattes and 3D tracking. Tutorial includes free project files!
Creating a slick walkthrough portal transition is surprisingly easy in After Effects, and the end result is sure to elicit a few oohs and aahs from your viewers. You can often find this style of first-person portal transition in travel videos and opening credit sequences, as they’re an eye-catching way to switch from one location to another.
Ready to make a portal of your own? Download the free project files, fire up After Effects, and follow the step-by-step video and transcription below. Let’s get started.
DOWNLOAD THE FREE PROJECT FILES
Which Footage to Use
In order to achieve the effect, you’ll need two different shots, both of which are tracking forward. It’ll definitely help the look of the effect if they’re moving at close to the same speed.

Tracking forward shot.
The camera movement will also need to be fairly smooth, so I recommend filming with a three-axis gimbal or a drone. I find that it also helps if the second shot is more of an open area than the first. This helps to prevent any obvious parallax issues between each video clip as they move forward.
3D Camera Tracker
Once you have your first shot picked out, add it to a new composition. Then, open up the Tracker panel in After Effects and select the Track Camera option. Once the tracker has completed, select an area of tracker points near the center of your footage and right-click. Now, select Set Ground Plane and Origin.
Select an area of tracker points that’s near the center of your footage.
This effectively sets that 3D area as the center of the composition, making it easier to navigate when new files are added. Finally, right-click on the same area of tracker points and select Create Solid and Camera.
Portal Reveal Animation

Once you’ve added your shape (or text), rotate the layer and reposition it in 3D space.
We now need to add a shape or text that’ll act as our portal reveal animation. For this portal, we’re going to use a scribble “write-on” animation. (I’ve included the scribble animation in the project file.)
Drag and drop the scribble animation clip into the composition and set it as a 3D layer. We’ll then need to rotate the layer and reposition it in 3D space, so that the tracker camera naturally moves through the center of it. Finally, turn on Motion Blur for the scribble animation layer.
Adding the Second Video Clip
Now, we can add the second video clip to our composition, placing it underneath the scribble animation layer. Since the scribble animation layer has an alpha channel, we can set our second video clip to Alpha Matte under the Track Matte settings. This will effectively matte our footage to only appear where the scribble animation is.

Now, add the second video clip to your composition.
When the 3D camera moves to the center of the scribble effect, we’ll need to split the layer of the second video clip. Do this when the second video clip fills up the entire screen, but before the 3D camera passes through the 3D scribble layer. To split the layer for the second video clip, you can use the shortcut Ctrl+Shift+D (Cmd+Shift+D on Mac).

Use Ctrl+Shift+D (Cmd+Shift+D on a Mac) to split the layer on the second video clip.
Adding Light Rays
To create some light rays, we first need to precompose all of the layers in our composition, except the original first video clip we used. Once you’ve precomposed all the other layers together, duplicate the precomp two times. You should now have three copies of the same precomp.
Name the top precomp copy Matte and the middle precomp copy Light Rays. Apply the effect CC Radial Fast Blur to the Light Rays precomp and set the Amount to 80. On the Matte precomp, apply the effect Matte Choker and set the follow settings: Geometric Softness to 35, Choke to 126, Gray Level Softness to 28 percent.

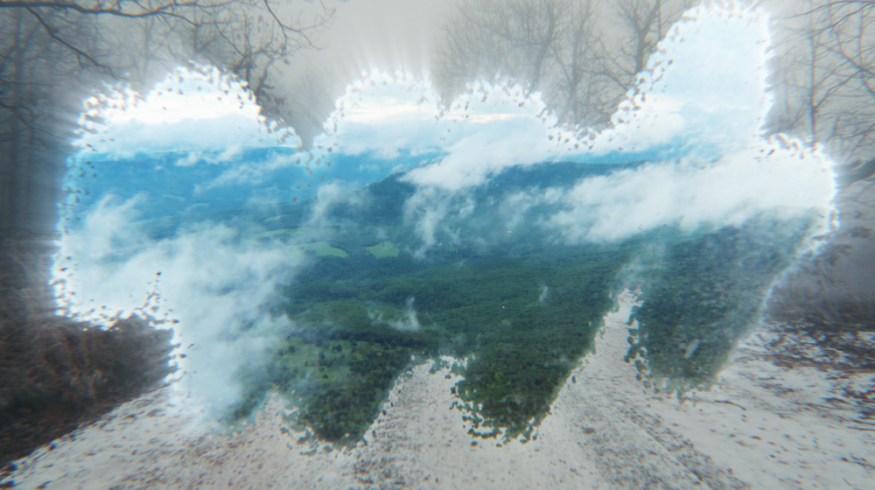
Precompose all of the layers in our composition to create light rays.
Now, set the Track Matte setting for the Light Rays precomp to be Alpha Inverted. Then, set the Light Rays precomp to a Screen blending mode. You can then adjust the Opacity level of the Light Rays comp to a value that looks best.

Now, adjust the opacity level.
Pixel Motion Blur
Finally, as an optional finishing touch, we can add some Pixel Motion Blur to the footage to smooth out the scribble animation. Add an Adjustment Layer above everything and apply Pixel Motion Blur to it. I like to set the Shutter Samples to twelve.
Smooth out the scribble animation by adding some Pixel Motion Blur to your footage.
Interested in the royalty-free tracks we used to make this video? Give them another listen:
- “True Encounters” by Cymatix
- “Lo Fi Waves” by Origami Pigeon
- “Lo Fi Beach Dawn” by Trending Music
Here are a few more tips/tricks/techniques you can keep up your After Effects sleeve:


