Drawing the Audience’s Eye by Shaping and Cutting Light
In this write-up, we’ll take a look at cutting and shaping light, why you would want to do it, and the best methods for each budget level.
The main reason to cut and shape light is to keep the light where you want it and to avoid spill where you don’t want it. The objective is to separate your subject from the background, drawing the viewer’s eye to where you want it.
Instead of painting the walls or using a huge location, you can keep light from the background by “flagging” — putting something between the background and the light to block it.
First off, you need a flag large enough to block light, but small enough to not be seen by the camera. A popular choice is the “meat axe.” It’s a four-by-one black diffusion, or a negative fill, which you can expand to a two-by-four cutter. The light will hit your subject, and the floppy will block the light from hitting the background. This is easier to do the more off-axis and smaller the light is that you’re shaping.
If the light’s directly above camera, or on camera, there’s no way to block the light from the background without blocking the light from your subject. If you have a light that’s thirty-degrees off camera and thirty-degrees above camera, you’ll be able to slide the floppy in so that it blocks the background but not your subject.
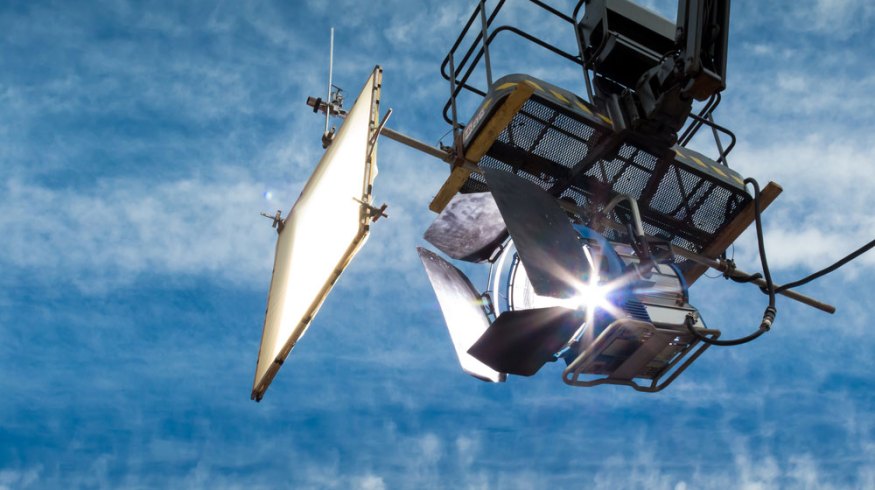
An easier way to flag the background with a Fresnel light is to simply use the barn doors that come with almost every Fresnel. If you move the barn door on the light itself, you’ll see that it starts blocking the background before it starts blocking your subject. If you do it even further, you’ll see that it starts to creep across the subject’s shoulder, and then eventually their face.

Fresnel Image via lapandr.
You can use both barn doors to create a “Film Noir” effect. If you move the barn doors all the way in, you’ll get a very narrow band. The closer the flag is to your subject, the harder the cut’s going to be, which can be good or bad.
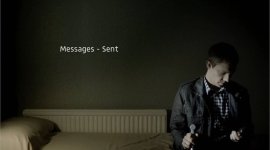
In the famous opening sequence of Skyfall, James Bond’s silhouette walks down a corridor and moves into this sort of light. Roger Deakins used a flag from a light further away, but the flag itself was probably four feet from the actor, so it wasn’t a hard edge but a much softer, natural edge.

Skyfall Image via Sony Pictures.
Flagging hard lights is relatively easy, and you have a lot of control. However, you’ll rarely use hard lights on set, because they create competing shadows on the face. Plus, it’s more popular to use soft, large sources.
The Intellytech LC-120 is a much larger light, which is akin to a Kino 4×4 form factor, so it’s three feet by one foot. If you move your cutter in with this light, it’ll do something, but not nearly as much as it did with a small light, because it’s only blocking part of a much larger light source. It becomes more complicated to get a good shape on this light and flag it off the background.

Image via Intellytech.
One way to get this larger light off the background is to move your cutter above the subject’s head. Then, you need to bring in a second flag, such as a two-by-four, next to your subject. Between these two flags and your subject’s body, you’re essentially sealing the light off the background. The cutter above the subject’s head will block the light coming from above the subject’s head, and the cutter on the side will block the light from the side. The subject blocks the direct light from hitting the background.
This is a very easy way to achieve your desired ratio — the difference between your subject and the background behind them. It allows you to attain any level of contrast and isolation, in order to achieve the mood you’re after

Another scenario involves where your subject is next to an open window, and there’s a huge contrast ratio between each side of your subject’s face that we want to make slightly more cinematic and palatable to the eye. To begin, it helps to put up a diffusion fabric (like a silent quarter grid) over the window, making the window more diffuse and the available sunlight fuller. Next, you can use a piece of reflector board to fill the side of your subject’s face not facing the window—it’s a good idea to have this ready on a stand, so that you can rotate it, giving your subject some fill to taste.
While this is a good start, it might be too diffused, and although we’ve lost the harshness, we now need a little bit more contrast. The next step is to bring in a “bottomer” by placing your flag on the floor next to your subject, so that it starts to take out some of the light coming up at your subject. This’ll give your subject additional contrast on the face. You can box the light in further by pulling in the curtain. The last stage is to bring in a topper to box that brings light in even further.
By using a reflector on one side, the diffusion, and boxing in that diffusion, you can achieve a far more cinematic look than what you started with. By using the flags, you’re able to reach your desired look and rotate this very precisely to go from an 8:1 contrast ratio all the way down to a 2:1. This gives you a lot of control, allowing you to finesse the image. This brings you to the next level of cinematography where you attain what you want, but then refine the image to ensure that it tells a story, or evokes an emotion.
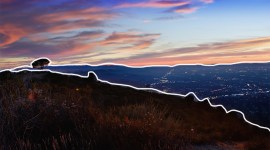
Cover image via Cineuno.
Looking for more on lighting? Check out these articles.
- Aputure Releases the 300D II — with Lantern Attachment
- The Simple, Stable Solution to Rigging Your Lights Anywhere
- Production Tips: Getting Started with High-Output Lights on Set
- Follow Fill: The Simple Solution to Lighting a Difficult Scene
- The Advantages of Hard Light and the Benefits of Using It on Set